Seeking A Balance

Recipes from decadent to healthy and everything in between.

  • Recipe Index
  • About Me
  • Home
  • Subscribe

Sourdough Discard Apple Scones

May 18, 2026 by Christine Leave a Comment

Sourdough Discard Apple Scones are light, fluffy and packed full of apple cinnamon flavor. They are a delicious snack at any time of day.
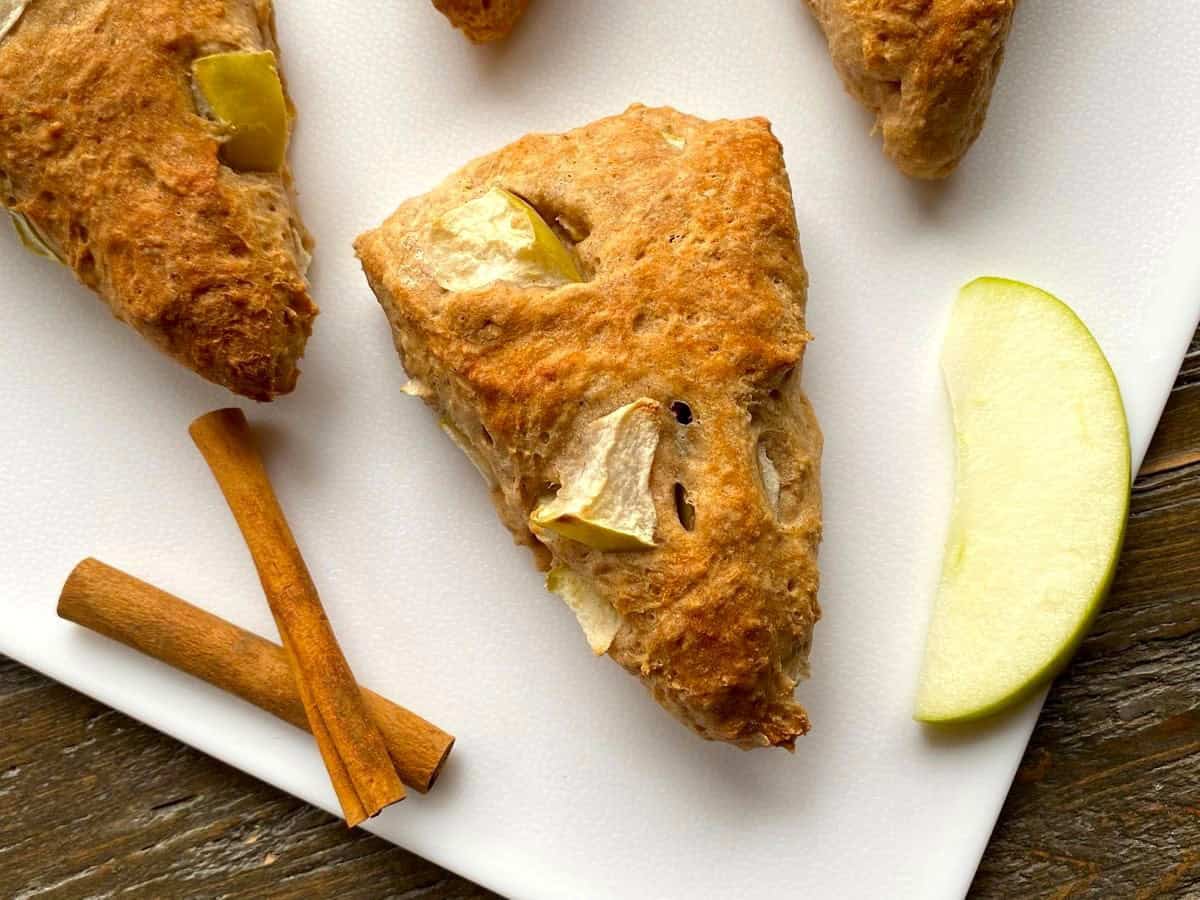
Baked scones with cinnamon sticks and an apple slice on a white cutting board.

Apple Scones are are great way to use up leftover sourdough discard. This recipe is quick and easy and it comes together in a breeze. First, add the dry ingredients to a bowl and mix well. Next, add the wet ingredients and chopped apples and mix until a dough forms. Lastly, shape the dough into triangles to make that classic scone shape. I promise the shaping isn’t as difficult as it may sound.

If you don’t have sourdough discard but you still want to make scones, try:

Strawberry Scones or Blueberry Scones

Ingredients
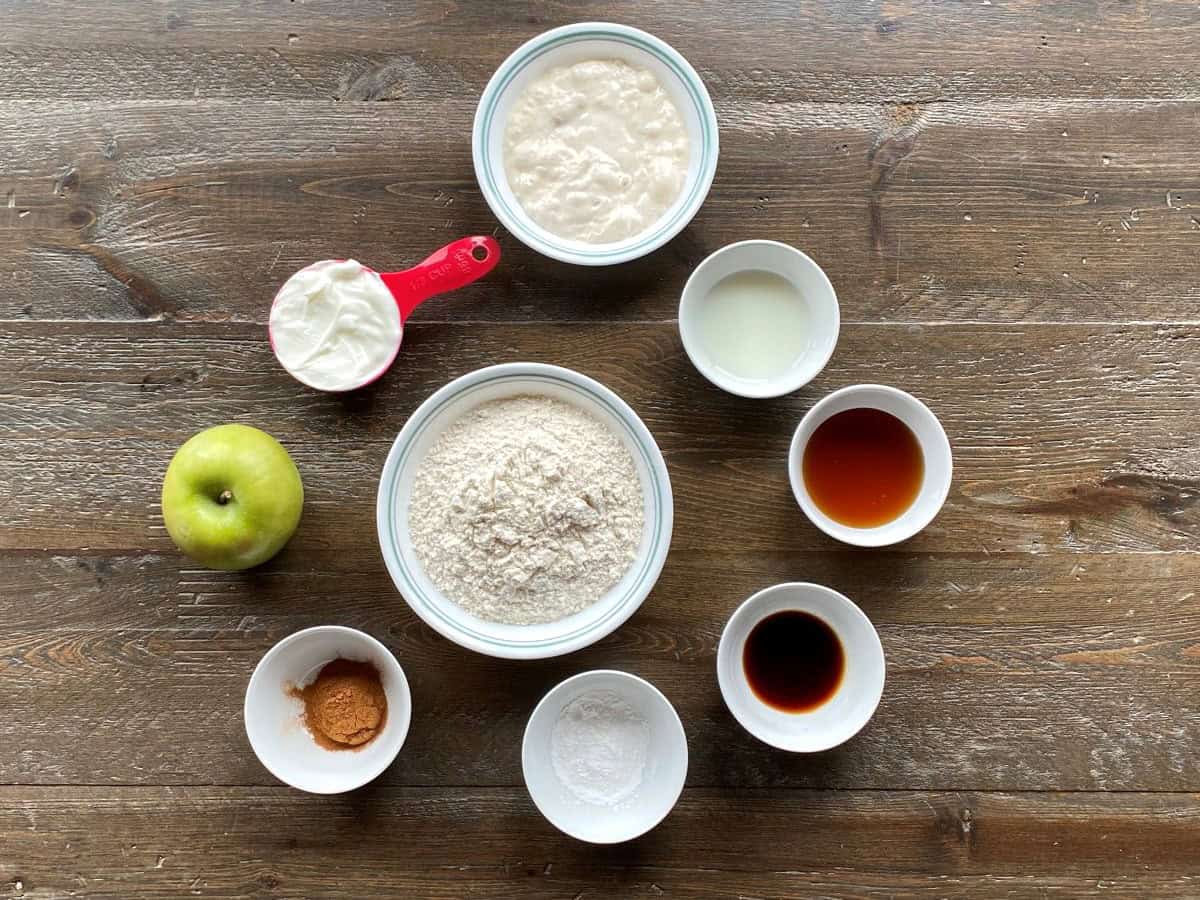
Ingredients for apple scones measured and laid out on a brown wooden surface.
  • All-Purpose Flour – I used all-purpose flour for this recipe. I haven’t made this recipe with any other type of flour but I believe gluten free 1:1 baking flour would work well.
  • Baking Powder – Helps to give the scones the fluffy like texture.
  • Cinnamon – The perfect flavor addition to accompany the apples.
  • Sourdough Discard – Room temperature works the best.
  • Greek Yogurt – I used 0%, no sugar added.
  • Maple Syrup – Natural sugar used to sweeten the dough.
  • Milk – I used skim milk for this recipe.
  • Vanilla – Adds a touch more flavor.
  • Medium Size Apple – Granny Smith variety works best for this recipe.

See recipe card for quantities.

Instructions

Preheat oven to 350F. Line a large baking sheet with parchment paper.
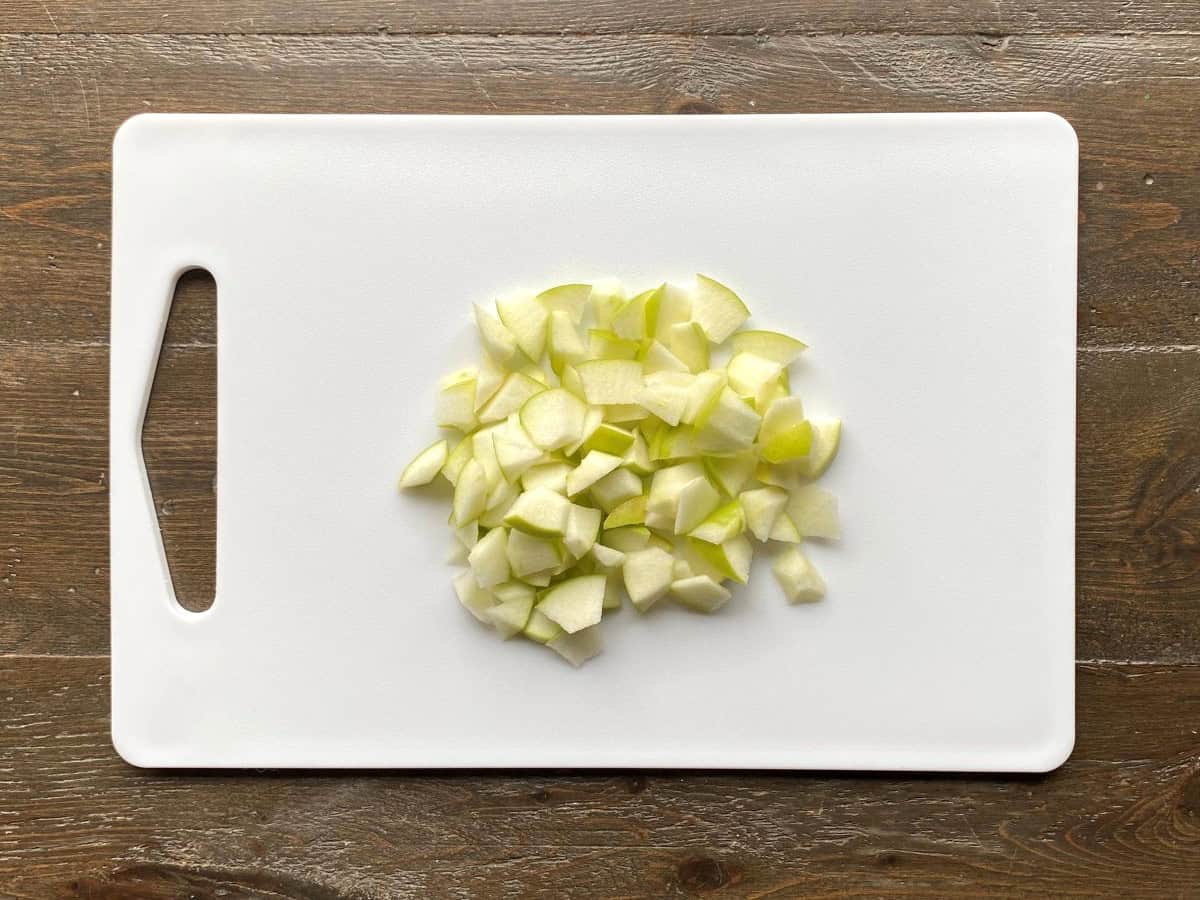
Chopped apples on a white cutting board.

Wash and chop apple into small pieces. There is no need to peel the apple and as a bonus the skin adds extra nutrients. Set aside.
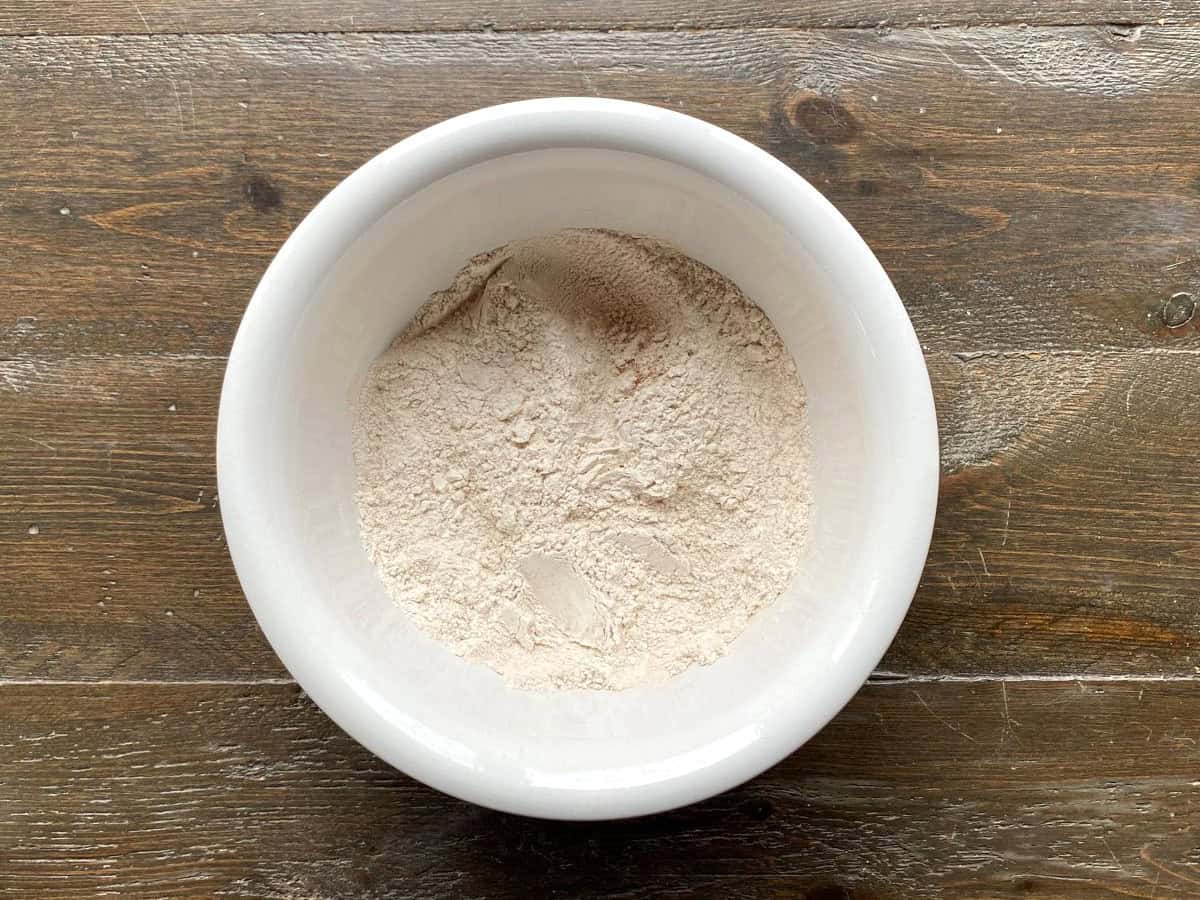
Dry ingredients in a large white bowl.

Add flour, baking powder and cinnamon to a large bowl. Mix well.
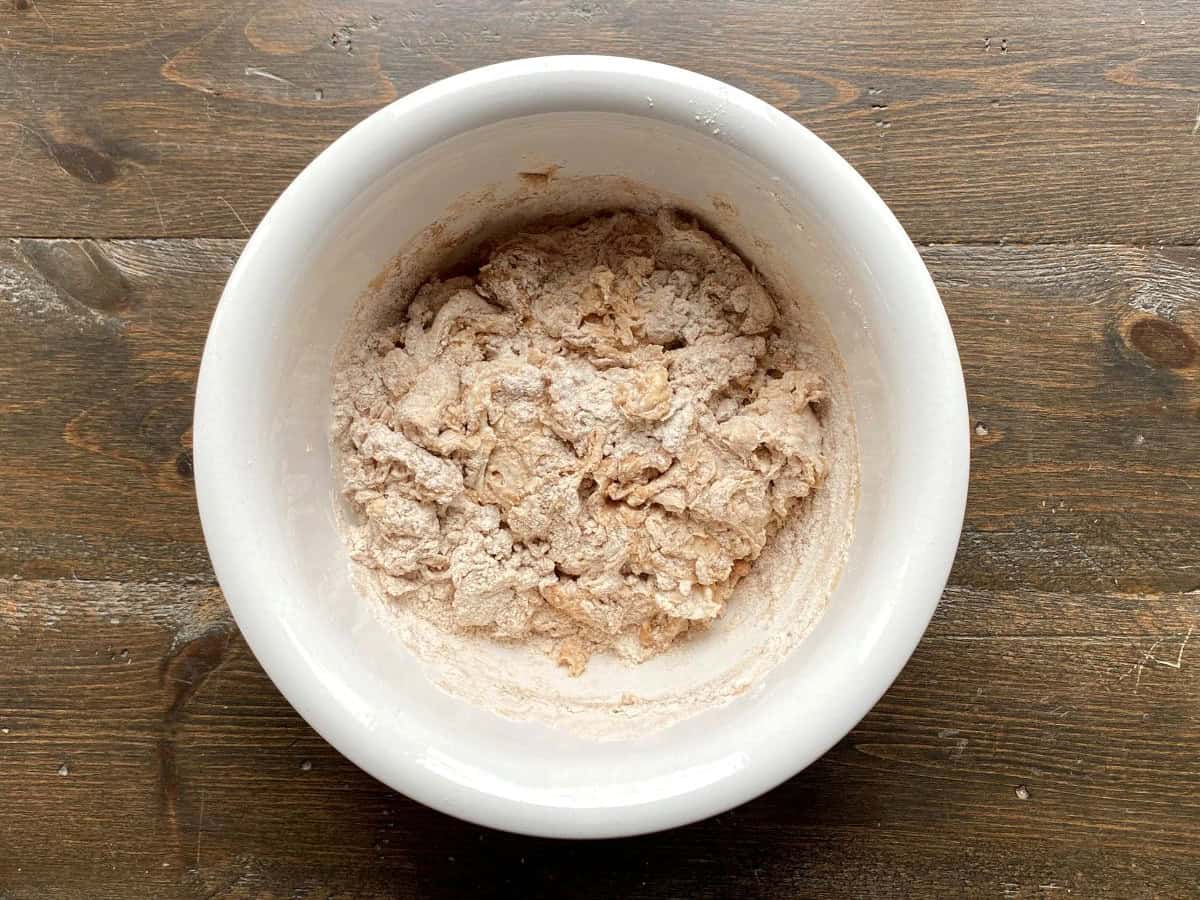
Shaggy dough in a large white bowl.

Add sourdough discard, Greek yogurt, maple syrup, milk and vanilla to the dry ingredients. Mix with a large spoon until the flour starts to incorporate into the mixture.
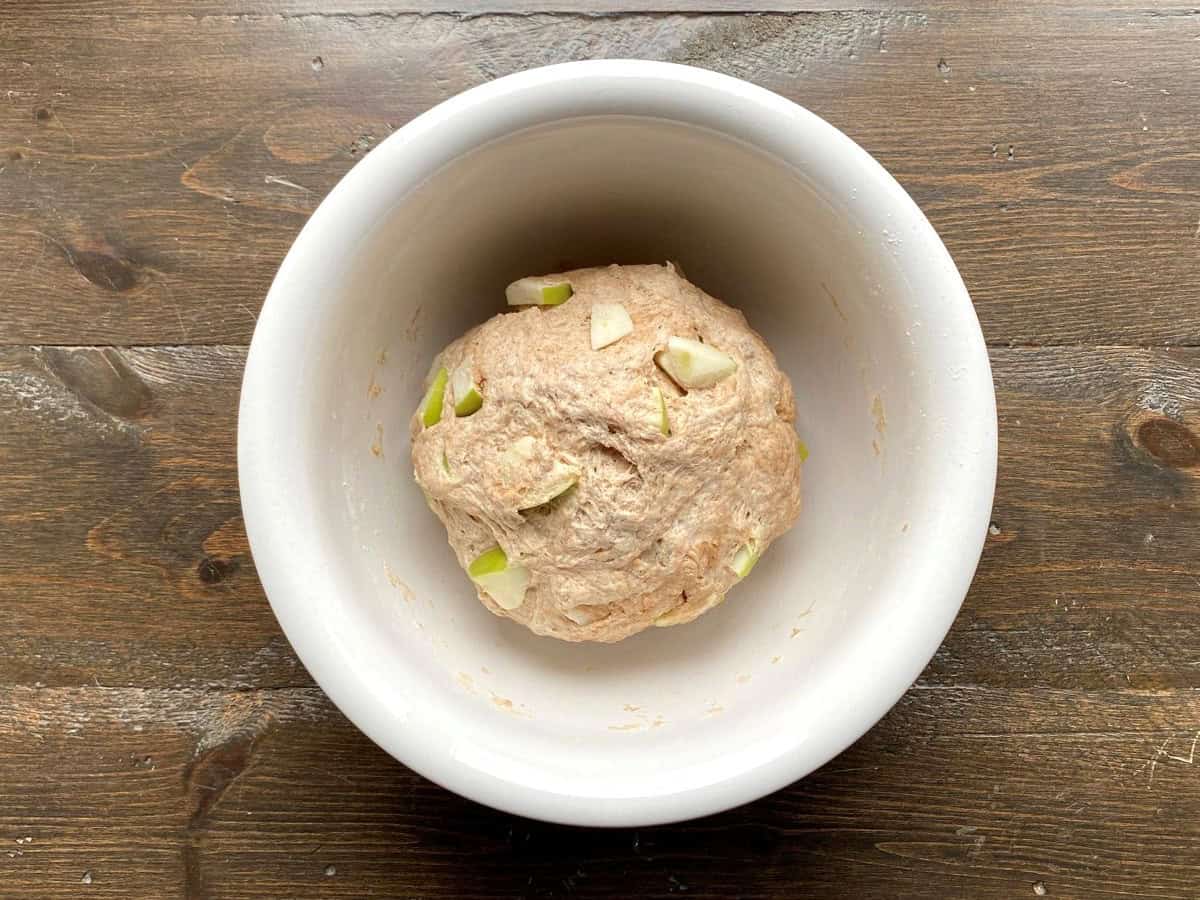
Dough ball in a large white bowl.

Add the chopped apples. Use your hands to continue mixing the dough until a ball of dough forms and the flour is completely mixed in.
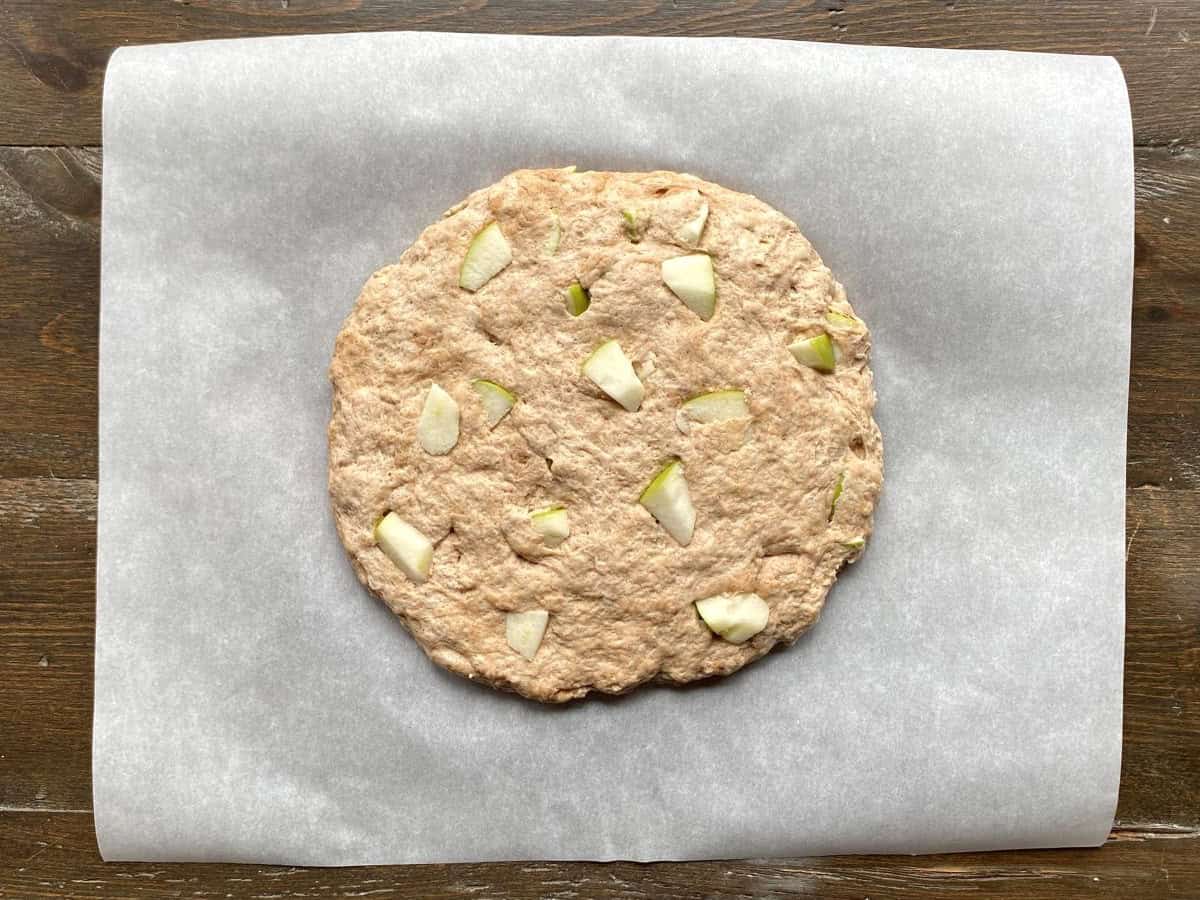
Dough is shaped into a flat round disc on top of white parchment paper.

Place a piece of parchment paper onto a large cutting surface. Gently shape the ball of dough into a flat round disc around 1/2 inch thickness and place onto parchment paper.
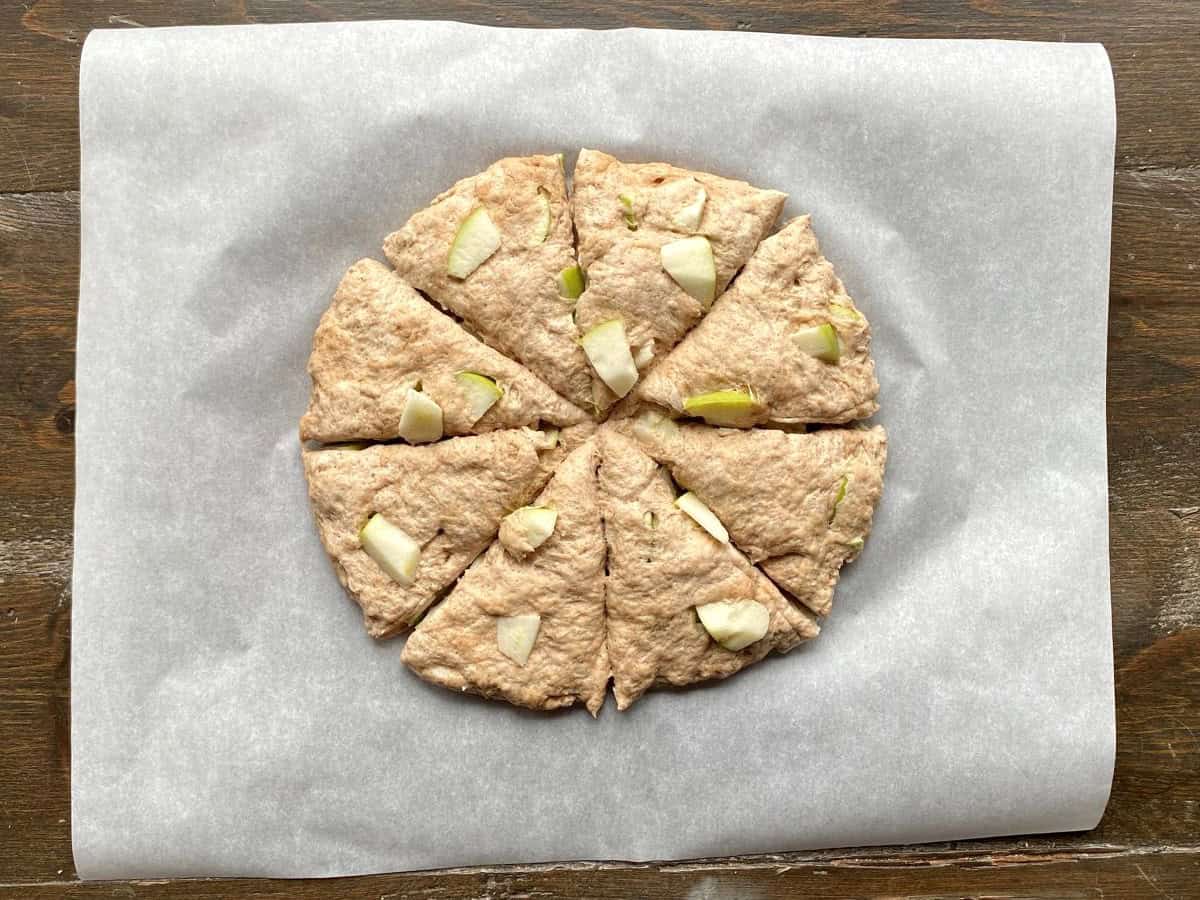
Dough is cut into eight equal triangle shaped pieces on top of white piece of parchment paper.

Use a pizza cutter or sharp knife to cut dough into eight slices just like slicing a pizza.
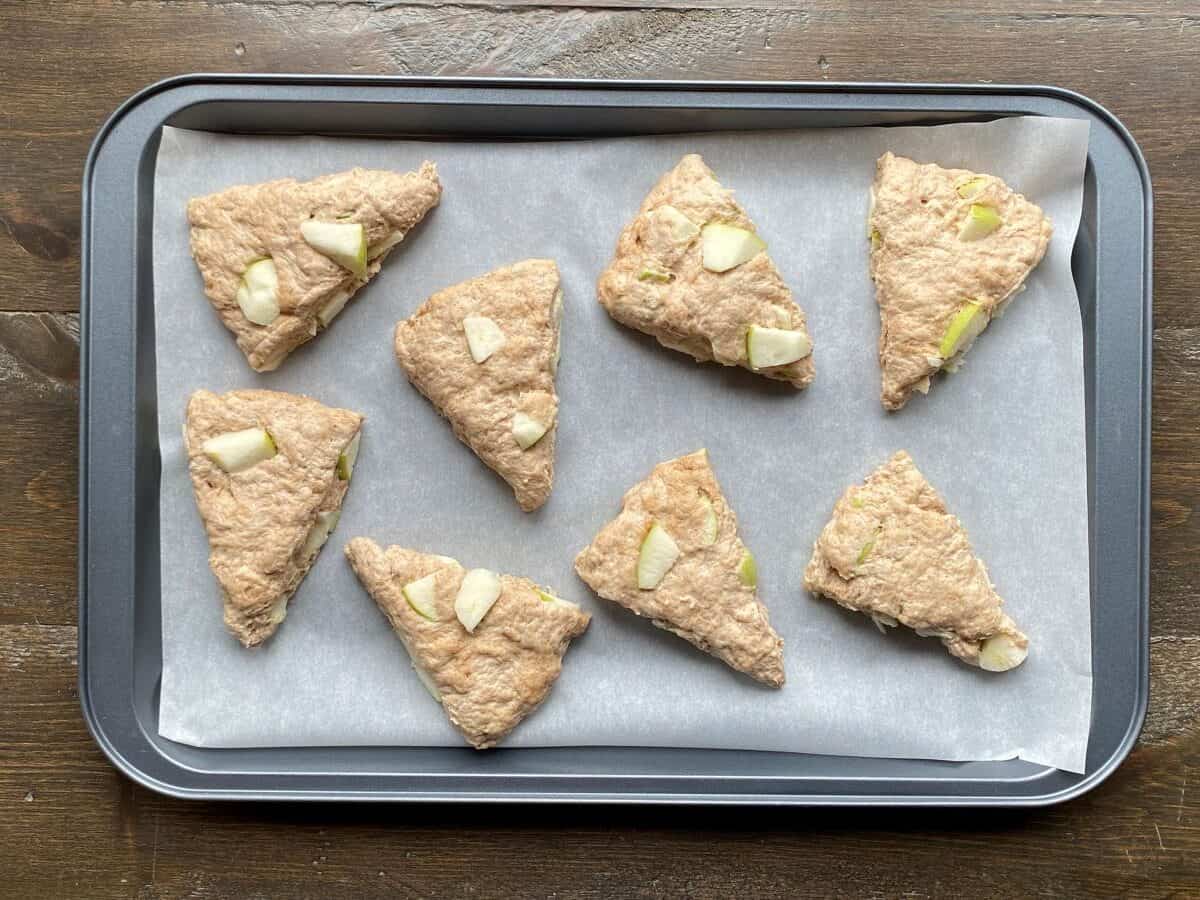
Dough triangles place on a large baking pan lined with parchment paper.

Place dough triangles onto prepared baking pan.
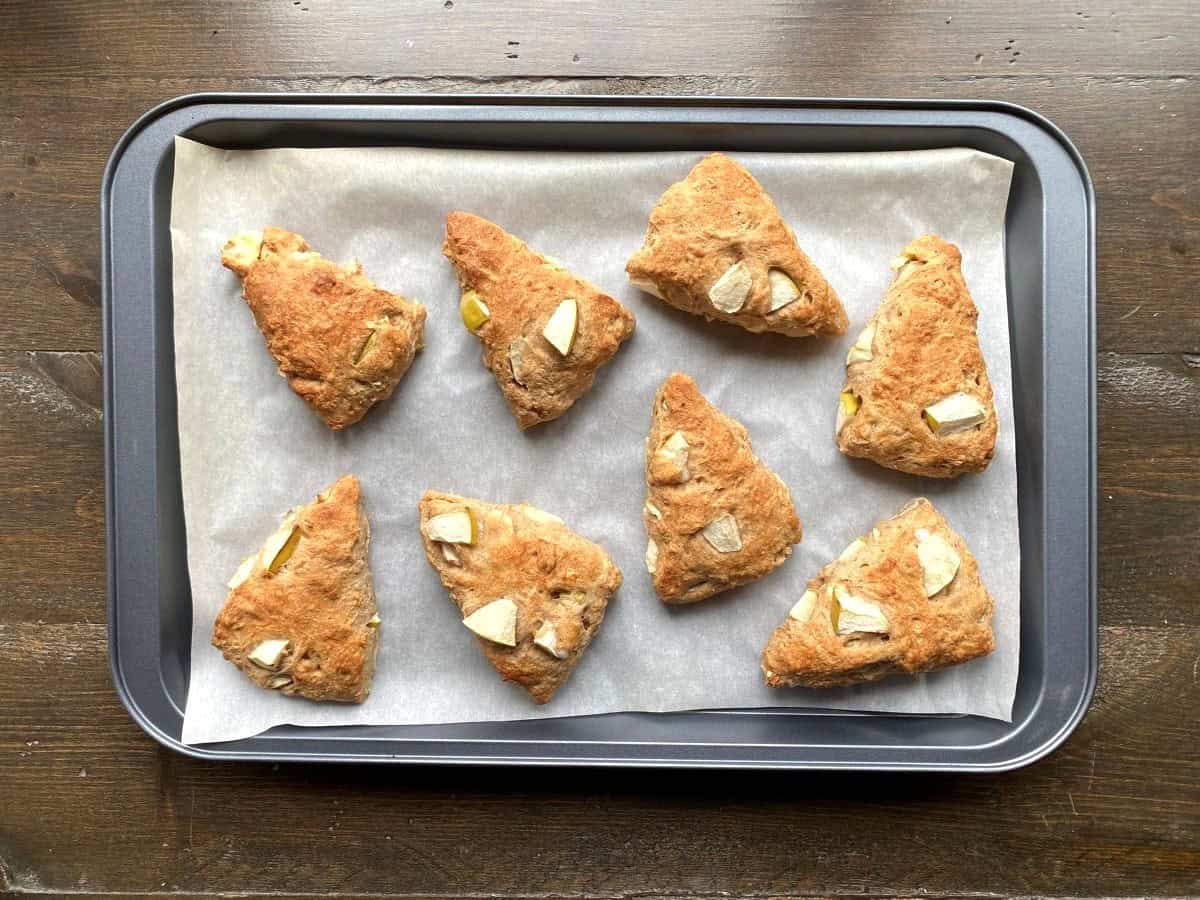
Baked apple scones on a large baking sheet lined with parchment paper.

Bake for 16-18 minutes or until the tops of the scones turn golden brown. Remove pan from oven and let the scones cool for 5 minutes before transferring to a wire rack to cool completely. Makes 8 scones.

Hint: Make sure the sourdough discard is at room temperature because it will be easier to mix into the dough.

Substitutions

  • All-Purpose Flour – 1:1 gluten free baking powder can be substituted for the all-purpose flour.
  • Greek Yogurt – 2% or higher or varieties with added sugar may be used. Please keep mind the scones will be sweeter and if you use a flavored Greek yogurt the taste of the scones will change.
  • Maple Syrup – Liquid honey can be substituted for the maple syrup.
  • Milk – Any type of milk or plant based milk can be used.

Equipment

Large Baking Pan – A large metal pan works best for this recipe.

Storage

Sourdough Discard Apple Scones can be stored in an airtight container or bag for up to three days.

Sourdough Discard Apple Scones freeze well. Place scones in a freezer safe container or bag and freeze up to three months.

Top Tip

Make sure to use parchment paper when slicing the dough into triangles and on the baking pan because the dough will stick. The parchment paper also makes cleanup a breeze!

FAQ

What is sourdough discard?

Sourdough discard is unfed sourdough starter.

Why are my scones dry?

You may have baked the scones for too long. Bake scones for 16-18 minutes or until the tops start to turn golden.

Related

Looking for other recipes like this? Try these:

Apple scones with cinnamon sticks and an apple slice on a white cutting board.
Print Recipe
No ratings yet

Sourdough Discard Apple Scones

Sourdough Discard Apple Scones are light, fluffy and packed full of apple cinnamon flavor. They are a delicious snack at any time of day.
Prep Time10 minutes mins
Bake Time16 minutes mins
Total Time26 minutes mins
Servings: 8
Calories: 143kcal

Ingredients

  • 1 ½ cups all-purpose flour
  • 2 teaspoons baking powder
  • 2 teaspoons cinnamon
  • ½ cup sourdough discard
  • â…“ cup Greek yogurt plain
  • 3 tablespoons maple syrup
  • 2 tablespoons milk
  • 2 teaspoons vanilla
  • 1 medium apple

Instructions

  • Preheat oven to 350F. Line a large baking sheet with parchment paper.
  • Wash and chop apple into small pieces. There is no need to peel the apple and as a bonus the skin adds extra nutrients. Set aside.
  • Add flour, baking powder and cinnamon to a large bowl. Mix well.
  • Add sourdough discard, Greek yogurt, maple syrup, milk and vanilla to the dry ingredients. Mix with a large spoon until the flour starts to incorporate into the mixture.
  • Add the chopped apples. Use your hands to continue mixing the dough until a ball of dough forms and the flour is completely mixed in.
  • Place a piece of parchment paper onto a large cutting surface. Gently shape the ball of dough into a flat round disc around 1/2 inch thickness and place onto parchment paper.
  • Use a pizza cutter or sharp knife to cut dough into eight slices just like slicing a pizza.
  • Place dough triangles onto prepared baking pan.
  • Bake for 16-18 minutes or until the tops of the scones turn golden brown. Remove pan from oven and let the scones cool for 5 minutes before transferring to a wire rack to cool completely. Makes 8 scones.

Notes

Make sure the sourdough discard is at room temperature because it will be easier to mix into the dough.
Make sure to use parchment paper when slicing the dough into triangles and on the baking pan because the dough will stick. The parchment paper also makes cleanup a breeze!
Sourdough Discard Apple Scones can be stored in an airtight container or bag for up to three days.
Sourdough Discard Apple Scones freeze well. Place scones in a freezer safe container or bag and freeze up to three months.

Nutrition

Serving: 1scone | Calories: 143kcal | Carbohydrates: 30g | Protein: 4g | Fat: 0.3g | Saturated Fat: 0.1g | Polyunsaturated Fat: 0.1g | Monounsaturated Fat: 0.03g | Cholesterol: 1mg | Sodium: 112mg | Potassium: 88mg | Fiber: 2g | Sugar: 8g | Vitamin A: 22IU | Vitamin C: 1mg | Calcium: 91mg | Iron: 1mg

Filed Under: Breakfast, Healthy Snacks

Healthy Brownies

January 5, 2025 by Christine 1 Comment

Healthy Brownies are chocolatey, decadent and fudgy. They are a great treat to satisfy those sweet tooth cravings without all of the extra calories.

Three pieces of healthy brownies stacked on top of one another with mini chocolate chips surrounding the brownies and a container of cocoa powder in the left background.

Guilty of indulging in a few too many treats over the holiday season? Thinking about eating healthier to promote a more balanced lifestyle? Healthy Brownies are going to be your new best friend. How could brownies possibly be healthy? First, we have completely eliminated all of the butter from this recipe and replaced it with Greek yogurt for a protein boost. Next, we have removed any processed sugars and replaced them with maple syrup. Finally, we are using mini chocolate chips in place of regular size chocolate chips because we can use less chocolate without compromising the taste. Don’t worry there is melt in your mouth chocolate in every bite. Healthy Brownies are a great way to get back on track with your health and fitness goals without having to give up sweets.

Looking for other health treats? Try No Bake Peanut Butter Protein Bites or Healthy Chocolate Muffins.

Ingredients

Ingredients for healthy brownies measured and laid out on a brown wooden surface.
  • Greek Yogurt – I used 0% no sugar added.
  • Maple Syrup – Used to sweeten the brownies.
  • Large Eggs – Helps to bind the other ingredients together.
  • Milk – I used skim milk in this recipe.
  • Cocoa Powder – Used to create that classic chocolate taste.
  • All-Purpose Flour – I used all-purpose flour for this recipe. I haven’t tried this recipe using any other type of flour.
  • Mini Chocolate Chips – Because extra chocolate is always a good idea!

See recipe card for quantities.

Instructions

Preheat oven to 350F. Line an 8×8 baking pan with parchment paper.

Wet ingredients in a large white bowl with a metal whisk leaning on the side of the bowl.

In a large bowl, add eggs, Greek yogurt, maple syrup and milk. Whisk to combine.

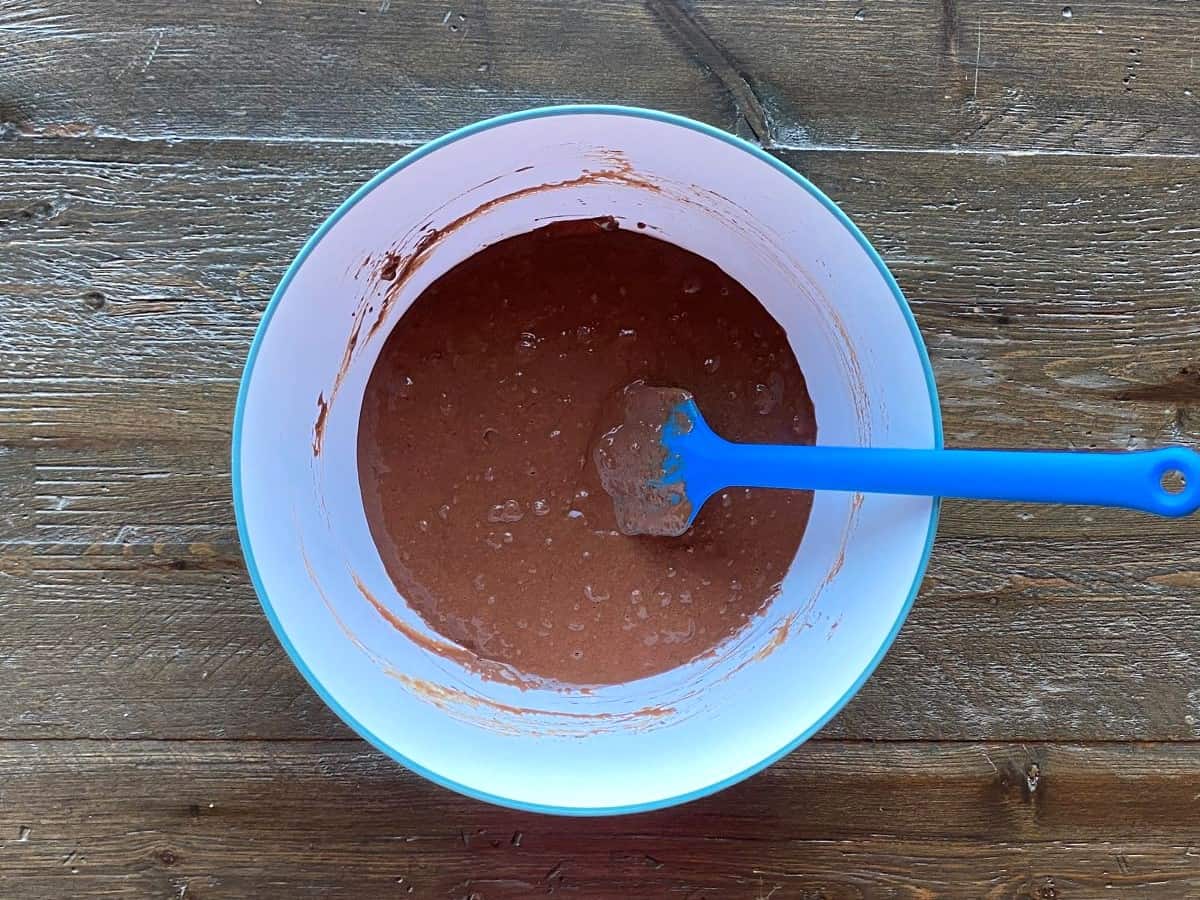
Brownie batter in a large white bowl with a blue spatula leaning on the side of the bowl.

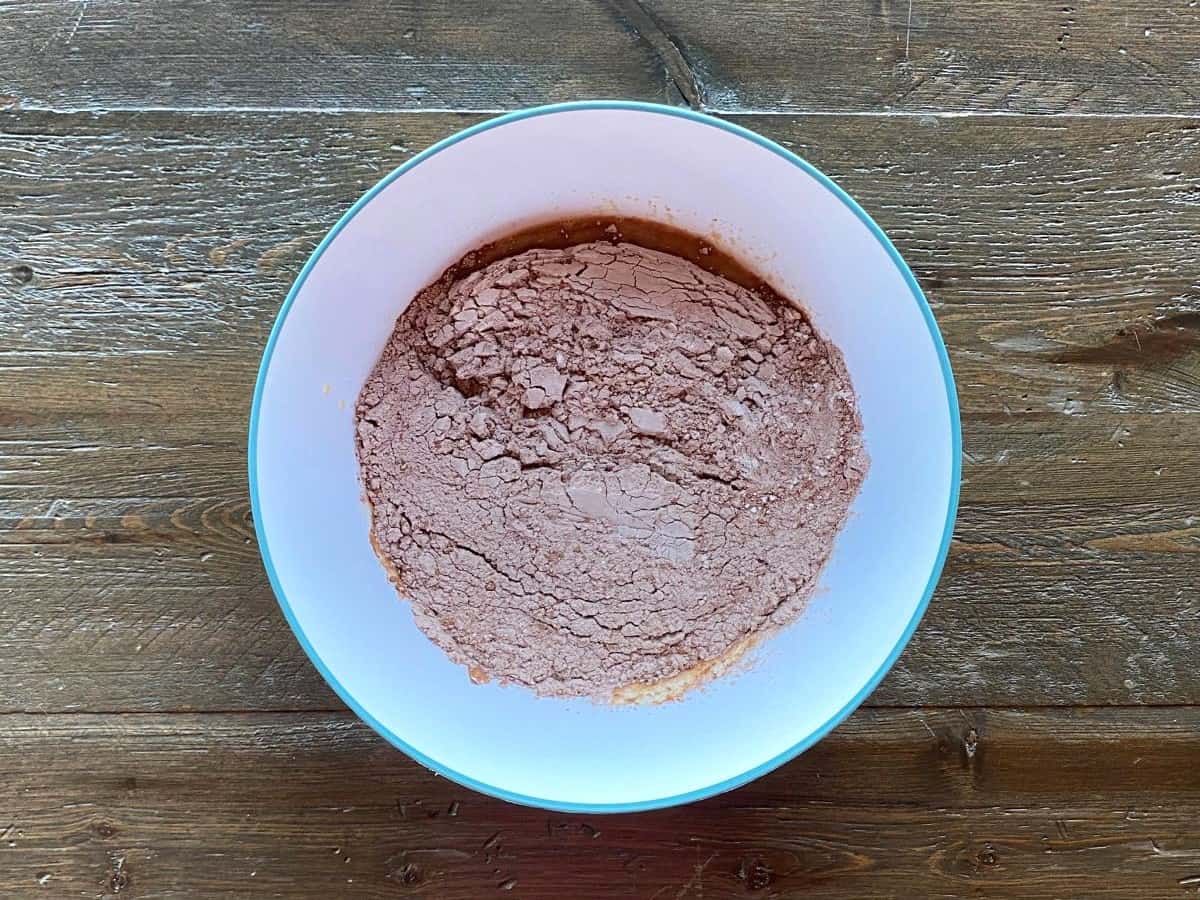
Sift flour and cocoa powder into the wet ingredients. Use a spatula to fold in the flour and cocoa powder.

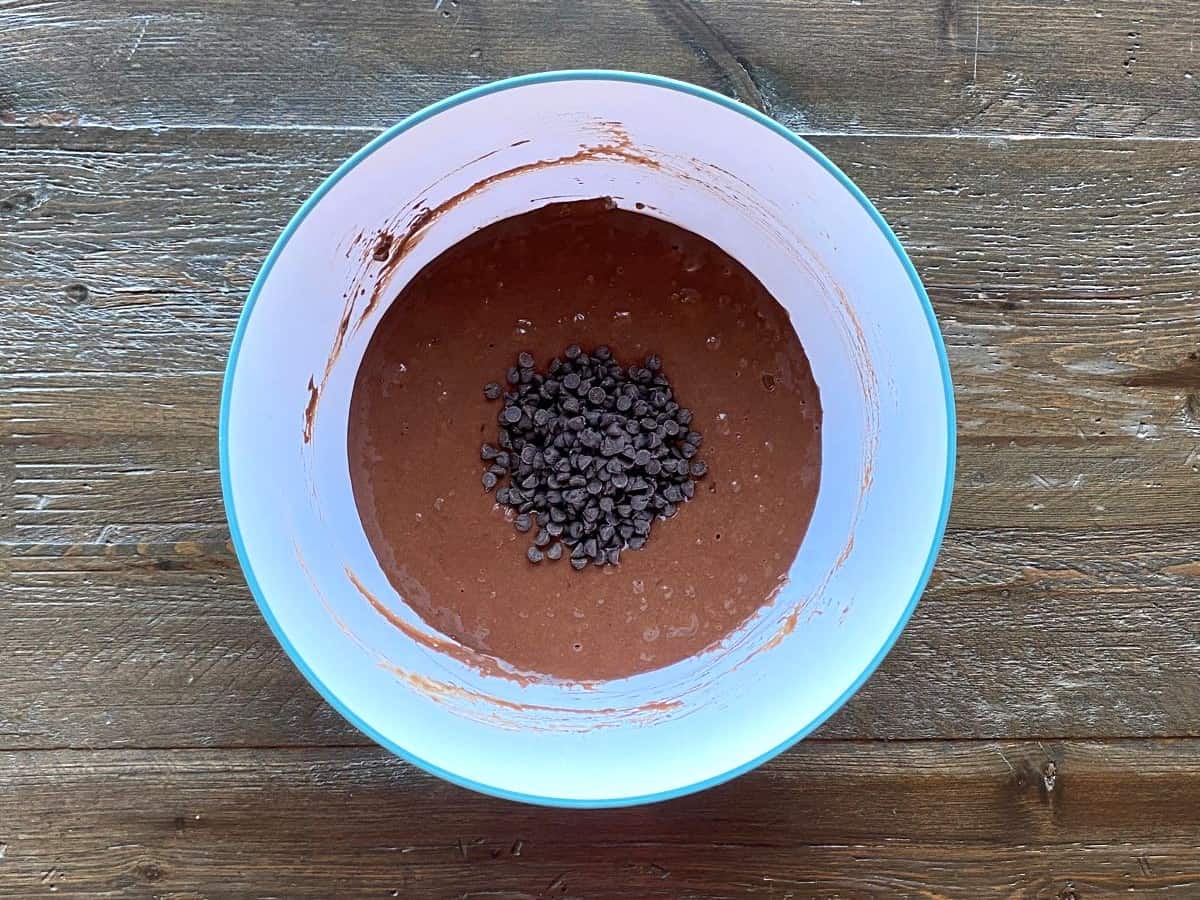
Mini chocolate chips on top of the brownie batter in a large white bowl.

Add mini chocolate chips.

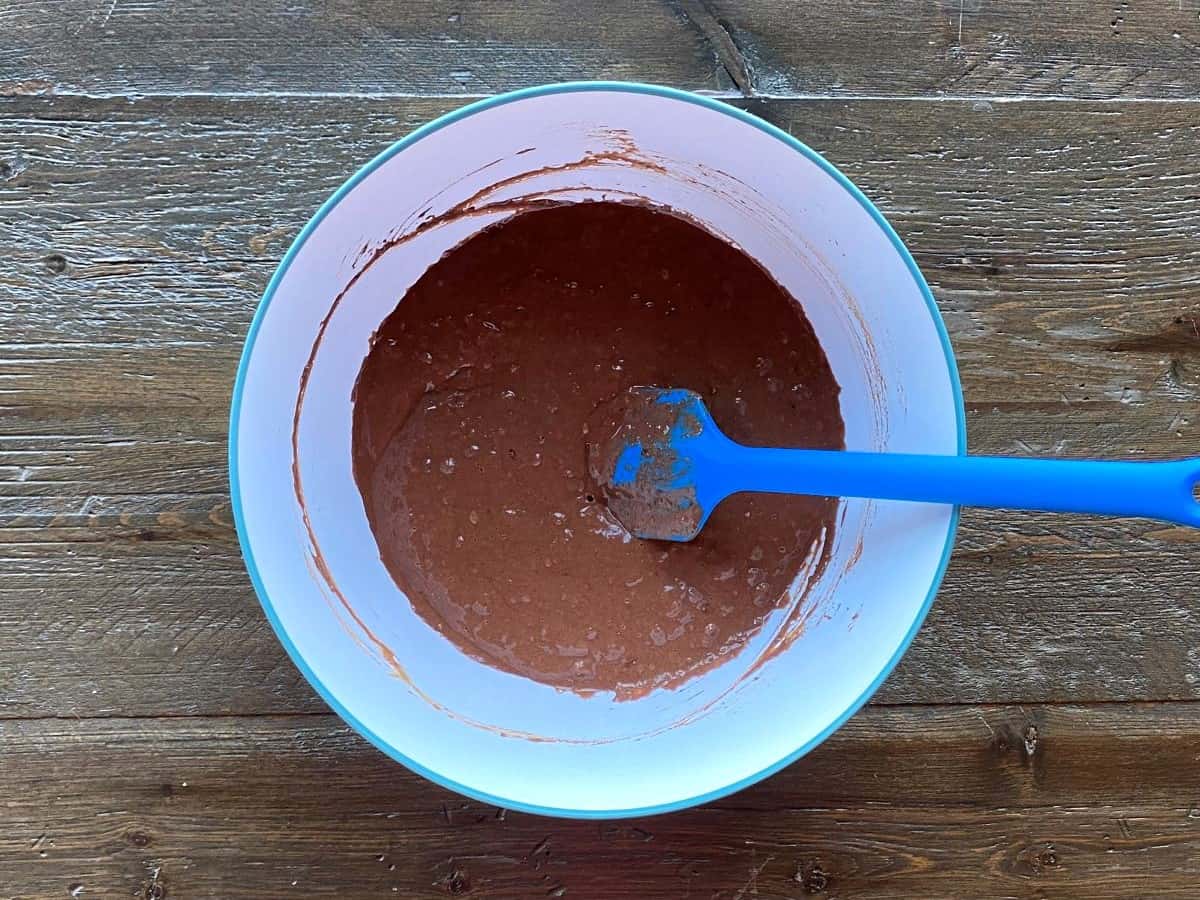
Brownie batter with chocolate chips in a large white bowl with a blue spatula leaning on the side of the bowl.

Use a spatula to fold in the chocolate chips.

Brownie batter in a square metal baking pan lined with parchment paper.

Pour batter into prepared baking pan.

Baked healthy brownies in a square metal baking pan lined with parchment paper.

Bake for 30-35 minutes or until a toothpick inserted into the center comes out clean. Cool before cutting into slices. Makes 16 brownies.

Hint: Make sure to line the baking pan with parchment paper. This prevents the brownies from sticking but it also makes for an easier clean-up.

Substitutions

  • Maple Syrup – Liquid honey can be substituted for the maple syrup.
  • Greek Yogurt – I used 0% no sugar added. You could substitute with 2% or higher or with varieties that have added sugar if you choose.
  • Milk – Any plant based on non plant based milk can be used.
  • Mini Chocolate Chips – Feel free to use regular chocolate chips if you prefer.

Equipment

8×8 Baking Pan – You can use a 9×9 baking pan but the brownies will be thinner. Do not use a 9×13 baking pan as there is not enough batter to cover the pan.

Storage

Healthy Brownies can be stored at room temperature in an airtight container or bag for up to three days.

Healthy Brownies freeze well. Store brownies in a freezer safe container or bag and free up to three months. Thaw when ready to eat.

Top Tip

Make sure to sift the flour and cocoa powder before adding it to the batter because this helps to prevent lumps.

FAQ

What if I don’t have mini chocolate chips?

Use regular chocolate chips instead. I like mini chocolate chips because they ensure you get melt in your mouth chocolate in every bite.

Are these brownies actually healthy?

Yes! One of these brownies has only 82 calories and 2 grams of fat. Make sure to eat more than one!

Related

Looking for other recipes like this? Try these:

Three pieces of healthy brownies stacked on top of one another with mini chocolate chips surrounding the brownies and a container of cocoa powder in the left background.
Print Recipe
5 from 1 vote

Healthy Brownies

Healthy Brownies are chocolatey, decadent and fudgy. They are a great treat to satisfy those sweet tooth cravings without all of the extra calories.
Prep Time10 minutes mins
Bake Time35 minutes mins
Total Time45 minutes mins
Servings: 16 squares
Calories: 82kcal
Author: Christine

Ingredients

  • â…“ cup Greek yogurt 0%, no sugar added
  • ½ cup maple syrup
  • 3 large eggs
  • â…“ cup milk
  • ¾ cup cocoa powder
  • ½ cup all-purpose flour
  • ¼ cup mini chocolate chips

Instructions

  • Preheat oven to 350F. Line an 8×8 baking pan with parchment paper.
  • In a large bowl, add eggs, Greek yogurt, maple syrup and milk. Whisk to combine.
  • Sift flour and cocoa powder into the wet ingredients. Use a spatula to fold in the flour and cocoa powder.
  • Add mini chocolate chips.
  • Use a spatula to fold in the chocolate chips.
  • Pour batter into prepared baking pan.
  • Bake for 30-35 minutes or until a toothpick inserted into the center comes out clean. Cool before cutting into slices. Makes 16 brownies.

Notes

Make sure to line the baking pan with parchment paper. This prevents the brownies from sticking but it also makes for an easier clean-up.
Make sure to sift the flour and cocoa powder before adding it to the batter because this helps to prevent lumps.
Healthy Brownies can be stored at room temperature in an airtight container or bag for up to three days.
Healthy Brownies freeze well. Store brownies in a freezer safe container or bag and free up to three months. Thaw when ready to eat.

Nutrition

Serving: 1brownie | Calories: 82kcal | Carbohydrates: 14g | Protein: 3g | Fat: 2g | Saturated Fat: 1g | Polyunsaturated Fat: 0.2g | Monounsaturated Fat: 1g | Trans Fat: 0.01g | Cholesterol: 36mg | Sodium: 21mg | Potassium: 115mg | Fiber: 2g | Sugar: 8g | Vitamin A: 68IU | Vitamin C: 0.02mg | Calcium: 37mg | Iron: 1mg

Filed Under: Desserts, Healthy Snacks, Recipes

Cranberry Sauce

December 15, 2024 by Christine 1 Comment

Cranberry Sauce is tart with a slight hint of sweetness and packed full of juicy cranberry flavor. It’s the perfect side for holiday meals.

A bowl of cranberry sauce in the center surrounded by fresh cranberries and a metal spoon on the right side.

Christmas is just around the corner and that means turkey and all of the fixings in this household. We are definitely team cranberry and a turkey dinner is not complete without cranberry sauce. I used to buy the sauce that comes in cans but I realized they are loaded with sugars. I set out to make my own cranberry sauce and I will never go back to the canned stuff again. This recipe is super simple to make and you can even prepare it ahead of time because there are always a million other things to think about when making a big holiday meal. I hope you enjoy this cranberry sauce as much as we do.

Ingredients

Ingredients for cranberry sauce measured and laid out on a brown wooden surface.
  • Cranberries – I used fresh cranberries for this recipe. They can usually be found in the produce section of the grocery store.
  • Maple Syrup – Used to sweeten the cranberry sauce.
  • Water – Adds a touch more moisture to the sauce.

See recipe card for quantities.

Instructions

Cranberries, water and maple syrup in a medium size pot.

Add cranberries, maple syrup and water to a medium size pot or saucepan.

Cranberry mixture brought to a boil in a medium size pot.

Bring sauce to a boil on medium heat until cranberries start to pop.

Mashed cranberries in a medium size pot with a potato masher leaning on the side of the pot.

Reduce heat to minimum. Use a potato masher to mash the cranberries.

Cranberry sauce in a medium size pot.

Remove from heat. The sauce will thicken at it cools. Makes 1 cup of sauce.

Hint: If you like a lot of cranberry sauce, feel free to double the recipe.

Substitutions

  • Cranberries – Frozen cranberries can easily be substituted for the fresh cranberries.
  • Maple Syrup – Liquid honey can be substituted for the maple syrup.

Equipment

Potato Masher – Used to mash the cranberries. Use a large fork if you do not have a potato masher but be sure to mash all of the cranberries.

Storage

Cranberry sauce keeps best in the refrigerator. Store sauce in an airtight container for up one week.

Cranberry Sauce freezes well. Place sauce in a freezer safe container and freeze up to three months. Thaw the sauce when you are ready to eat it.

Top Tip

Be sure to cook the cranberries until they start to pop because this will make it easier to mash them.

FAQ

Is cranberry sauce healthy?

Yes! This cranberry sauce is healthy because it’s made with two simple ingredients: fresh cranberries and maple syrup. We are skipping the processed sugars and preservatives that typically come in the canned varieties.

What should I serve cranberry sauce with?

Cranberry sauce can be served as a side with a turkey dinner or any holiday meal. I prefer to spread mine on top of my turkey. It also works great in leftover turkey sandwiches or wraps.

Related

Looking for other recipes like this? Try these:

A bowl of cranberry sauce in the center surrounded by fresh cranberries and a metal spoon on the right side.
Print Recipe
5 from 1 vote

Cranberry Sauce

Cranberry Sauce is tart with a slight hint of sweetness and packed full of juicy cranberry flavor. It's the prefect side for holiday meals.
Prep Time5 minutes mins
Cook Time10 minutes mins
Total Time15 minutes mins
Servings: 8
Calories: 36kcal
Author: Christine

Ingredients

  • 1 ½ cups cranberries
  • ¼ cup water
  • ¼ cup maple syrup See notes

Instructions

  • Add cranberries, maple syrup and water to a medium size pot or saucepan.
  • Bring sauce to a boil on medium heat until cranberries start to pop.
  • Reduce heat to minimum. Use a potato masher to mash the cranberries.
  • Remove from heat. The sauce will thicken at it cools.

Notes

If you like a lot of cranberry sauce, feel free to double the recipe.
Be sure to cook the cranberries until they start to pop because this will make it easier to mash them.
Add 2 tablespoons of extra maple syrup if you prefer you cranberry sauce on the sweeter side.
Cranberry sauce keeps best in the refrigerator. Store sauce in an airtight container for up one week.
Cranberry Sauce freezes well. Place sauce in a freezer safe container and freeze up to three months. Thaw the sauce when you are ready to eat it.

Nutrition

Serving: 2tablespoons | Calories: 36kcal | Carbohydrates: 9g | Protein: 0.1g | Fat: 0.02g | Saturated Fat: 0.001g | Polyunsaturated Fat: 0.01g | Monounsaturated Fat: 0.004g | Sodium: 2mg | Potassium: 38mg | Fiber: 1g | Sugar: 7g | Vitamin A: 11IU | Vitamin C: 3mg | Calcium: 13mg | Iron: 0.1mg

Filed Under: Recipes

Dark Chocolate Cranberry Cookies

November 26, 2024 by Christine Leave a Comment

Dark Chocolate Cranberry Cookies are decadent, soft and chewy. They are sure to be a crowd pleasing dessert for the upcoming holiday season.

Dark chocolate cranberry cookies on a black wire rack on top of a brown wooden surface.

Dark Chocolate Cranberry Cookies are the perfect way to kick off the holiday baking season! This recipe starts with a basic cookie dough batter. Next, dark chocolate chips and dried cranberries are added to make this a rich and decadent cookie. Finally, these cookies are baked until they are golden brown. Let them cool slightly and enjoy a warm, soft and delicious cookie. Be careful because these cookies are so addicting that you might not want to save any for your guests!

If you are looking for other holiday cookie recipes, try my Christmas M&M Cookies or Soft and Chewy Gingerbread Cookies.

Ingredients

Ingredients for dark chocolate cranberry cookies measured and laid out on a brown wooden surface.
  • All-Purpose Flour – I used all-purpose flour for this recipe. I haven’t made these cookies with any other type of flour but I think 1:1 gluten free baking flour would work well.
  • Baking Soda – Helps the cookies to rise.
  • Unsalted Butter, Melted – Makes the cookies rich and decadent.
  • Granulated Sugar – Adds some sweetness to the cookies.
  • Brown Sugar – Adds more sweetness and helps to keep the cookies soft and chewy.
  • Eggs – Helps to bind the other ingredients together.
  • Vanilla – Adds some extra flavor.
  • Dark Chocolate Chips and Dried Cranberries – The perfect combination for these delicious cookies!

See recipe card for quantities.

Instructions

Preheat oven to 350F. Line two large baking sheets with parchment paper.

Dry ingredients in a medium size bowl with a spoon leaning on the side of the bowl.

In a medium size bowl, mix together flour and baking soda.

Cookie batter in a large white bowl with an electric mixer leaning on the side of the bowl.

In a large bowl, add melted butter, granulated sugar and brown sugar. Beat with an electric mixer until smooth.

Smooth batter in a large white bowl with an electric mixer leaning on the side of the bowl.

Add eggs and vanilla. Beat on medium until the batter is smooth.

Cookie dough in a large white bowl with a blue spatula leaning on the side of the bowl.

Add half of the flour mixture to the batter. Turn electric mixer to low and mix until the flour mixture starts to incorporate into the batter. As the flour mixture starts to incorporate, you can increase the speed of the electric mixer to medium. Use a spatula to scrape down the sides of the bowl as necessary. Repeat with remaining flour mixture.

Cranberries and dark chocolate chips on top of cookie dough in a large white bowl.

Add dark chocolate chips and cranberries.

Cranberries and cookies are folded into the dough in a large white bowl with a blue spatula leaning on the side of the bowl.

Use a spatula to fold in chocolate chips and cranberries.

12 dough balls on a large baking sheet lined with parchment paper.

Use a cookie scoop or large spoon to drop dough onto prepared baking sheets. (About 2 tablespoons of dough per cookie).

12 baked cookies on a large baking pan lined with parchment paper.

Bake 10-12 minutes or until the cookies start to turn golden. Cool cookies slightly before transferring to a wire rack to cool completely. Makes 24 cookies.

Hint: Make sure to line the baking sheet with parchment paper so the cookies don’t stick. It also helps with a quicker cleanup!

Substitutions

  • Unsalted Butter – You could substitute salted butter if it’s all you have on hand.
  • Dark Chocolate Chips – Feel free to use whatever type of chocolate chip you prefer.

Equipment

Large Non-Stick Baking Pan – I used two large non-stick metal baking pans for this recipe. You can use smaller baking pans but you won’t be able to fit as many cookies on a pan.

Electric Mixer – I used an electric mixer for this recipe. I highly recommend using an electric mixer because the cookie dough is quite thick. You can try mixing by hand but you will likely end up with very sore arms!

Storage

Dark Chocolate Cranberry Cookies can be stored at room temperature in an airtight container or bag for up to three days.

Dark Chocolate Cranberry Cookies freeze well. Place cookies in a freezer safe container or bag and freeze up to three months. Thaw when ready to eat. I actually prefer to keep my cookies frozen because it maximizes the freshness.

Top Tip

Do not overbake the cookies! If you overbake the cookies they won’t be soft and chewy. Bake 10-12 minutes or until the cookies start to turn golden.

FAQ

Does this cookie dough have to be chilled before baking?

No! There is no need to chill the cookie dough before baking. The cookies will still be thick and chewy.

Can I use a different kind of chocolate chip?

Yes! Feel free to use your favorite type of chocolate chip. I love the combination of dark chocolate and cranberry. I am sure semisweet or milk chocolate chips would taste great as well.

Related

Looking for other recipes like this? Try these:

Dark chocolate cranberry cookies on a black wire rack on top of a brown wooden surface.
Print Recipe
No ratings yet

Dark Chocolate Cranberry Cookies

Dark Chocolate Cranberry Cookies are decadent, soft and chewy. They are sure to be a crowd pleasing dessert for the upcoming holiday season.
Prep Time15 minutes mins
Bake Time12 minutes mins
Total Time27 minutes mins
Servings: 24
Calories: 179kcal
Author: Christine

Ingredients

  • 2 ½ cups all-purpose flour
  • 2 teaspoons baking soda
  • ½ cup unsalted butter melted
  • ¼ cup granulated sugar
  • 1 cup brown sugar
  • 2 large eggs
  • 2 teaspoons vanilla
  • 1 cup dark chocolate chips
  • ½ cup dried cranberries

Instructions

  • Preheat oven to 350F. Line two large baking sheets with parchment paper.
  • In a medium size bowl, mix together flour and baking soda.
  • In a large bowl, add melted butter, granulated sugar and brown sugar. Beat with an electric mixer until smooth.
  • Add eggs and vanilla. Beat on medium until the batter is smooth.
  • Add half of the flour mixture to the batter. Turn electric mixer to low and mix until the flour mixture starts to incorporate into the batter. As the flour mixture starts to incorporate, you can increase the speed of the electric mixer to medium. Use a spatula to scrape down the sides of the bowl as necessary.
  • Repeat with remaining flour mixture.
  • Add dark chocolate chips and cranberries.
  • Use a spatula to fold in chocolate chips and cranberries.
  • Use a cookie scoop or large spoon to drop dough onto prepared baking sheets. (About 2 tablespoons of dough per cookie).
  • Bake 10-12 minutes or until the cookies start to turn golden. Cool cookies slightly before transferring to a wire rack to cool completely. Makes 24 cookies.

Notes

Make sure to line the baking sheet with parchment paper so the cookies don’t stick. It also helps with a quicker cleanup!
Do not overbake the cookies! If you overbake the cookies they won’t be soft and chewy. Bake 10-12 minutes or until the cookies start to turn golden.
Dark Chocolate Cranberry Cookies can be stored at room temperature in an airtight container or bag for up to three days.
Dark Chocolate Cranberry Cookies freeze well. Place cookies in a freezer safe container or bag and freeze up to three months. Thaw when ready to eat. I actually prefer to keep my cookies frozen because it maximizes the freshness.

Nutrition

Serving: 1cookie | Calories: 179kcal | Carbohydrates: 27g | Protein: 3g | Fat: 7g | Saturated Fat: 5g | Polyunsaturated Fat: 0.3g | Monounsaturated Fat: 1g | Trans Fat: 0.2g | Cholesterol: 26mg | Sodium: 109mg | Potassium: 82mg | Fiber: 1g | Sugar: 15g | Vitamin A: 142IU | Vitamin C: 0.04mg | Calcium: 36mg | Iron: 1mg

Filed Under: Cookies, Recipes

Pumpkin Pie

September 25, 2024 by Christine 2 Comments

Pumpkin Pie is sweet and delicious. It’s filled with pumpkin and warm spices and literally melts in your mouth.

A baked pumpkin pie in the middle with an oven mitt on the left side and a pie lifter and pumpkin on the right side.

My all time favorite pie is definitely pumpkin! Pumpkin Pie reminds me of the holidays because it’s a mandatory dessert for my family at Thanksgiving and Christmas. I used to buy store bought pumpkin pies and I’ll admit I thought they were really good but then I started experimenting with baking my own pumpkin pies and the rest is history! I don’t think I could ever eat a store bought pumpkin pie again.

A piece of pumpkin pie on a white plate in the foreground with a pumpkin, pumpkin pie, oven mitt and pie lifter in the background.

This pumpkin pie recipe can be made with any unbaked pie crust of your choosing. You can buy a premade crust or you can make your own. I personally feel the crust plays a major role in how good the pie is. Try my Butter Pie Crust if you are looking for the prefect crust for this pumpkin pie recipe.

Ingredients

Ingredients for pumpkin pie measured and laid out on a brown wooden surface.
  • Canned Pumpkin – Be sure to use canned pumpkin and not pumpkin pie filling.
  • Brown Sugar – Used to sweeten the pie.
  • Evaporated Milk – I used evaporated skim milk.
  • Eggs – Helps to bind the other ingredients together.
  • Pumpkin Pie Spice – A mixture of warm spices to flavor the pie.
  • Salt – Brings out the flavor of the other ingredients.
  • Unbaked Pie Crust – The filling will be poured into the crust before baking.

See recipe card for quantities.

Instructions

Preheat oven to 350F.

Ingredients for pumpkin pie mixture added to a large white bowl.

Add canned pumpkin, brown sugar, evaporated milk, eggs, pumpkin pie spice and salt to a large bowl.

Pumpkin pie mixture in a large white bowl with an electric mixer leaning on the right side of the bowl.

Beat with an electric mixer on low until a smooth filling forms.

Batter poured into unbaked pie crust.

Pour filling into prepared crust.

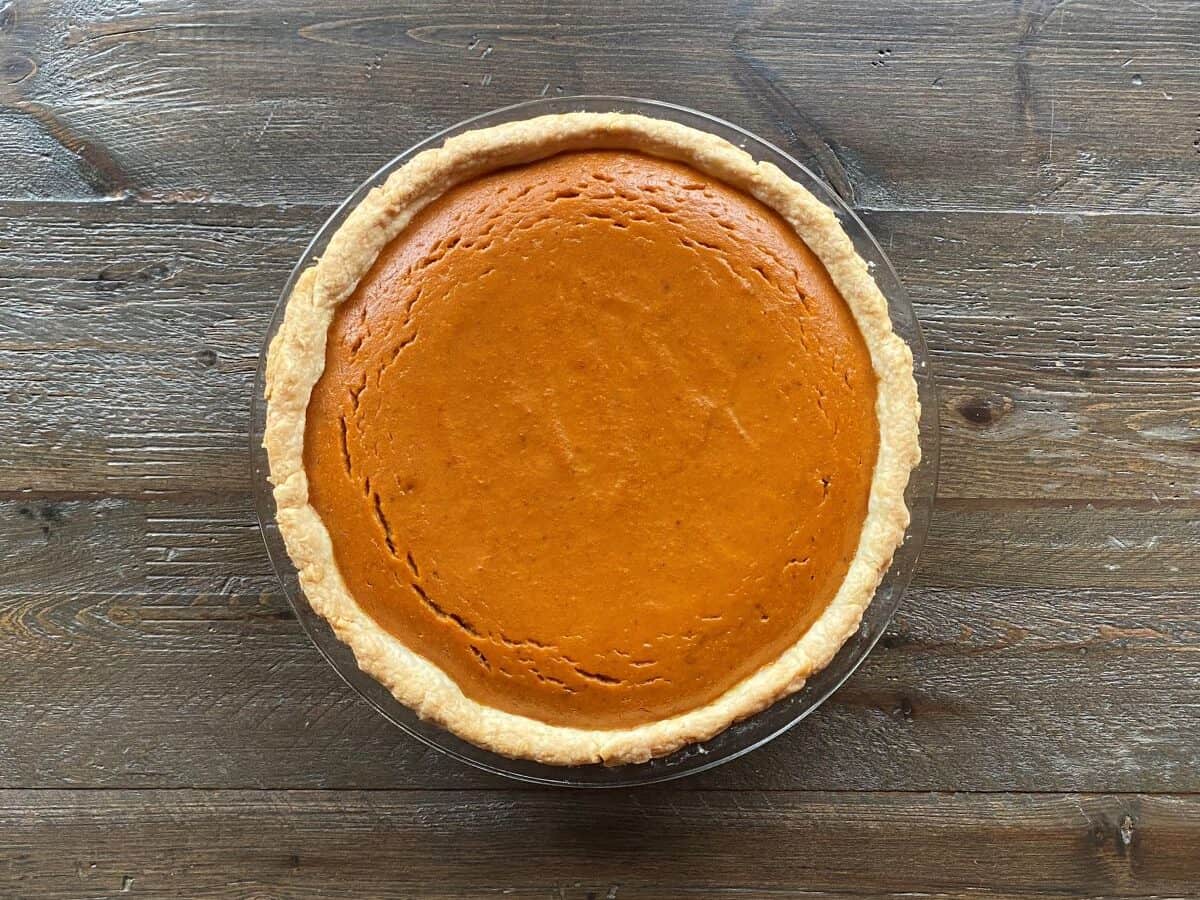
Baked pumpkin pie in a glass pie dish.

Bake for 50-60 minutes or until the center of the pie is slightly jiggly. Cool completely before cutting into slices. Makes 16 slices.

Hint: Make sure to use a large bowl as the filling tends to splash when it’s mixed with an electric mixer.

Substitutions

  • Canned Pumpkin – You can substitute homemade pumpkin puree for the canned pumpkin. Do not use canned pumpkin pie filling.
  • Evaporated Milk I used evaporated skim milk but you can use whatever kind of evaporated milk you choose. Just be sure not to use condensed milk.

Equipment

Electric Mixer – An electric mixer works best for mixing the filling. You can use a whisk if you do not have an electric mixer but make sure to whisk the filling until it’s smooth and there are no lumps.

Storage

Pumpkin Pie can be covered and stored in the fridge for up to five days. I do not recommend leaving the pie at room temperature.

Pumpkin Pie freezes well. Wrap individual pieces in plastic wrap before placing in a freezer safe container or bag or cover the whole pie and freeze for up to three months.

Top Tip

Be sure to cool the pie completely as this gives the filling a chance to set. I prefer to make the pie the day before I am going to serve it.

FAQ

Can I use condensed milk instead of evaporated milk?

Unfortunately no. The consistency of condensed milk and evaporated milk are quite different.

Can I make this pie the day before I plan on serving it?

Absolutely! I actually prefer to make this pie the day before as it has to cool completely before serving so the filling has a chance to set.

Why did the pie fall apart when I cut it?

Make sure to cool the pie completely before cutting. If the filling does not have a chance to set, the pie will fall apart.

Related

Looking for other recipes like this? Try these:

A baked pumpkin pie in the middle with an oven mitt on the left side and a pie lifter and pumpkin on the right side.
Print Recipe
5 from 2 votes

Pumpkin Pie

Pumpkin Pie is sweet and delicious. It's filled with pumpkin and warm spices and literally melts in your mouth.
Prep Time10 minutes mins
Bake Time50 minutes mins
Total Time1 hour hr
Servings: 16
Calories: 129kcal

Ingredients

  • 3 cups canned pumpkin
  • ¾ cup brown sugar
  • 1 ¼ cup evaporated milk
  • 2 large eggs
  • 2 teaspoons pumpkin pie spice
  • ¼ teaspoon salt
  • 1 pie crust unbaked

Instructions

  • Preheat oven to 350F.
  • Add canned pumpkin, brown sugar, evaporated milk, eggs, pumpkin pie spice and salt to a large bowl.
  • Beat with an electric mixer on low until a smooth filling forms.
  • Pour filling into prepared crust.
  • Bake for 50-60 minutes or until the center of the pie is slightly jiggly. Cool completely before cutting into slices. Makes 16 slices.

Notes

Make sure to use a large bowl as the filling tends to splash when it’s mixed with an electric mixer.
Be sure to cool the pie completely as this gives the filling a chance to set. I prefer to make the pie the day before I am going to serve it.
Pumpkin Pie can be covered and stored in the fridge for up to five days. I do not recommend leaving the pie at room temperature.
Pumpkin Pie freezes well. Wrap individual pieces in plastic wrap before placing in a freezer safe container or bag or cover the whole pie and freeze for up to three months.

Nutrition

Serving: 1slice | Calories: 129kcal | Carbohydrates: 21g | Protein: 3g | Fat: 4g | Saturated Fat: 1g | Polyunsaturated Fat: 0.5g | Monounsaturated Fat: 2g | Trans Fat: 0.003g | Cholesterol: 24mg | Sodium: 117mg | Potassium: 195mg | Fiber: 2g | Sugar: 14g | Vitamin A: 7263IU | Vitamin C: 2mg | Calcium: 86mg | Iron: 1mg

Filed Under: Desserts, Recipes

Butter Pie Crust

September 23, 2024 by Christine Leave a Comment

Butter pie crust is rich, flaky and delicious. This crust is the perfect base for all of your favorite pie recipes.

Pie crust in a glass pie plate with a rolling pin on the top left and a pie lifter on the right.

Are you looking for an easy pie crust recipe that doesn’t require kneading? If the answer is yes, you have come to the right place! Butter Pie Crust is super simple to make. Simply toss the ingredients into a food processor. Pulse until the dough starts to come together and then shape the dough into a flat round disc to chill. Roll out when you are ready to make your pie. The best part about this recipe is it doesn’t require any kneading. Use this pie crust for all of your favorite pie recipes!

Ingredients

Ingredients for pie crust measured and laid out on a brown wooden surface.
  • All-Purpose Flour – I used all-purpose flour for this recipe. I have also used 1:1 gluten free baking flour and it worked well.
  • Granulated Sugar – Adds a touch of sweetness to the crust.
  • Salt – Adds an extra touch of flavor to the crust.
  • Unsalted Butter – Used to make the crust rich and flaky.
  • Cold Water – Mixed with the flour and butter to create the crust.
  • Ice Cubes – To make sure the cold water is really cold!

See recipe card for quantities.

Instructions

Butter cut into small pieces on a small white plate.

Cut butter into small pieces. Place butter in freezer.

Dry ingredients in a food processor.

Add flour, sugar and salt to a food processor. Pulse to combine.

Dry ingredients with small pieces of butter in a food processor.

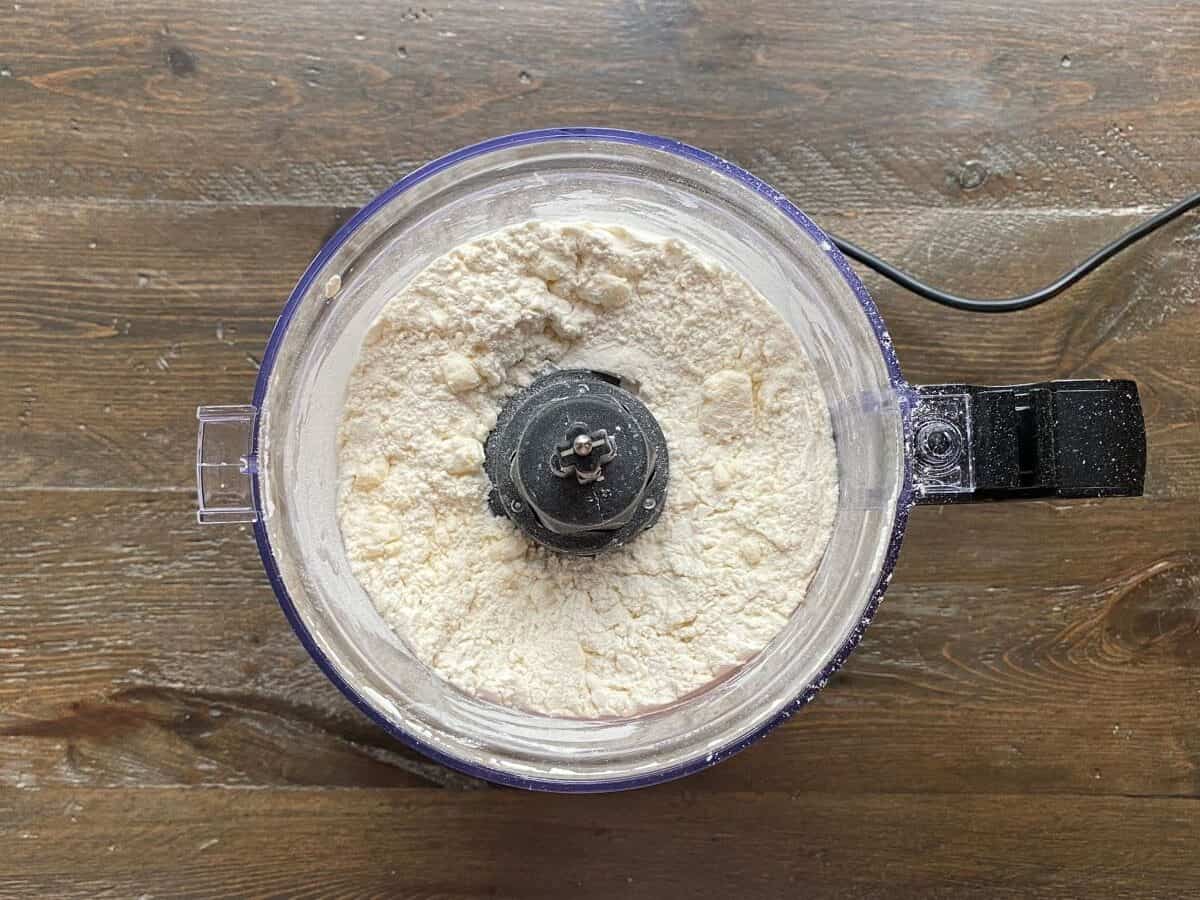
Add cold diced butter. Pulse until the butter forms into pea size pieces.

Water and ice in a small white bowl.

Add cold water and ice cubes to a bowl.

Dough in a food processor.

Add 1 tablespoon of ice water at a time. Pulse until the dough starts to moisten and come together. If the dough sticks together when pressed, you have added enough water. Do not add more than 4 tablespoons of water.

Dough shaped into a flat round disc.

Remove dough from food processor. Shape the dough into a flat round disc. Wrap in plastic wrap and place in the fridge to chill for two hours.

Dough rolled out on a lightly floured surface with a rolling pin on the right side of the dough.

Remove dough from the fridge. On a lightly floured surface, use a rolling pin to roll the dough into a flat round circle. The edges will start to crack but this is okay because we will trim them off.

Pie crust in a glass pie plate.

Place dough on pie plate and gently press the dough into the plate. Trim excess dough off the top. Use your finger to gently press the top edges of the crust into the pie plate. Use prepared crust for your favorite pie recipes! Makes one pie crust.

Hint: Make sure to chill the dough after forming it into a flat round disc. We want to keep the butter as cold as possible because this helps to create a nice flaky crust.

Substitutions

  • All-Purpose Flour – 1:1 gluten free baking flour can be substituted for the all-purpose flour.
  • Unsalted Butter – Salted butter can be substituted but be sure to omit the salt from the recipe.

Equipment

Food Processor – I used a food processor to mix the dough because it’s much faster than kneading the dough and it keeps the butter nice and cold. If you do not have a food processor you could mix the dough in a large bowl and knead it for 2-3 minutes.

Pie Plate – I used a 9″ pie plate for this recipe. You could use an 8″ pie plate but you will have to trim off the excess dough.

Storage

Butter Pie Crust can be covered and stored in the fridge for up to two days before baking. You can also store the dough in the fridge for up to two days before rolling it out.

Butter Pie Crust freezes well. Shape dough into a flat round disc and cover with plastic wrap. Place dough in a freezer safe container or bag and freeze up to three months. Thaw in the fridge and roll out once the dough is thawed.

Top Tip

Be sure to use ice cold water to form the dough. This helps to keep the butter cold to create a flakier crust.

FAQ

Can I make this dough ahead of time?

Yes! The dough can be stored for up to two days in the fridge prior to baking. You can also freeze the dough and use it whenever you want to bake a pie. See the “storage” section of the blog post for further details.

Why do I need to add ice cubes to the cold water?

The water needs to be as cold as possible to prevent the butter from getting warm. The colder the butter, the flakier the pie crust.

Can I double this recipe?

Yes! This recipe makes one pie crust. Feel free to double the recipe if you need more than one crust.

Related

Looking for other recipes like this? Try these:

Pie crust in a glass pie plate with a rolling pin on the top left and a pie lifter on the right.
Print Recipe
No ratings yet

Butter Pie Crust

Butter pie crust is rich, flaky and delicious. This crust is the perfect base for all of your favorite pie recipes.
Prep Time15 minutes mins
Chill Time2 hours hrs
Total Time2 hours hrs 15 minutes mins
Servings: 16 slices
Calories: 87kcal
Author: Christine

Ingredients

  • 1 ¼ cup all-purpose flour
  • 1 teaspoon granulated sugar
  • ¼ teaspoon salt
  • ½ cup unsalted butter
  • 3-4 ice cubes
  • 4 tablespoons cold water

Instructions

  • Cut butter into small pieces. Place butter in freezer.
  • Add flour, sugar and salt to a food processor. Pulse to combine.
  • Add cold diced butter. Pulse until the butter forms into pea size pieces.
  • Add cold water and ice cubes to a bowl.
  • Add 1 tablespoon of ice water at a time. Pulse until the dough starts to moisten and come together. If the dough sticks together when pressed, you have added enough water. Do not add more than 4 tablespoons of water.
  • Remove dough from food processor. Shape the dough into a flat round disc. Wrap in plastic wrap and place in the fridge to chill for two hours.
  • Remove dough from the fridge. On a lightly floured surface, use a rolling pin to roll the dough into a flat round circle. The edges will start to crack but this is okay because we will trim them off.
  • Place dough on pie plate and gently press the dough into the plate. Trim excess dough off the top. Use your finger to gently press the top edges of the crust into the pie plate. Use prepared crust for your favorite pie recipes! Makes one pie crust.

Notes

Make sure to chill the dough after forming it into a flat round disc. We want to keep the butter as cold as possible because this helps to create a nice flaky crust.
Be sure to use ice cold water to form the dough. This helps to keep the butter cold to create a flakier crust.
Butter Pie Crust can be covered and stored in the fridge for up to two days before baking. You can also store the dough in the fridge for up to two days before rolling it out.
Butter Pie Crust freezes well. Shape dough into a flat round disc and cover with plastic wrap. Place dough in a freezer safe container or bag and freeze up to three months. Thaw in the fridge and roll out once the dough is thawed.

Nutrition

Serving: 1slice | Calories: 87kcal | Carbohydrates: 8g | Protein: 1g | Fat: 6g | Saturated Fat: 4g | Polyunsaturated Fat: 0.3g | Monounsaturated Fat: 2g | Trans Fat: 0.2g | Cholesterol: 15mg | Sodium: 37mg | Potassium: 12mg | Fiber: 0.3g | Sugar: 0.3g | Vitamin A: 177IU | Calcium: 3mg | Iron: 0.5mg

Filed Under: Desserts, Recipes

Lemon Blueberry Bread

July 25, 2024 by Christine Leave a Comment

Lemon Blueberry Bread is soft, fluffy and moist. It’s packed full of sweet juicy blueberries while perfectly balanced with tart lemon flavor.

A piece of lemon blueberry bread in the middle with part of the loaf on the right side and another piece of bread and a lemon on the top.

It’s blueberry season again in Northwestern Ontario, Canada and the berries are looking great this year. I have been busy in the kitchen experimenting with recipes and this Lemon Blueberry Bread is definitely a winner. Lemon Blueberry Bread often has a sugary glaze on top but we are skipping the glaze in this recipe because the bread is sweet enough on its own. We are also using Greek yogurt in place of the butter to cut down on the fat but to also add a boost of protein. We are also omitting any processed sugars and using maple syrup as a replacement. Lemon Blueberry Bread is great snack at any time of day.

If you are looking for other recipes with blueberries, try my Healthy Blueberry Muffins or Gluten Free Blueberry Oatmeal Breakfast Bars.

Ingredients

Ingredients for lemon blueberry bread measured and laid out on a brown wooden surface.
  • All-Purpose Flour – I used all-purpose flour for this bread. I haven’t tried this recipe using any other type of flour.
  • Baking Soda – Helps the bread to rise.
  • Baking Powder – Helps to give the bread a soft and fluffy texture.
  • Cinnamon – Adds an extra touch of flavor.
  • Lemon Zest and Lemon Juice – Used in combination to create the tart lemony flavor to balance the sweetness of the berries.
  • Eggs – Helps to bind the other ingredients together.
  • Maple Syrup – Used to sweeten the bread.
  • Greek yogurt – Used in place of butter or oil. I used plain, 0%.
  • Milk – I used skim milk for this recipe.
  • Fresh Blueberries – You can’t have lemon blueberry bread without the blueberries.

See recipe card for quantities.

Instructions

Preheat oven to 350F. Grease a 9×5 loaf pan with non-stick cooking spray.

Dry ingredients in a white bowl.

Add flour, baking soda, baking powder and cinnamon to a medium size bowl. Stir to combine.

Wet ingredients in a large white bowl with a metal whisk leaning on the side of the bowl.

In a large bowl, add lemon zest, lemon juice, eggs, maple syrup, Greek yogurt and milk. Whisk to combine.

Batter in a large white bowl with a blue spatula leaning on the side of the bowl.

Add dry mixture to the wet mixture. Use a spatula to fold in the dry mixture until all of the flour is incorporated and there are no lumps in the batter.

A third of the batter in a metal loaf pan.

Pour 1/3 of the batter into loaf pan.

Blueberries on top of the batter in a large white bowl.

Add blueberries to remaining batter.

Blueberries mixed into the batter in a large white bowl with a blue spatula leaning on the side of the bowl.

Use a spatula to fold in the blueberries.

Batter in a metal loaf pan.

Pour remaining batter into loaf pan.

Baked bread in a metal loaf pan.

Bake 50-60 minutes or until a toothpick inserted into the center comes out clean. Cool in pan for 10 minutes before transferring to a wire rack to cool completely. Use a bread knife to cut into slices. Makes 12 slices.

Hint: Make sure to grease the pan so the bread doesn’t stick!

Substitutions

  • Maple Syrup – Liquid honey can be substituted for the maple syrup.
  • Greek yogurt – I used plain, 0%. You could substitute with 2% or higher if you choose.
  • Milk – You can use any type of plant based or non plant based milk.
  • Fresh Blueberries – fresh berries work best in this recipe. If you want to use frozen berries, thaw and drain the berries before adding to the batter to eliminate the excess liquid.

Equipment

9×5 Loaf Pan – Be sure to use a 9×5 loaf pan for this recipe. The baking time will change if you use a different size pan.

Storage

Lemon Blueberry Bread can be stored at room temperature in an airtight container or bag for up to three days.

Lemon Blueberry Bread freezes well. Place bread slices in a freezer safe container or bag and freeze up to three months. Thaw in the fridge or at room temperature when ready to eat.

Top tip

Make sure to add a third of the batter to the pan before folding in the blueberries because this prevents the blueberries from sinking to the bottom of the pan.

FAQ

Can I use frozen blueberries for this recipe?

Fresh blueberries work the best in this recipe. See the substitution section above if you would like to use frozen blueberries.

Why is my bread dry?

You have baked the bread too long. Bake for 50-60 minutes or until a toothpick inserted into the center comes out clean. The top of the loaf should be golden. I recommend checking the bread after 50 minutes.

What is lemon zest?

Lemon zest is the outer yellow layer of the lemon. Use a small grater on the outside of a lemon to make lemon zest.

Related

Looking for other recipes like this? Try these:

A piece of lemon blueberry bread in the middle with part of the loaf on the right side and another piece of bread and a lemon on the top.
Print Recipe
No ratings yet

Lemon Blueberry Bread

Lemon Blueberry Bread is soft, fluffy and moist. It's packed full of sweet juicy blueberries while perfectly balanced with tart lemon flavor.
Prep Time15 minutes mins
Bake Time50 minutes mins
Total Time1 hour hr 5 minutes mins
Servings: 12 slices
Calories: 111kcal
Author: Christine

Ingredients

  • 1 ½ cups all-purpose flour
  • 2 teaspoons baking soda
  • 1 teaspoon baking powder
  • 1 teaspoon cinnamon
  • 2 tablespoons lemon zest
  • ¼ cup lemon juice
  • 2 large eggs
  • â…“ cup maple syrup
  • â…“ cup Greek yogurt
  • ¼ cup milk
  • 1 ½ cups blueberries

Instructions

  • Preheat oven to 350F. Grease a 9×5 loaf pan with non-stick cooking spray.
  • Add flour, baking soda, baking powder and cinnamon to a medium size bowl. Stir to combine.
  • In a large bowl, add lemon zest, lemon juice, eggs, maple syrup, Greek yogurt and milk. Whisk to combine.
  • Add dry mixture to the wet mixture. Use a spatula to fold in the dry mixture until all of the flour is incorporated and there are no lumps in the batter.
  • Pour 1/3 of the batter into loaf pan.
  • Add blueberries to remaining batter. Use a spatula to fold in the blueberries.
  • Pour remaining batter into loaf pan.
  • Bake 50-60 minutes or until a toothpick inserted into the center comes out clean. Cool in pan for 10 minutes before transferring to a wire rack to cool completely. Use a bread knife to cut into slices. Makes 12 slices.

Notes

Be sure to grease the pan so the bread doesn’t stick!
Make sure to add a third of the batter to the pan before folding in the blueberries. This prevents the blueberries from sinking to the bottom of the pan.
Lemon Blueberry Bread can be stored at room temperature in an airtight container or bag for up to three days.
Lemon Blueberry Bread freezes well. Place bread slices in a freezer safe container or bag and freeze up to three months. Thaw in the fridge or at room temperature when ready to eat.

Nutrition

Serving: 1slice | Calories: 111kcal | Carbohydrates: 22g | Protein: 4g | Fat: 1g | Saturated Fat: 0.3g | Polyunsaturated Fat: 0.3g | Monounsaturated Fat: 0.3g | Trans Fat: 0.003g | Cholesterol: 31mg | Sodium: 235mg | Potassium: 87mg | Fiber: 1g | Sugar: 8g | Vitamin A: 67IU | Vitamin C: 5mg | Calcium: 54mg | Iron: 1mg

Filed Under: Breads, Healthy Snacks, Recipes

Strawberry Scones

July 3, 2024 by Christine Leave a Comment

Strawberry Scones are light, fluffy and packed full of delicious juicy strawberries.

A strawberry scone on a white board with fresh strawberries beside the scone and other scones in the background.

It’s strawberry season again and I been busy in the kitchen experimenting with recipes! These Strawberry Scones have made it to the blog because they are flavorful but light. Traditionally scones are made with a lot of butter but we are eliminating the butter in this recipe. Many of my regular blog readers know that I like to substitute Greek Yogurt for butter in my recipes and we are doing just that for these scones. We are also using maple syrup in place of processed sugars to make these scones even healthier. Strawberry Scones are a great option for breakfast but they also make a healthy snack at any time of day.

If you are looking for other recipes with strawberries, try Strawberry Rhubarb Muffins or Healthy Strawberry Rhubarb Crisp.

Ingredients

Ingredients for strawberry scones measured and laid out on a brown wooden surface.
  • All-Purpose Flour – I used all-purpose flour for this recipe. I haven’t made this recipe using any other type of flour.
  • Baking Powder – Helps to make the scones nice and fluffy.
  • Cinnamon – Adds some flavor.
  • Greek Yogurt – We are using this to replace the butter.
  • Milk – I used skim milk for this recipe.
  • Maple Syrup – Used to sweeten the scones.
  • Vanilla – Adds a touch more flavor.
  • Strawberries – Fresh strawberries work the best.

See recipe card for quantities.

Instructions

Preheat oven to 400F. Line a large baking sheet with parchment paper.

Dry ingredients in a large white bowl.

In a medium size bowl, add flour, baking powder and cinnamon. Stir to combine.

Dough ball in a large white bowl.

Add Greek yogurt, milk, maple syrup, vanilla and strawberries. Mix with a spoon until the dough starts to come together. Use your hands to continue mixing until all of the ingredients come together into a dough ball.

Dough is shaped into a flat round disc on a piece of parchment paper.

Place dough ball onto a piece of parchment paper and flatten it into a disc about 1/2 inch high.

Dough has been sliced into 8 pieces on a piece of parchment paper.

Use a pizza cutter or knife to slice dough into 8 equal slices.

Dough wedges on a baking pan lined with parchment paper.

Place dough slices onto prepared baking sheet.

Baked strawberry scones on a baking sheet lined with parchment paper.

Bake for 14-16 minutes or until the scones start to turn golden on the tops. Remove scones from oven and let cool for 5 minutes before transferring to a wire rack to cool completely. Makes 8 scones.

Hint: Make sure to use parchment paper when shaping the dough into a flat disc because it will be quite sticky!

Substitutions

  • Greek Yogurt – I used 0%, no sugar added but you could substitute with 2% or higher if you choose.
  • Milk – You could substitute the skim milk with any plant based or non plant based milk.
  • Maple Syrup – Liquid honey can be substituted for the maple syrup.

Equipment

Parchment Paper – I highly recommend using parchment paper for this recipe. The dough is quite sticky and it’s best to cut the dough into slices on the top of a piece of parchment paper.

Storage

Strawberry Scones can be stored in an airtight container or bag in the refrigerator for up to three days.

Strawberry Scones freeze well. Place scones in a freezer safe container or bag and freeze up to three months. Thaw in the fridge or at room temperature when ready to eat. I highly recommend freezing the scones if you aren’t eating them the same day to maximize the freshness!

Top tip

Be sure to add the diced berries to the dough mixture at the same time as the liquid ingredients. If you wait until the dough has formed, it will be difficult to mix in the strawberries.

FAQ

Why are my scones dry?

You have overbaked the scones. Bake for 14-16 minutes or until the scones start to turn golden.

Are these scones healthy?

Yes! Strawberry Scones have just 151 calories and less than 1g of fat. They are also free from butter and processed sugars.

Can I use frozen strawberries?

Yes but be sure to thaw and drain the strawberries before dicing them into small pieces.

Related

Looking for other recipes like this? Try these:

A strawberry scone on a white board with fresh strawberries beside the scone and other scones in the background.
Print Recipe
No ratings yet

Strawberry Scones

Strawberry Scones are light, fluffy and packed full of delicious juicy strawberries.
Prep Time10 minutes mins
Bake Time14 minutes mins
Total Time24 minutes mins
Servings: 8
Calories: 151kcal
Author: Christine

Ingredients

  • 2 cups all-purpose flour
  • 2 teaspoons baking powder
  • 1 teaspoon cinnamon
  • â…“ cup Greek Yogurt 0%, no sugar added
  • â…“ cup milk
  • 3 tablespoons maple syrup
  • 1 teaspoon vanilla
  • 1 cup strawberries diced

Instructions

  • Preheat oven to 400F. Line a large baking sheet with parchment paper.
  • In a medium size bowl, add flour, baking powder and cinnamon. Stir to combine.
  • Add Greek yogurt, milk, maple syrup, vanilla and strawberries. Mix with a spoon until the dough starts to come together. Use your hands to continue mixing until all of the ingredients come together into a dough ball.
  • Place dough ball onto a piece of parchment paper and flatten it into a disc about ½ inch high.
  • Use a pizza cutter or knife to slice dough into 8 equal slices.
  • Place dough slices onto prepared baking sheet.
  • Bake for 14-16 minutes or until the scones start to turn golden on the tops. Remove scones from oven and let cool for 5 minutes before transferring to a wire rack to cool completely. Makes 8 scones.

Notes

Make sure to use parchment paper when shaping the dough into a flat disc because it will be quite sticky!
Be sure to add the diced berries to the dough mixture at the same time as the liquid ingredients. If you wait until the dough has formed, it will be difficult to mix in the strawberries.
Strawberry Scones can be stored in an airtight container or bag in the refrigerator for up to three days.
Strawberry Scones freeze well. Place scones in a freezer safe container or bag and freeze up to three months. Thaw in the fridge or at room temperature when ready to eat. I highly recommend freezing the scones if you aren’t eating them the same day to maximize the freshness!

Nutrition

Serving: 1scone | Calories: 151kcal | Carbohydrates: 32g | Protein: 5g | Fat: 0.4g | Saturated Fat: 0.1g | Polyunsaturated Fat: 0.2g | Monounsaturated Fat: 0.04g | Cholesterol: 1mg | Sodium: 115mg | Potassium: 109mg | Fiber: 1g | Sugar: 6g | Vitamin A: 25IU | Vitamin C: 11mg | Calcium: 100mg | Iron: 2mg

Filed Under: Breakfast, Healthy Snacks, Recipes

Healthy Chocolate Chip Muffins

June 11, 2024 by Christine Leave a Comment

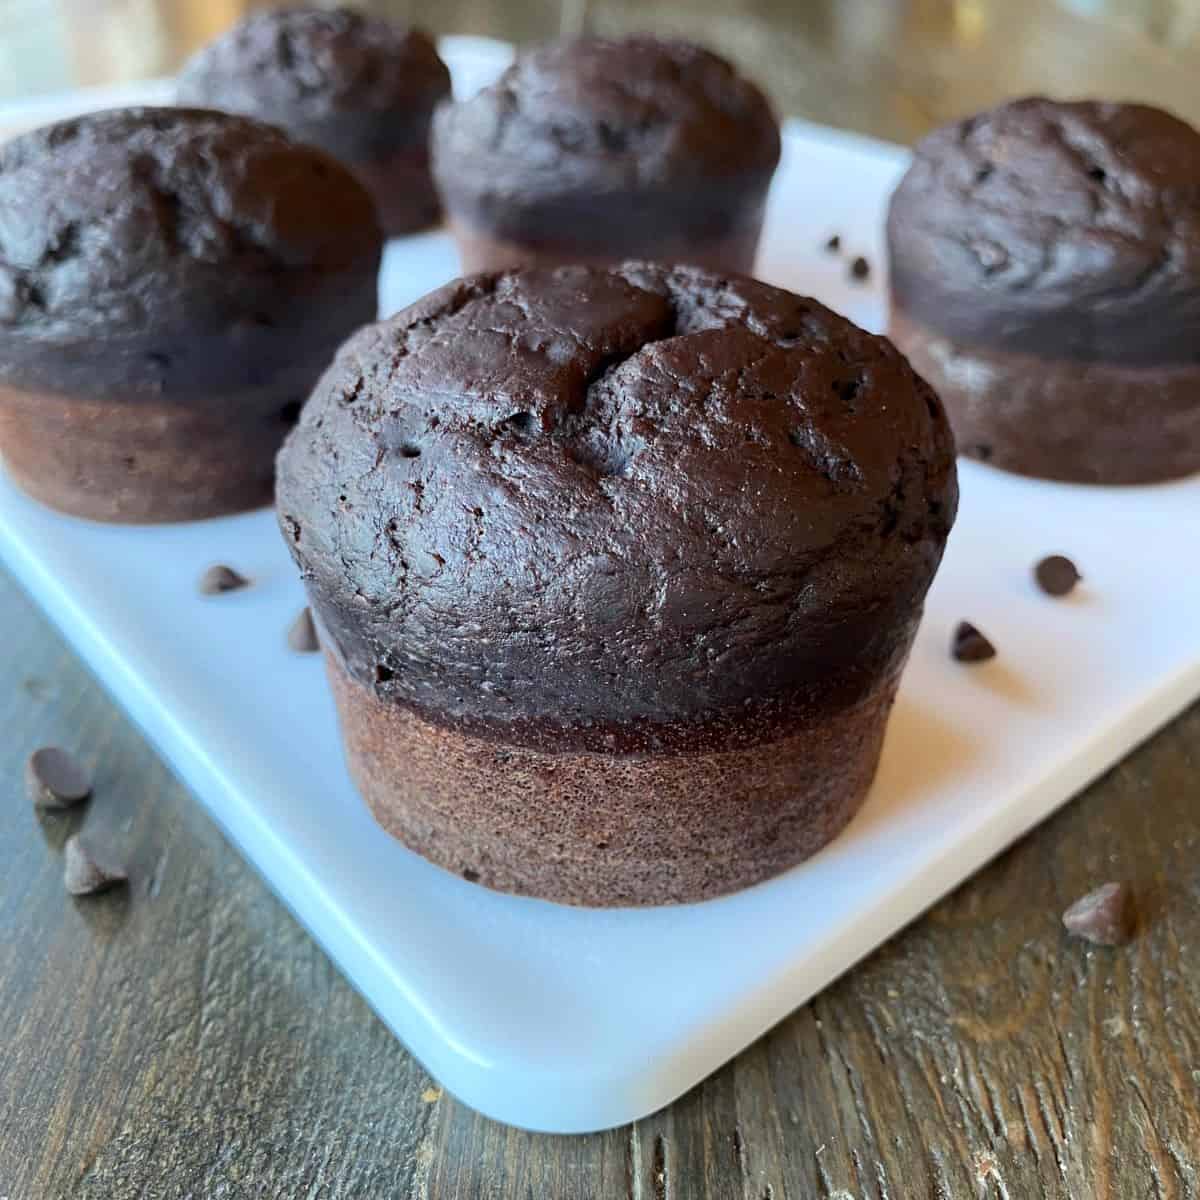
Healthy Chocolate Chip Muffins are soft and fluffy and packed with tiny bits of rich and decadent chocolate.

A chocolate chip muffin with chocolate chips scattered around the muffin in the foreground with chocolate chips muffins and a tea towel in the background.

Healthy Chocolate Chips Muffins….you might be thinking is this even possible? The answer is yes! So how are we making these muffins healthy. First, we are completely eliminating any butter or oil and replacing it with Greek yogurt. This not only cuts down on the fats but it adds a great protein boost as well. Next we are eliminating processed sugars and using maple syrup to sweeten the muffins. Finally, we are using mini chocolate chips instead of regular chocolate chips. This allows for rich chocolate flavor in every bite using much less chocolate than a standard size chocolate chip. These muffins may be healthy but they are definitely not short on flavor.

If you are looking for other healthy muffins recipes, try my Carrot Raisin Muffins or Healthy Chocolate Muffins.

Ingredients

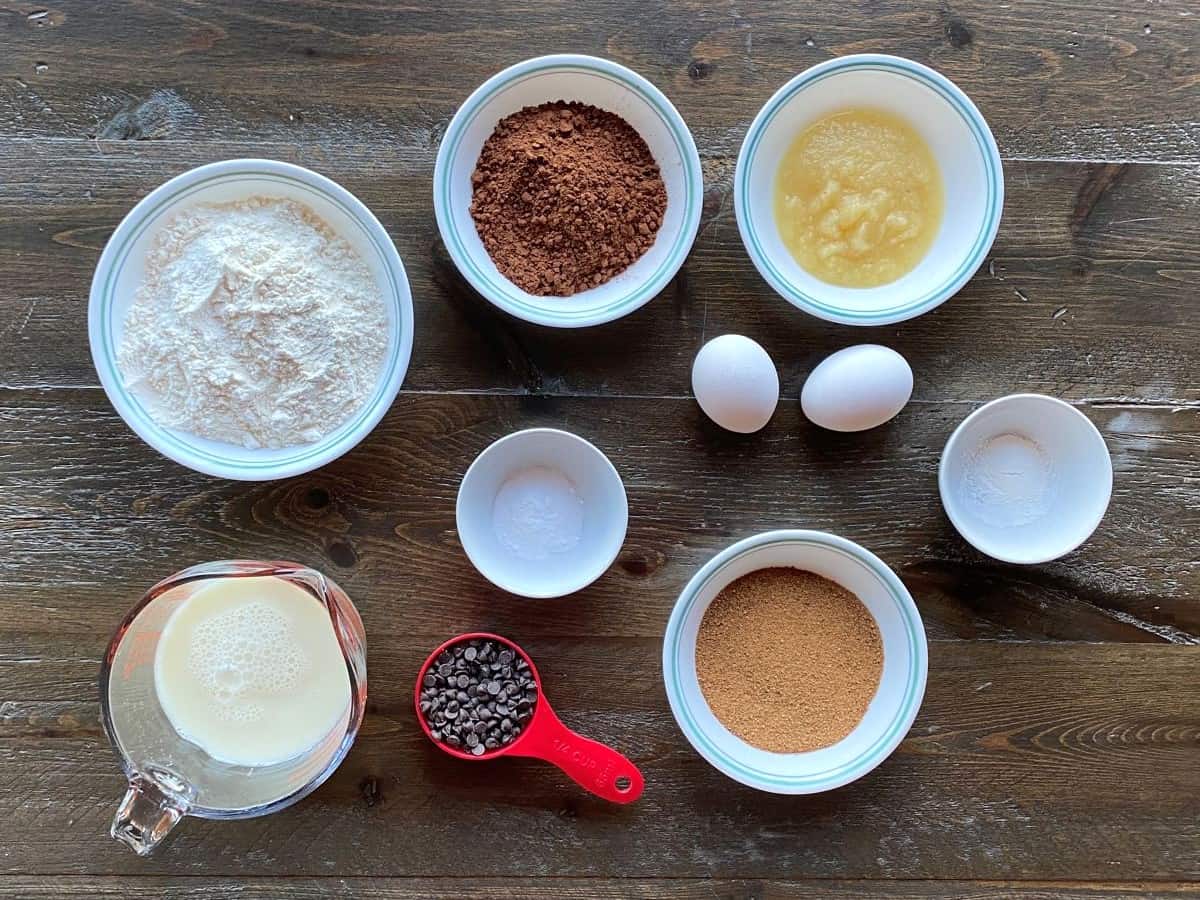
Ingredients for healthy chocolate chip muffins measured and laid out on a brown wooden surface.
  • All-Purpose Flour – I used all-purpose flour for this recipe. I haven’t tried this recipe using any other type of flour.
  • Baking Soda – Helps the muffins to rise.
  • Baking Powder – Gives the muffins that fluffy cake like texture.
  • Cinnamon – Gives a flavor boost to the muffins.
  • Milk – I used skim milk for this recipe.
  • Maple Syrup– Used to sweeten the muffins.
  • Eggs – Helps to bind the other ingredients together.
  • Greek Yogurt – I used plain 0%, no sugar added.
  • Vanilla– Adds a touch more flavor.
  • Mini Chocolate Chips – Because you can’t have chocolate chips muffins without the chocolate!

See recipe card for quantities.

Instructions

Preheat oven to 350F. Grease a muffin pan with nonstick cooking spray.

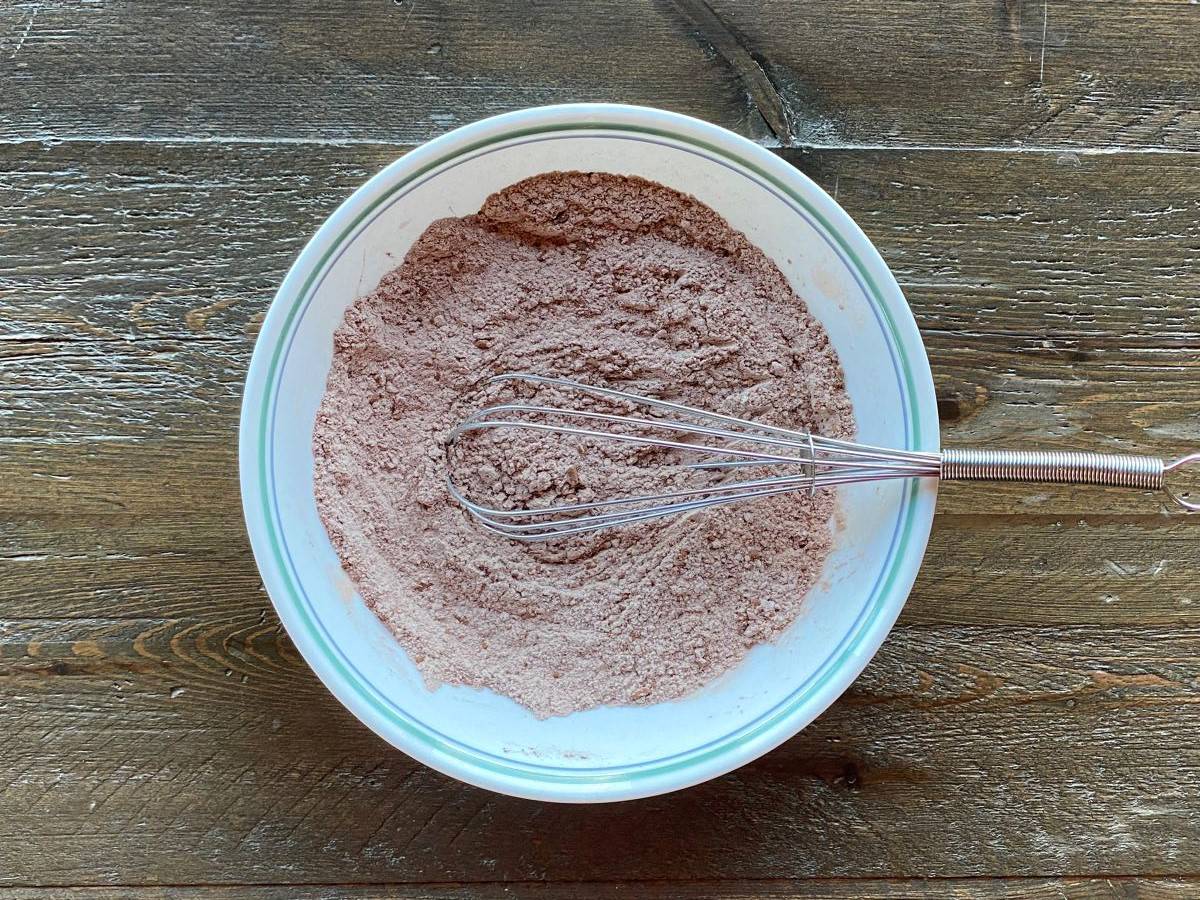
Dry ingredients in a medium sized white bowl with a metal whisk leaning on the side of the bowl.

Add flour, baking soda, baking powder and cinnamon to a medium size bowl. Whisk to combine.

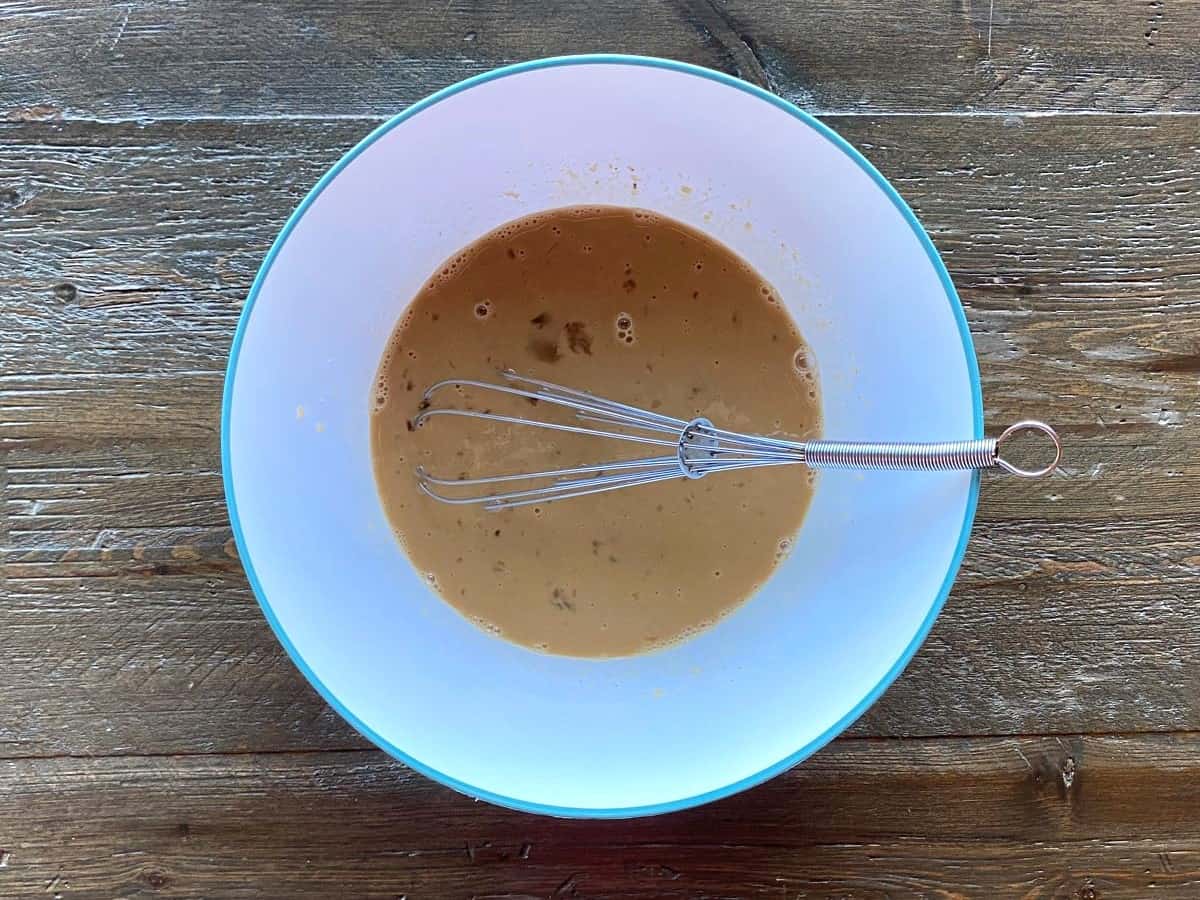
Wet ingredients in a large white bowl with a metal whisk leaning on the side of the bowl.

Add milk, maple syrup, eggs, Greek yogurt and vanilla to a large bowl. Whisk to combine.

Muffin batter in a large white bowl with a blue spatula leaning on the side of the bowl.

Add the dry ingredients to the wet ingredients. Using a spatula, fold dry ingredients into wet ingredients. Fold until the flour mixture is incorporated and there are no lumps in the batter.

Chocolate chip muffin batter in a large white bowl with a blue spatula leaning on the side of the bowl.

Add chocolate chips. Use a spatula to fold in the chocolate chips.

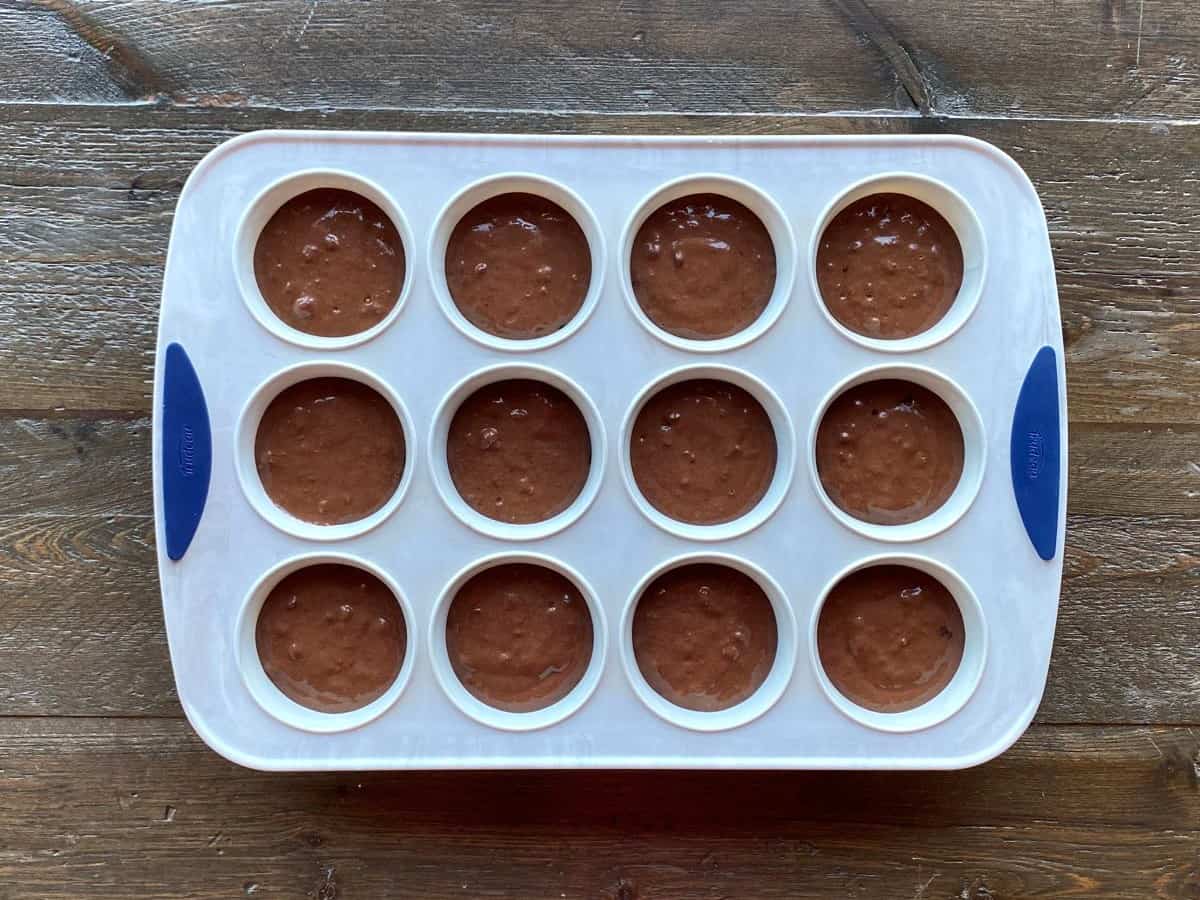
Batter in a blue and white silicone muffin pan.

Using a cookie scoop, divide batter evenly into prepared muffin pan.

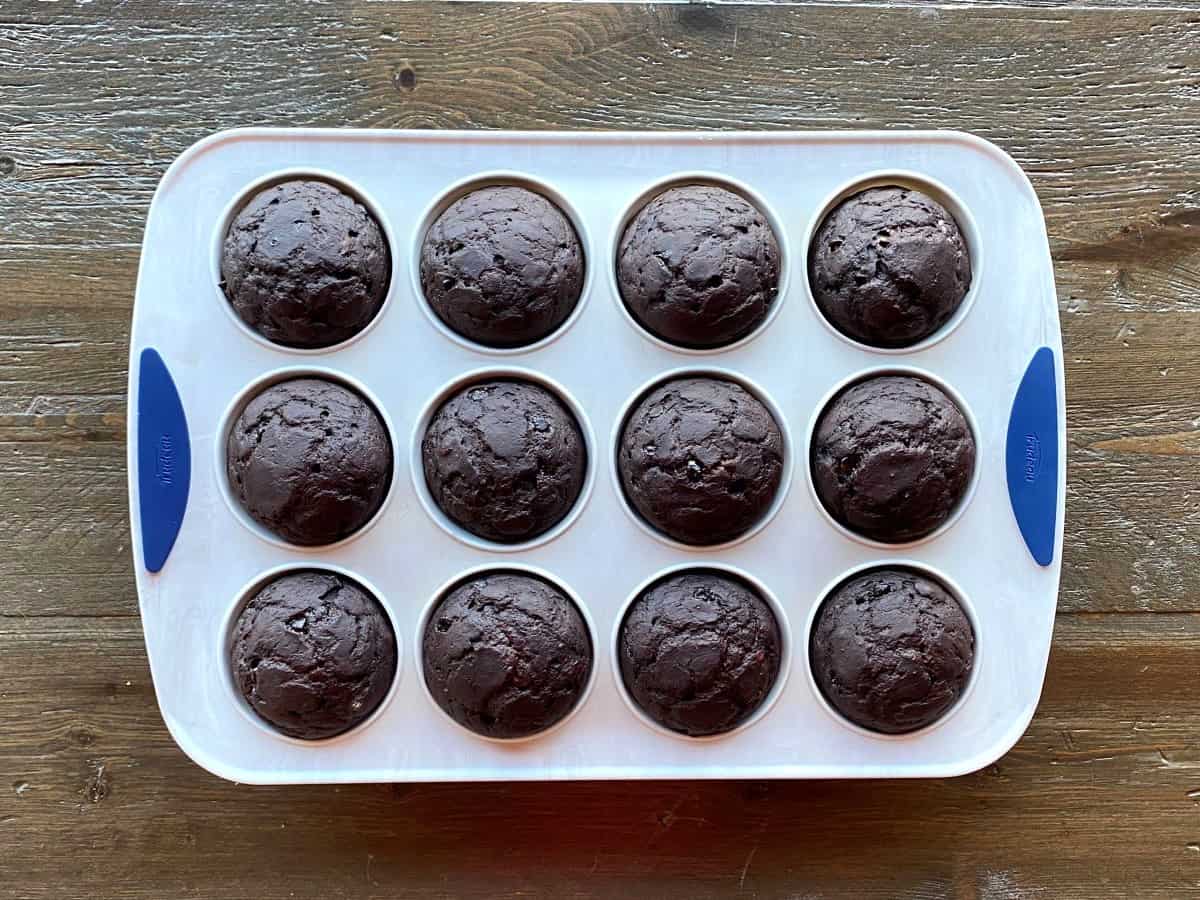
Baked muffins in a blue and white silicone muffin pan.

Bake 14-16 minutes or until a toothpick inserted into the center comes out clean. Let muffins cool for 10 minutes before transferring muffins to a wire rack to cool completely. Makes 12 muffins.

Hint: Make sure to grease the muffin pan so the muffins don’t stick!

Substitutions

  • Milk – I used skim milk in this recipe but you could substitute with any plant based or non plant based milk.
  • Maple Syrup – Liquid honey can be substituted for the maple syrup.
  • Greek Yogurt – You can use 2% or higher but I would recommended sticking to a type with no added sugar.

Equipment

Silicone Muffin Pan – I used a silicone muffin pan for this recipe because it makes it super easy to pop the muffins out of the pan. You can use a metal non-stick muffin pan but be sure to grease it liberally as the muffins tend to stick.

Cookie Scoop – I used a cookie scoop to divide the batter into the muffin pan. If you do not have a cookie scoop, feel free to use a large spoon.

Storage

Healthy Chocolate Chip Muffins can be stored at room temperature in an airtight container or bag for up to three days. If the temperature inside your home is warm, I recommend storing them in the fridge.

Healthy Chocolate Chip Muffins freeze well. Place muffins in a freezer safe container or bag and freeze up to three months. Thaw in the fridge or at room temperature when ready to eat.

Top tip

Do not overbake the muffins or they will be dry. Remember you can put underbaked muffins back in the oven but you can’t reverse the overbaked muffin. I recommend checking the muffins after 14 minutes of baking time.

FAQ

Are these muffins actually healthy?

Yes! Each muffin has only 120 calories and 2 grams of fat.

Is it okay to eat these muffins for breakfast?

Yes! These muffins make a great on the go breakfast and you can enjoy them guilt free because they are healthy!

Related

Looking for other recipes like this? Try these:

A chocolate chip muffin with chocolate chips scattered around the muffin in the foreground with chocolate chips muffins and a tea towel in the background.
Print Recipe
No ratings yet

Healthy Chocolate Chip Muffins

Healthy Chocolate Chip Muffins are soft and fluffy and packed with tiny bits of rich and decadent chocolate.
Prep Time10 minutes mins
Bake Time14 minutes mins
Total Time24 minutes mins
Servings: 12
Calories: 120kcal
Author: Christine

Ingredients

  • 1 ½ cups all-purpose flour
  • 2 teaspoons baking soda
  • 1 teaspoon baking powder
  • 1 teaspoon cinnamon
  • ½ cup milk
  • â…“ cup maple syrup
  • 2 large eggs
  • â…“ cup Greek yogurt plain
  • 1 teaspoon vanilla
  • ¼ cup mini chocolate chips

Instructions

  • Preheat oven to 350F. Grease a muffin pan with nonstick cooking spray.
  • Add flour, baking soda, baking powder and cinnamon to a medium size bowl. Whisk to combine.
  • Add milk, maple syrup, eggs, Greek yogurt and vanilla to a large bowl. Whisk to combine.
  • Add the dry ingredients to the wet ingredients. Using a spatula, fold dry ingredients into wet ingredients. Fold until the flour mixture is incorporated and there are no lumps in the batter.
  • Add chocolate chips. Use a spatula to fold in the chocolate chips.
  • Using a cookie scoop, divide batter evenly into prepared muffin pan.
  • Bake 14-16 minutes or until a toothpick inserted into the center comes out clean. Let muffins cool for 10 minutes before transferring muffins to a wire rack to cool completely. Makes 12 muffins.

Notes

Make sure to grease the muffin pan so the muffins don’t stick!
Do not overbake the muffins or they will be dry. Remember you can put underbaked muffins back in the oven but you can’t reverse the overbaked muffin. I recommend checking the muffins after 14 minutes of baking time.
Healthy Chocolate Chip Muffins can be stored at room temperature in an airtight container or bag for up to three days. If the temperature inside your home is warm, I recommend storing them in the fridge.
Healthy Chocolate Chip Muffins freeze well. Place muffins in a freezer safe container or bag and freeze up to three months. Thaw in the fridge or at room temperature when ready to eat.

Nutrition

Serving: 1muffin | Calories: 120kcal | Carbohydrates: 22g | Protein: 4g | Fat: 2g | Saturated Fat: 1g | Polyunsaturated Fat: 0.2g | Monounsaturated Fat: 0.3g | Trans Fat: 0.01g | Cholesterol: 32mg | Sodium: 239mg | Potassium: 75mg | Fiber: 1g | Sugar: 9g | Vitamin A: 75IU | Vitamin C: 0.03mg | Calcium: 62mg | Iron: 1mg

Filed Under: Breakfast, Muffins, Recipes

Apple Cinnamon Oatmeal Cups

May 28, 2024 by Christine Leave a Comment

Apple Cinnamon Oatmeal Cups are soft, flavorful and full of delicious juicy apple pieces. They are a great option on those busy mornings.

Oatmeal cup with apple slices on a white plate in the foreground with additional oatmeal cups and an apple in the background.

I love eating oatmeal but I will be the first to admit that it can taste very bland. The great news is that eating oatmeal doesn’t have to be boring! There are so many ways to make oatmeal and these Apple Cinnamon Oatmeal Cups are just one of those ways.

Apple Cinnamon Oatmeal Cups are easy to make. Simply mix the ingredients in a large bowl, divide the mixture into a muffin pan and bake until set. Just like that you have a new and exciting way to eat oatmeal. These oatmeal cups can be made ahead of time and they are great for meal prepping.

If you are looking for other ways to add some delicious flavor to your oats, try Slow Cooker Apple Cinnamon Oatmeal or Strawberry Overnight Oats.

Ingredients

Ingredients for Apple Cinnamon Oatmeal Cups measured and laid out on a brown wooden surface.
  • Rolled Oats – Used as the base for the oatmeal cups. Be sure to use rolled oats and not steel cut or quick oats as they have different cooking times.
  • Baking Powder – Helps to give the oatmeal cups more of a cake like texture.
  • Cinnamon and Nutmeg – Spices to add some flavor.
  • Milk– I used skim milk for this recipe.
  • Maple Syrup – Used to sweeten the oatmeal cups.
  • Unsweetened Applesauce – Also adds some sweetness and adds some extra apple taste.
  • Chopped Apples – Use whatever type of apple you have on hand. Be sure to cut the apple into small pieces.

See recipe card for quantities.

Instructions

Preheat oven to 350F. Grease a muffin pan with non-stick cooking spray.

Dry ingredients in a large white bowl.

In a large bowl, mix together rolled oats, baking powder, cinnamon and nutmeg.

Batter for apple cinnamon oatmeal cups in a large white bowl.

Add milk, unsweetened apple sauce, maple syrup and chopped apples. Mix well.

Batter for oatmeal cups divided evenly into muffin pan.

Divide batter evenly into prepared muffin pan.

Baked oatmeal cups in a blue and white silicone muffin pan.

Bake for 30-35 minutes or until the cups look set and the liquid has been absorbed. Let the cups cool completely in the pan before removing them. Makes 12 oatmeal cups.

Hint: Make sure to grease the muffin pan so the oatmeal cups don’t stick!

Substitutions

  • Milk – You can substitute the milk with any plant based or non plant based milk.
  • Maple Syrup – Feel free to use liquid honey instead.
  • Unsweetened Apple Sauce – You can use sweetened applesauce instead but keep in mind the oatmeal cups will be sweeter.

Equipment

Muffin Pan – I used a silicone muffin pan for this recipe but you can also use a nonstick metal muffin pan.

Storage

Apple Cinnamon Oatmeal Cups can be stored in the refrigerator in an airtight container or bag for up to five days.

Apple Cinnamon Oatmeal Cups freeze well. Place oatmeal cups in a freezer safe container or bag and freeze up to three months. Thaw in the fridge or at room temperature when ready to eat.

Top tip

Make sure to let the oatmeal cups completely cool before removing them from the pan so they have a chance to set.

FAQ

Do I need to peel the apple before chopping it?

There is no need to peel the apples. The skin adds some extra nutrients and it’s barely noticeable after baking.

Are these oatmeal cups healthy?

Yes! Each oatmeal cup has 114 calories and 1 gram of fat so you can eat more than one!

Why did the oatmeal cups fall apart when I removed them from the pan?

Make sure to completely cool the oatmeal cups before removing them from the pan as this gives them a chance to set.

Related

Looking for other recipes like this? Try these:

Oatmeal cup with apple slices on a white plate in the foreground with additional oatmeal cups and an apple in the background.
Print Recipe
No ratings yet

Apple Cinnamon Oatmeal Cups

Apple Cinnamon Oatmeal Cups are soft, flavorful and full of delicious juicy apple pieces. They are a great option on those busy mornings.
Prep Time5 minutes mins
Bake Time35 minutes mins
Total Time40 minutes mins
Servings: 12
Calories: 114kcal
Author: Christine

Ingredients

  • 3 cups rolled oats
  • 1 teaspoon baking powder
  • 2 teaspoons cinnamon
  • ¼ teaspoon nutmeg
  • 1 ½ cups milk
  • 1 ½ cups unsweetened applesauce
  • 1-2 tablespoons maple syrup see notes
  • 1 ½ cups apples chopped

Instructions

  • Preheat oven to 350F. Grease a muffin pan with non-stick cooking spray.
  • In a large bowl, mix together rolled oats, baking powder, cinnamon and nutmeg.
  • Add milk, unsweetened apple sauce, maple syrup and chopped apples. Mix well.
  • Divide batter evenly into prepared muffin pan.
  • Bake for 30-35 minutes or until the cups look set and the liquid has been absorbed. Let the cups cool completely in the pan before removing them. Makes 12 oatmeal cups.

Notes

Add two tablespoons of the maple syrup if you prefer your oatmeal cups on the sweeter side.
Make sure to grease the muffin pan so the oatmeal cups don’t stick!
Make sure to let the oatmeal cups completely cool before removing them from the pan so they have a chance to set.
Apple Cinnamon Oatmeal Cups can be stored in the refrigerator in an airtight container or bag for up to five days.
Apple Cinnamon Oatmeal Cups freeze well. Place oatmeal cups in a freezer safe container or bag and freeze up to three months. Thaw in the fridge or at room temperature when ready to eat.
 

Nutrition

Serving: 1oatmeal cup | Calories: 114kcal | Carbohydrates: 22g | Protein: 4g | Fat: 1g | Saturated Fat: 0.3g | Polyunsaturated Fat: 0.5g | Monounsaturated Fat: 0.4g | Cholesterol: 1mg | Sodium: 50mg | Potassium: 169mg | Fiber: 3g | Sugar: 7g | Vitamin A: 81IU | Vitamin C: 1mg | Calcium: 78mg | Iron: 1mg

Filed Under: Breakfast, Healthy Snacks, Recipes

Burger Buns

April 15, 2024 by Christine Leave a Comment

Burger Buns are slightly crispy on the outside but soft and moist on the inside. Pack them high with toppings for the ultimate burger experience.

A sliced bun with a knife on a white cutting board on the right center with three buns on the left top, center and bottom.

Imagine you are putting together the perfect burger. You gently slice the bun and place the patty on the bottom half. Next, you add a slice of cheese, onions, tomato, pickles, lettuce and your favorite sauces. The burger looks so delicious and you can’t wait to taste it. Finally, you take the first bite of the burger and it tastes like pure bliss and you can hardly wait to chew that bite so you can take a second one. At last you bite into the burger again and the buns falls apart and all of the toppings spill out onto your plate. What a huge disappointment!

This Burger Bun recipe is here to save the day. Unfortunately I have had my burger bun crumble on one too many occasions so I set out to change this. These buns hold together even when they are packed with toppings and they also work great for your favorite sandwiches.

Try these buns with Air Fryer Chicken Burgers.

Ingredients

Ingredients measured and laid out on a brown wooden surface.
  • Warm Water – Warm water is key for this recipe. Make sure to use water between 90 and 110F.
  • Instant Yeast – I prefer to use instant yeast because I can quickly tell if it’s fermenting.
  • Granulated Sugar – Mixed with the warm water to activate the yeast.
  • Salt – adds some flavor to the buns. We are keeping the salt level down because store bought breads and buns are loaded with unnecessary sodium.
  • All-Purpose Flour – I used all-purpose flour for this recipe. I haven’t made this recipe using any other type of flour.
  • Unsalted Butter – Adds some flavor and richness to the buns.
  • Egg – Make sure the egg is at room temperature.

See recipe card for quantities.

Instructions

Line a large baking sheet with parchment paper. Set aside.

Foamy yeast mixture in a small white bowl.

Mix together warm water, yeast and sugar in a small bowl. Let this mixture sit for 5 – 10 minutes. It will look foamy once the yeast has activated.

Ingredients for the buns in the bowl of a stand mixer.

Pour yeast mixture into the large bowl of a stand mixer. Add flour, salt, egg and butter.

Dough in the bowl of a stand mixer.

Using a dough hook on a stand mixer, mix together for 3-5 minutes. The dough should be tacky and slightly sticky to touch. It should not be so sticky that it stays on your hands when you touch it. If the dough is too sticky add a pinch of flour. If the dough is too dry, add a teaspoon of water and mix thoroughly. The end result should be a slightly sticky dough.

Dough shaped into a ball and placed in a large white bowl.

Once the dough has formed, roughly shape it into a ball and place in a large greased bowl. Cover with plastic wrap or a clean dishtowel. Let the dough rise until doubled in size. This could take anywhere from 30-90 minutes depending on the temperature of your kitchen.

Dough balls on a large baking pan lined with parchment paper.

Remove dough from the bowl and punch down to remove any air pockets. Divide dough into 6 equal pieces. Gently shape dough pieces into balls. Place dough balls onto prepared baking sheet.

Flattened dough balls on a large baking sheet lined with parchment paper.

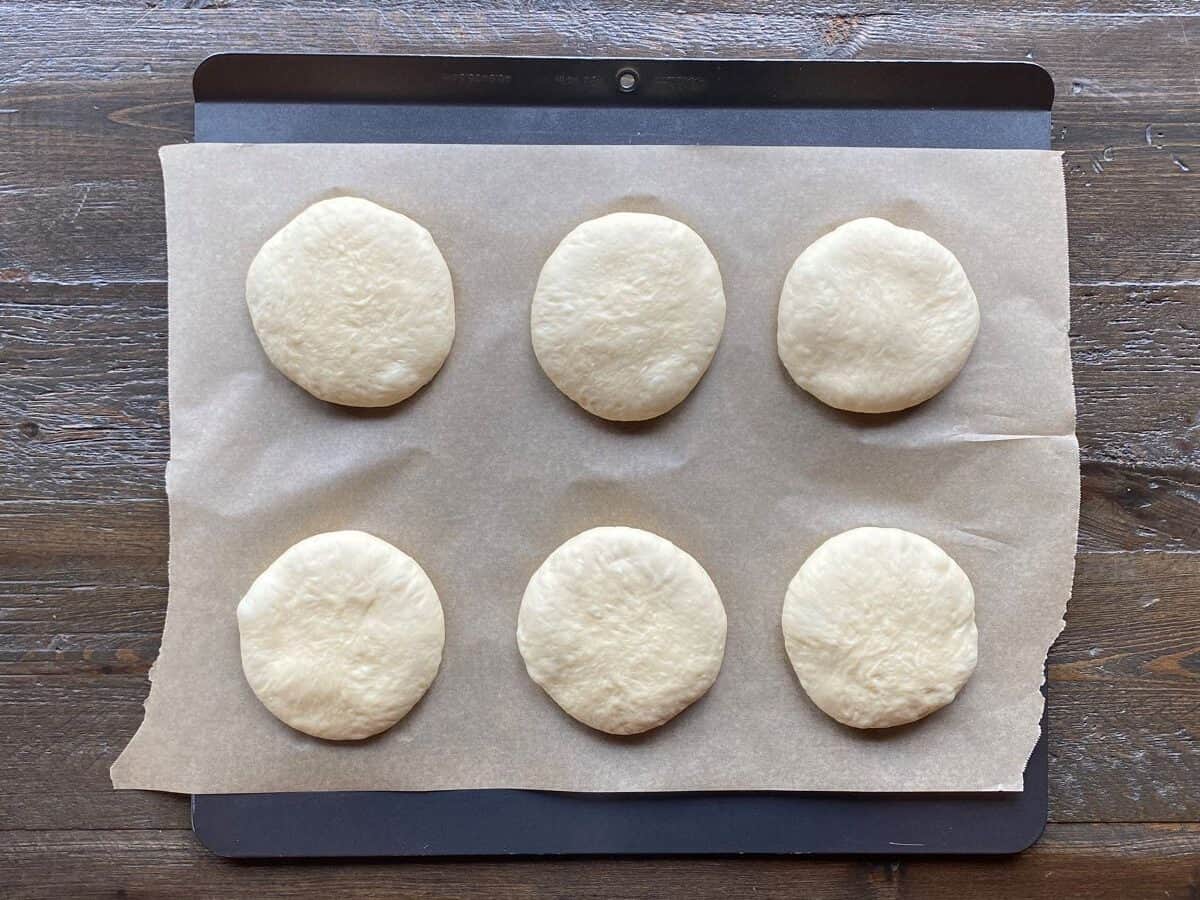
Use hands to gently push dough balls down. They should look like flat round discs.

Puffy dough balls on a baking sheet lined with parchment paper.

Cover with a clean dish towel and let rise until puffy. This could take anywhere from 30 minutes to 1 hour depending on the temperature of your kitchen.

Baked buns on a large baking sheet lined with parchment paper.

Preheat oven to 375F. Bake buns for 16-18 minutes or until the tops are golden. The buns will sound hollow if you knock on them. Let cool slightly before slicing. Makes 6 buns.

Hint:

It’s important to measure the flour by spooning it into the measuring cup because flour gets compacted when it sits in the bag or container. If you scoop the flour with the measuring cup it will stay compacted and you will add too much flour. Use a knife to level the flour.

Substitutions

  • Unsalted Butter – Feel free to substitute salted butter for the unsalted butter but be sure to omit the salt from the recipe.

Equipment

Stand Mixer – These buns are made with a stand mixer using the dough hook attachment. I have not tried to make this recipe without a stand mixer.

Large Baking Pan – I used a large baking pan so I could fit all of the buns on one pan. If you do not have a large baking pan, you can use two small or medium baking pans.

Storage

Burger Buns are best enjoyed immediately after removing them from the oven or on the same day they were baked.

Burger Buns freeze well. Place in a freezer safe container or bag and freeze up to three months. Thaw at room temperature when ready to eat. I recommend covering the buns with a clean dish towel when thawing so they do not dry out.

Top tip

Do not add too much flour to the dough! If you add too much flour, the buns will be dense.

FAQ

Why isn’t the yeast activating?

Make sure to use warm water mixed with granulated sugar to activate the yeast. The water should be between 90-110F. Be sure to check that the yeast hasn’t expired.

Why are my buns dense?

You may have over proofed the dough. Let the dough rise until doubled in size. If you let the dough rise too long after it has doubled in size, the buns will be dense.

Why is my dough dry?

You have added too much flour to the dough. Make sure to scoop and level the flour when you are measuring it. The dough should still be slightly sticky.

Related

Looking for other recipes like this? Try these:

A sliced bun with a knife on a white cutting board on the right center with three buns on the left top, center and bottom.
Print Recipe
No ratings yet

Burger Buns

Burger Buns are slightly crispy on the outside but soft and moist on the inside. Pack them high with toppings for the ultimate burger experience.
Prep Time2 hours hrs 20 minutes mins
Bake Time16 minutes mins
Total Time2 hours hrs 36 minutes mins
Servings: 6
Calories: 295kcal
Author: Christine

Ingredients

  • 2 ¼ teaspoons instant yeast
  • 1 tablespoon granulated sugar
  • 1 cup warm water
  • 3 cups all-purpose flour
  • ¼ teaspoon salt
  • 2 tablespoons unsalted butter
  • 1 large egg

Instructions

  • Line a large baking sheet with parchment paper. Set aside.
  • Mix together warm water, yeast and sugar in a small bowl. Let this mixture sit for 5 – 10 minutes. It will look foamy once the yeast has activated.
  • Pour yeast mixture into the large bowl of a stand mixer. Add flour, salt, egg and butter.
  • Using a dough hook on a stand mixer, mix together for 3-5 minutes. The dough should be tacky and slightly sticky to touch. It should not be so sticky that it stays on your hands when you touch it. If the dough is too sticky add a pinch of flour. If the dough is too dry, add a teaspoon of water and mix thoroughly. The end result should be a slightly sticky dough.
  • Once the dough has formed, roughly shape it into a ball and place in a large greased bowl. Cover with plastic wrap or a clean dishtowel. Let the dough rise until doubled in size. This could take anywhere from 30-90 minutes depending on the temperature of your kitchen.
  • Remove dough from the bowl and punch down to remove any air pockets. Divide dough into 6 equal pieces. Gently shape dough pieces into balls. Place dough balls onto prepared baking sheet.
  • Use hands to gently push dough balls down. They should look like flat round discs.
  • Cover with a clean dish towel and let rise until puffy. This could take anywhere from 30 minutes to 1 hour depending on the temperature of your kitchen.
  • Preheat oven to 375F. Bake buns for 16-18 minutes or until the tops are golden. The buns will sound hollow if you knock on them. Let cool slightly before slicing. Makes 6 buns.

Notes

It’s important to measure the flour by spooning it into the measuring cup because flour gets compacted when it sits in the bag or container. If you scoop the flour with the measuring cup it will stay compacted and you will add too much flour. Use a knife to level the flour.
Do not add too much flour to the dough! If you add too much flour, the buns will be dense.
Burger Buns are best enjoyed immediately after removing them from the oven or on the same day they were baked.
Burger Buns freeze well. Place in a freezer safe container or bag and freeze up to three months. Thaw at room temperature when ready to eat. I recommend covering the buns with a clean dish towel when thawing so they do not dry out.

Nutrition

Serving: 6buns | Calories: 295kcal | Carbohydrates: 52g | Protein: 9g | Fat: 6g | Saturated Fat: 3g | Polyunsaturated Fat: 1g | Monounsaturated Fat: 2g | Trans Fat: 0.2g | Cholesterol: 41mg | Sodium: 115mg | Potassium: 123mg | Fiber: 3g | Sugar: 2g | Vitamin A: 163IU | Vitamin C: 0.01mg | Calcium: 18mg | Iron: 3mg

Filed Under: Breads, Recipes

Roasted Red Pepper Sauce

April 4, 2024 by Christine Leave a Comment

Roasted Red Pepper Sauce is savory and delicious. Toss it over your favorite pasta or use it as a sauce on pizza.

Sauce in large pan with fresh parsley sprigs in the sauce.

Roasted Red Pepper Sauce is my new favorite recipe. I have been searching for an alternative to tomato based pasta sauce for a long time and this one hits the mark. This sauce is traditionally made with roasted red peppers from a jar and quite a large amount of olive oil. We are substituting the jarred peppers and replacing them with fresh red peppers that will be roasted in the oven. We are also eliminating most of the olive oil in place of cottage cheese which provides an excellent protein boost. This sauce tastes rich and flavorful but without the excess calories. I love eating it on pasta and of course pizza as well.

This sauce also tastes great poured over my Vegan Black Bean Meatballs!

Ingredients

Ingredients for roasted red pepper sauce measured and laid out on a brown wooden surface.
  • Red Peppers – We will cut these in half and roast them for the base of the sauce.
  • Garlic Cloves – These will be roasted alongside the peppers to add some extra flavor.
  • Olive oil – A small amount of olive oil is drizzled onto the peppers before roasting them.
  • Garlic Powder, Basil, Parsley, Ground Black Pepper – Spices to season the sauce.
  • Cottage Cheese, 2% – Adds a good protein boost to the sauce.
  • Chicken Broth – Used to thin out the sauce and it adds a touch more flavor.
  • Cornstarch – Helps to thicken the sauce.

See recipe card for quantities.

Instructions

Preheat oven to 400F. Line a large baking sheet with parchment paper.

Cut up peppers and garlic cloves on a white cutting board.

Cut peppers in half and remove the seeds. Peel garlic and chop off the ends.

Peppers and garlic placed on a baking sheet lined with parchment paper.

Place the cut side of the peppers and garlic cloves onto prepared baking pan. Drizzle with olive oil and sprinkle with 1/2 teaspoon of garlic powder and 1/2 teaspoon of ground black pepper.

Roasted red peppers and garlic on a baking sheet lined with parchment paper.

Bake 20 minutes or until the peppers are soft. Set aside to cool.

Ingredients added to a large blender.

Place cooked red peppers and garlic, cottage cheese, chicken broth and cornstarch into a blender. Blend until the mixture is smooth and creamy.

Sauce in a large pot with spices sprinkled on top.

Transfer mixture to a large sauce pan and sprinkle with oregano, basil, parsley and remaining garlic powder and ground black pepper. Cook on medium heat until the sauce begins to bubble.

Sauce in a large white pot.

Reduce heat to minimum and let simmer for 10 minutes. Remove sauce from heat and toss over your favorite pasta. Makes 6 servings, 1 cup each.

Hint: Make sure to line the baking sheet with parchment paper. This will prevent the peppers and garlic from sticking to the pan and it makes for a much quicker cleanup.

Substitutions

  • Cottage Cheese– I used 2% cottage cheese in this recipe. You can use 0% or anything higher. If you are looking for a creamier sauce use a cottage cheese with a higher fat content.
  • Chicken Broth – I used a no salt added chicken broth. You can use a variety with salt if you prefer. You could also substitute with vegetable broth.

Equipment

Blender – I used a blender to puree the sauce. You can also use a food processor instead of a blender.

Storage

Roasted Red Pepper Sauce can be stored in the fridge in an airtight container for up to three days.

Roasted Red Pepper Sauce freezes well. Place sauce in a freezer safe container and freeze up to three months. I like to freeze mine in individual portions so I can use it for pizza sauce or single serve pasta dishes. Reheat on the stovetop when ready to eat.

Top tip

Make sure the peppers are soft before placing them into the blender as this will ensure there are no lumps in the sauce.

FAQ

Can I use green peppers instead of red peppers?

I do not recommend using green peppers because they have a different taste than red peppers.

I don’t have a blender or food processor. Can I mix the sauce with an electric mixer?

I do not recommend using an electric mixer as the sauce will be lumpy. A blender or food processor works best.

Related

Looking for other recipes like this? Try these:

Sauce in large pan with fresh parsley sprigs in the sauce.
Print Recipe
5 from 1 vote

Roasted Red Pepper Sauce

Roasted Red Pepper Sauce is savory and delicious. Toss it over your favorite pasta or use it as a sauce on pizza.
Prep Time10 minutes mins
Cook Time40 minutes mins
Total Time50 minutes mins
Servings: 6
Calories: 84kcal
Author: Christine

Ingredients

  • 4 medium red bell peppers
  • 4 cloves garlic
  • 2 teaspoons olive oil
  • 1 ½ teaspoons garlic powder divided
  • 1 teaspoon ground black pepper divided
  • 1 cup cottage cheese 2%
  • 1 cup chicken broth
  • 2 teaspoons cornstarch
  • 2 teaspoons oregano
  • 1 teaspoon basil
  • 1 teaspoon parsley

Instructions

  • Preheat oven to 400F. Line a large baking sheet with parchment paper.
  • Cut peppers in half and remove the seeds. Peel garlic and chop off the ends.
  • Place the cut side of the peppers and garlic cloves onto prepared baking pan. Drizzle with olive oil and sprinkle with 1/2 teaspoon of garlic powder and 1/2 teaspoon of ground black pepper.
  • Bake 20 minutes or until the peppers are soft. Set aside to cool.
  • Place cooked red peppers and garlic, cottage cheese, chicken broth, and cornstarch into a blender. Blend until the mixture is smooth and creamy.
  • Transfer mixture to a large sauce pan and sprinkle with oregano, basil, parsley and remaining garlic powder and ground black pepper. Cook on medium heat until the sauce begins to bubble.
  • Reduce heat to minimum and let simmer for 10 minutes. Remove sauce from heat and toss over your favorite pasta. Makes 6 servings, 1 cup each.

Notes

Make sure to line the baking sheet with parchment paper. This will prevent the peppers and garlic from sticking to the pan and it makes for a much quicker cleanup.
Make sure the peppers are soft before placing them into the blender as this will ensure there are no lumps in the sauce.
Roasted Red Pepper Sauce can be stored in the fridge in an airtight container for up to three days.
Roasted Red Pepper Sauce freezes well. Place sauce in a freezer safe container and freeze up to three months. I like to freeze mine in individual portions so I can use it for pizza sauce or single serve pasta dishes. Reheat on the stovetop when ready to eat.

Nutrition

Serving: 1cup | Calories: 84kcal | Carbohydrates: 9g | Protein: 6g | Fat: 3g | Saturated Fat: 1g | Polyunsaturated Fat: 0.4g | Monounsaturated Fat: 1g | Cholesterol: 6mg | Sodium: 127mg | Potassium: 272mg | Fiber: 2g | Sugar: 4g | Vitamin A: 2548IU | Vitamin C: 102mg | Calcium: 56mg | Iron: 1mg

Filed Under: Recipes

Apple Cinnamon Bread

February 27, 2024 by Christine 2 Comments

With sweet pieces of apple and warm spices, Apple Cinnamon Bread is soft, fluffy and delicious at any time of day.

Slices of bread next to the loaf on a white cutting board with cinnamon sticks on the bottom left and an apple and knife on the top right.

Looking for a heathy snack that also tastes super delicious? Look no further than this Apple Cinnamon Bread. With no oil, butter or refined sugars, this bread is a guilt free treat at any time of day including breakfast! One slice of this bread has only 100 calories and 1 gram of fat so you can definitely eat more than once slice.

Apple Cinnamon Bread comes together in a breeze. Simply add the dry ingredients to the wet ingredients, add the diced apples and pour into a loaf pan to bake. One hour later you will have a sweet and delicious snack and you can’t even tell it’s healthy. To kick this bread up a notch, serve it with some vanilla frozen yogurt.

Try Healthy Strawberry Rhubarb Crisp or Healthy Chocolate Chip Zucchini Bread for some other delicious healthy snacks and desserts.

Ingredients

Ingredients measured and laid out on a brown wooden surface.
  • All-Purpose Flour – I used all-purpose flour for this recipe. I haven’t tried this recipe using any other type of flour.
  • Baking Soda – Helps the bread to rise.
  • Baking Powder – Gives the bread that soft and fluffy texture.
  • Cinnamon and Nutmeg – Spices that pair nicely with apples.
  • Eggs– Helps to bind the ingredients together.
  • Unsweetened Applesauce – Adds a touch more apple flavor to the bread and helps to keep it moist.
  • Maple Syrup – Used to sweeten the bread.
  • Almond Milk – I used unsweetened almond milk.
  • Apple – I used a gala apple but feel free to use whatever type of apple you have on hand.

See recipe card for quantities.

Instructions

Preheat oven to 350F. Grease a 9×5 loaf pan with cooking spray. I like to use an olive oil cooking spray.

Diced apples on a white cutting board with a small knife laying on the top right on the cutting board.

Peel and dice the apple. Set aside.

Dry ingredients in a medium size white bowl with a metal whisk leaning on the side of the bowl.

Add flour, baking soda, baking powder, cinnamon and nutmeg to a medium size bowl. Whisk to combine.

We ingredients in a large white bowl with a metal whisk leaning on the side of the bowl.

Add eggs, unsweetened applesauce, maple syrup and almond milk to a large bowl. Whisk to combine.

Batter in a large white bowl with a blue spatula leaning on the side of the bowl.

Add the dry ingredients to the wet ingredients. Using a spatula, fold dry ingredients into wet ingredients. Fold until the flour mixture is incorporated and there are no lumps in the batter.

Diced apples on top of the batter in a large white bowl.

Add diced apples to the batter.

Batter with visible apple pieces in a large white bowl with a blue spatula leaning on the side of the bowl.

Use a spatula to fold in the apples.

Batter in a metal loaf pan.

Pour batter into prepared baking pan.

Baked bread in a metal loaf pan.

Bake for 50-60 minutes or until a toothpick inserted into the bread comes out clean. Cool in the pan for 10 minutes before transferring to a wire rack to cool completely. Cut into 12 slices.

Hint: Make sure to grease the loaf pan before pouring in the batter. The bread will stick if you do not grease the pan.

Substitutions

  • Maple Syrup – Liquid honey can be substituted for the maple syrup.
  • Unsweetened Applesauce – Feel free to use sweetened applesauce but keep in mind the bread will be sweeter.
  • Almond Milk – You can substitute the almond milk with any plant based or non plant based milk.

Equipment

9×5 Baking Pan – I used a 9×5 non-stick metal loaf pan for this recipe. Please keep in mind the baking time will change if you use a different size pan.

Storage

Apple Cinnamon Bread can be stored at room temperature in an airtight container or bag for up to three days.

Apple Cinnamon Bread freezes well. You can freeze the whole loaf or you can cut the loaf into slices before freezing. Make sure to place the bread into a freezer safe container or bag before freezing. I prefer to cut the loaf into slices so I can take out a couple of slices at a time to enjoy. You will be lucky if the bread even makes it to the freezer!

Top tip

Make sure to peel the apple before dicing it. I find the apple cooks best in this bread without the peel.

FAQ

Is this bread actually healthy?

Yes! One slice of Apple Cinnamon Bread has only 100 calories and 1 gram of fat. Plus we are skipping the butter, oil and refined sugars!

Why is my bread dry?

You have overbaked the bread. Bake 50-60 minutes or until a toothpick inserted into the center comes out clean. I recommend checking the loaf at 50 minutes.

Related

Looking for other recipes like this? Try these:

Slices of bread next to the loaf on a white cutting board with cinnamon sticks on the bottom left and an apple and knife on the top right.
Print Recipe
5 from 2 votes

Apple Cinnamon Bread

With sweet pieces of apple and warm spices, Apple Cinnamon Bread is soft, fluffy and delicious at any time of day.
Prep Time10 minutes mins
Bake Time50 minutes mins
Total Time1 hour hr
Servings: 12 slices
Calories: 100kcal
Author: Christine

Ingredients

  • 1 medium apple
  • 1 ½ cups all-purpose flour
  • 2 teaspoons baking soda
  • 1 teaspoon baking powder
  • 2 teaspoons cinnamon
  • ¼ teaspoon nutmeg
  • 2 large eggs
  • ¼ cup unsweetened applesauce
  • ¼ cup maple syrup
  • ¾ cup almond milk

Instructions

  • Preheat oven to 350F. Grease a 9×5 loaf pan with cooking spray. I like to use an olive oil cooking spray.
  • Peel and dice the apple. Set aside.
  • Add flour, baking soda, baking powder, cinnamon and nutmeg to a medium size bowl. Whisk to combine.
  • Add eggs, unsweetened applesauce, maple syrup and almond milk to a large bowl. Whisk to combine.
  • Add the dry ingredients to the wet ingredients. Using a spatula, fold dry ingredients into wet ingredients. Fold until the flour mixture is incorporated and there are no lumps in the batter.
  • Add diced apples to the batter.
  • Use a spatula to fold in the apples.
  • Pour batter into prepared baking pan.
  • Bake for 50-60 minutes or until a toothpick inserted into the bread comes out clean. Cool in the pan for 10 minutes before transferring to a wire rack to cool completely. Cut into 12 slices.

Notes

Make sure to grease the loaf pan before pouring in the batter. The bread will stick if you do not grease the pan.
Make sure to peel the apple before dicing it. I find the apple cooks best in this bread without the peel.
Apple Cinnamon Bread can be stored at room temperature in an airtight container or bag for up to three days.
Apple Cinnamon Bread freezes well. You can freeze the whole loaf or you can cut the loaf into slices before freezing. Make sure to place the bread into a freezer safe container or bag before freezing. I prefer to cut the loaf into slices so I can take out a couple of slices at a time to enjoy. You will be lucky if the bread even makes it to the freezer!

Nutrition

Calories: 100kcal | Carbohydrates: 20g | Protein: 3g | Fat: 1g | Saturated Fat: 0.3g | Polyunsaturated Fat: 0.3g | Monounsaturated Fat: 0.4g | Trans Fat: 0.003g | Cholesterol: 31mg | Sodium: 251mg | Potassium: 65mg | Fiber: 1g | Sugar: 6g | Vitamin A: 56IU | Vitamin C: 1mg | Calcium: 57mg | Iron: 1mg

Filed Under: Breads, Healthy Snacks, Recipes

Healthy Chocolate Muffins

February 23, 2024 by Christine Leave a Comment

Healthy Chocolate Muffins are soft, fluffy and moist. They are full of rich chocolatey flavor to satisfy those sweet tooth cravings.

Chocolate muffin on white cutting board in the foreground with additional chocolate muffins and mini chocolate chips in the background.

Healthy Chocolate Muffins…is it possible to have a rich tasting chocolate muffin that is actually healthy? The short answer is yes. So how are we making these chocolate muffins better than store bought or bakery alternatives? First, we are completely eliminating any butter or oil as these ingredients bring a lot of unhealthy fats to the muffins. Next, we are cutting back on the sugar and eliminating processed sugar altogether. We are using coconut sugar and unsweetened applesauce in place of the processed sugar that is typically in muffin recipes. The unsweetened applesauce will also help keep the muffins moist. Finally, we are using mini chocolate chips because you will get more rich chocolatey flavor in every bite using a lesser amount of chocolate than if you were using standard size chips. It’s a win win if you ask me.

If you are looking for other healthy muffin recipes, try Healthy Blueberry Muffins or Carrot Raisin Muffins.

Ingredients

Ingredients for healthy chocolate muffins measured and laid out on a brown wooden surface.
  • All-Purpose Flour – I used all-purpose flour in this recipe. I haven’t tried this recipe using any other type of flour.
  • Cocoa Powder – Gives the muffins that great chocolate flavor.
  • Baking soda – Helps the muffins to rise.
  • Baking Powder – Gives the muffins that fluffy cake like texture.
  • Eggs – Helps to bind all of the other ingredients together.
  • Coconut Sugar – Used to sweeten the muffins.
  • Unsweetened Applesauce – Adds to the sweetness and helps to keep the muffins moist.
  • Almond Milk– I used unsweetened almond milk for this recipe.
  • Mini Chocolate Chips – For that extra burst of chocolate flavor because who doesn’t love more chocolate.

See recipe card for quantities.

Instructions

Preheat oven to 350F. Grease a muffin pan with non-stick cooking spray.

Dry ingredients in a medium white bowl with a metal whisk leaning on the side of the bowl.

Add flour, cocoa, baking soda and baking powder to a medium size bowl. Whisk to combine.

Wet ingredients in a large white bowl with a metal whisk leaning on the side of the bowl.

Add coconut sugar, eggs, unsweetened applesauce and almond milk to a large bowl. Whisk to combine.

Dry ingredients added to wet ingredients in a large white bowl.

Add dry ingredient to the wet ingredients.

Muffin batter in a large white bowl with a blue spatula leaning on the side of the bowl.

Using a spatula, gently fold the dry ingredients into the wet ingredients until the flour mixture is incorporated. Do not overmix.

Chocolate chips on top of the batter in a large white bowl.

Add chocolate chips.

Muffin batter in a large white bowl with a blue spatula leaning on the side of the bowl.

Use a spatula to fold in the chocolate chips.

Muffin batter in a blue and white silicone muffin pan.

Using a cookie scoop, divide batter evenly into prepared muffin pan.

Baked muffins in a white and blue silicone muffin pan.

Bake for 16-18 minutes or until a toothpick inserted into the center of a muffin comes out clean. Let muffins cool for 10 minutes before transferring to a wire rack to cool completely. Makes 12 muffins.

Hint: Make sure to grease the muffin pan. These muffins are low in fat so they have the tendency to stick to the pan.

Substitutions

  • Coconut Sugar – Any type of granulated sugar can be substituted for the coconut sugar.
  • Unsweetened Applesauce – You could substitute with sweetened applesauce but keep in mind the muffins will be sweeter.
  • Almond Milk – You can substitute the almond will with any type of plant based or non plant based milk.
  • Mini Chocolate Chips – Feel free to substitute regular size chocolate chips.

Equipment

Silicone Muffin Pan – I used a silicone muffin pan for this recipe because it makes it super easy to pop the muffins out of the pan. You can use a metal non-stick muffin pan but be sure to grease it liberally as the muffins tend to stick.

Cookie Scoop – I used a cookie scoop to divide the batter into the muffin pan. If you do not have a cookie scoop, feel free to use a large spoon.

Storage

Healthy Chocolate Muffins can be stored at room temperature in an airtight container or bag for up to three days.

Healthy Chocolate Muffins freeze well. Place muffins in a freezer safe container or bag and freeze up to three months. Thaw muffins at room temperature when ready to eat.

Top tip

Do not overmix the batter or the muffins will be dense. Mix the batter until all of the flour mixture has been incorporated and there are no lumps.

FAQ

Why are the muffins dry?

You have overbaked the muffins. Bake muffins for 16-18 minutes or until a toothpick inserted into the center comes out clean. I recommend checking the muffins at 16 minutes.

Why did the muffins stick to the pan?

Did you forget the grease the muffin pan? Make sure to grease the pan thoroughly as the muffins tend to stick. A silicone muffin pan works great!

What if I don’t have mini chocolate chips?

No problem! You can use whatever type of chocolate chip you have on hand.

Related

Looking for other recipes like this? Try these:

Chocolate muffin on white cutting board in the foreground with additional chocolate muffins and mini chocolate chips in the background.
Print Recipe
5 from 1 vote

Healthy Chocolate Muffins

Healthy Chocolate Muffins are soft, fluffy and moist. They are full of rich chocolatey flavor to satisfy those sweet tooth cravings.
Prep Time10 minutes mins
Bake Time18 minutes mins
Total Time28 minutes mins
Servings: 12 muffins
Calories: 116kcal
Author: Christine

Ingredients

  • 1 ½ cups all-purpose flour
  • ½ cup cocoa powder
  • 2 teaspoons baking soda
  • 1 teaspoon baking powder
  • 2 large eggs
  • â…“ cup coconut sugar
  • ¼ cup unsweetened applesauce
  • 1 ¼ cup almond milk
  • ¼ cup mini chocolate chips

Instructions

  • Preheat oven to 350F. Grease a muffin pan with non-stick cooking spray.
  • Add flour, cocoa, baking soda and baking powder to a medium size bowl. Whisk to combine.
  • Add coconut sugar, eggs, unsweetened applesauce and almond milk to a large bowl. Whisk to combine.
  • Add dry ingredient to the wet ingredients.
  • Using a spatula, gently fold the dry ingredients into the wet ingredients until the flour mixture is incorporated. Do not overmix.
  • Add chocolate chips.
  • Use a spatula to fold in the chocolate chips.
  • Using a cookie scoop, divide batter evenly into prepared muffin pan.
  • Bake for 16-18 minutes or until a toothpick inserted into the center of a muffin comes out clean. Let muffins cool for 10 minutes before transferring to a wire rack to cool completely. Makes 12 muffins.

Notes

Make sure to grease the muffin pan. These muffins are low in fat so they have the tendency to stick to the pan.
Do not overmix the batter or the muffins will be dense. Mix the batter until all of the flour mixture has been incorporated and there are no lumps.
Healthy Chocolate Muffins can be stored at room temperature in an airtight container or bag for up to three days.
Healthy Chocolate Muffins freeze well. Place muffins in a freezer safe container or bag and freeze up to three months. Thaw muffins at room temperature when ready to eat.

Nutrition

Serving: 1muffin | Calories: 116kcal | Carbohydrates: 21g | Protein: 4g | Fat: 3g | Saturated Fat: 1g | Polyunsaturated Fat: 0.4g | Monounsaturated Fat: 1g | Trans Fat: 0.01g | Cholesterol: 32mg | Sodium: 276mg | Potassium: 87mg | Fiber: 2g | Sugar: 6g | Vitamin A: 55IU | Vitamin C: 0.1mg | Calcium: 67mg | Iron: 1mg

Filed Under: Healthy Snacks, Muffins, Recipes

Air Fryer Potato Wedges

February 1, 2024 by Christine Leave a Comment

Air Fryer Potato Wedges are slightly crispy with a touch of spices and they make a great substitute for store bought wedges or fries.

Potato wedges on a square white plate with a small bowl of ketchup on the right side of the plate.

Are you looking to stay on track with your health and fitness goals but still craving takeout or store bought fries? These Air Fryer Potato Wedges are the perfect recipe for you. Air Fryer Potato Wedges are really easy to make. Simply cut the potatoes into wedges, sprinkle with olive oil and seasonings and toss into the air fryer. In less than 30 minutes you will have a plate of perfectly seasoned potato wedges to satisfy those cravings without all of the unnecessary fats, salts and preservatives. This recipe will quickly become part of your regular meal rotation.

This recipe pairs well with Air Fryer Chicken Strips and Air Fryer Chicken Burgers for some delicious game day appetizers or snacks.

Ingredients

Ingredients measured and laid out on a brown wooden surface.
  • Potatoes – I used red potatoes for this recipe. You could also use russet or yellow potatoes.
  • Olive Oil – A heart healthy fat to add some crispiness to the wedges.
  • Spices – A combination of garlic powder, salt, paprika, chili powder and ground black pepper.

See recipe card for quantities.

Instructions

Four red potatoes with blemishes removed on a white cutting board.

Wash and dry potatoes. Use the top of a potato peeler or knife to remove any blemishes or bad spots on the potatoes.

Potato cut in half on a white cutting board with a knife on the right side of the cutting board.

Cut potatoes into wedges. First cut the potato in half lengthwise.

A potato half cut in half on the left side of a white cutting board with a potato half and knife on the right side of the cutting board.

Next place the cut side of the potato on the cutting board and cut in half again.

Potato wedges on a white cutting board with a knife on the right side of the cutting board.

Finally turn the potato over and cut in half again. Repeat with remaining potatoes.

Potato wedges tossed in spices and oil in a large white bowl.

Preheat air fryer to 400F. Place wedges in a large bowl and toss with olive oil and seasonings.

Cooked potato wedges in a black air fryer basket.

Places wedges in air fryer basket in a single layer. Cook for 22-24 minutes or until the wedges turn golden. Toss the wedges every 5-6 minutes. Remove from air fryer and serve immediately. Makes four servings, 8 wedges each.

Hint: Make sure to place the wedges in a single layer in the air fryer basket. This will ensure the potatoes cook evenly.

Substitutions

  • Red Potatoes – I used red potatoes because these are the type of potatoes I often have on hand. You can substitute with yellow or russet potatoes if you prefer.
  • Olive Oil – You can substitute the olive oil with canola oil or vegetable oil if you want. I like to use olive oil because it contains heart healthy fats.

Variations

  • Spicy – If you are looking for some extra spice or heat, feel free to add 1/2 teaspoon of dried red chilies to the spice mix.

Equipment

Air Fryer – I used a basket style air fryer for this recipe. If you are using another type of air fryer, flip the potato wedges halfway through cooking to ensure they crisp and brown evenly.

Storage

Air Fryer Potato Wedges are best served immediately after cooking. Leftovers can be stored for a day or two in the refrigerator. They can be reheated in the microwave or in the air fryer but they won’t be as crispy as they were when they first came out of the air fryer.

Top tip

Shake the air fryer basket every 5-6 minutes during cooking time as this will ensure the wedges cook evenly.

FAQ

Do I need to peel the potatoes before cutting them into wedges?

There is no need to peel the potatoes before cutting them into wedges. The skin provides extra nutrients and it helps to achieve that crispiness we are looking for.

Why aren’t my potato wedges crispy?

You have placed too many wedges in the air fryer. Place wedges in a single layer in the air fryer basket to ensure crispiness.

Related

Looking for other recipes like this? Try these:

Potato wedges on a square white plate with a small bowl of ketchup on the right side of the plate.
Print Recipe
5 from 1 vote

Air Fryer Potato Wedges

Air Fryer Potato Wedges are slightly crispy with a touch of spices and they make a great substitute for store bought wedges or fries.
Prep Time5 minutes mins
Cook Time20 minutes mins
Total Time25 minutes mins
Servings: 4
Calories: 160kcal
Author: Christine

Ingredients

  • 4 medium red potatoes
  • 1 teaspoon olive oil
  • ½ teaspoon garlic powder
  • ¼ teaspoon salt
  • ¼ teaspoon paprika
  • ¼ teaspoon chili powder
  • ¼ teaspoon ground black pepper

Instructions

  • Wash and dry potatoes. Use the top of a potato peeler or knife to remove any blemishes or bad spots on the potatoes.
  • Cut potatoes into wedges. First cut the potato in half lengthwise.
  • Next place the cut side of the potato on the cutting board and cut in half again.
  • Finally turn the potato over and cut in half again. Repeat with remaining potatoes.
  • Preheat air fryer to 400F. Place wedges in a large bowl and toss with olive oil and seasonings.
  • Places wedges in air fryer basket in a single layer. Cook for 22-24 minutes or until the wedges turn golden. Toss the wedges every 5-6 minutes. Remove from air fryer and serve immediately. Makes four servings, 8 wedges each.

Notes

Make sure to place the wedges in a single layer in the air fryer basket. This will ensure the potatoes cook evenly.
Shake the air fryer basket every 5-6 minutes during cooking time as this will ensure the wedges cook evenly.
Air Fryer Potato Wedges are best served immediately after cooking. Leftovers can be stored for a day or two in the refrigerator. They can be reheated in the microwave or in the air fryer but they won’t be as crispy as they were when they first came out of the air fryer.

Nutrition

Serving: 8wedges | Calories: 160kcal | Carbohydrates: 34g | Protein: 4g | Fat: 1g | Saturated Fat: 0.2g | Polyunsaturated Fat: 0.3g | Monounsaturated Fat: 1g | Sodium: 186mg | Potassium: 981mg | Fiber: 4g | Sugar: 3g | Vitamin A: 114IU | Vitamin C: 18mg | Calcium: 23mg | Iron: 2mg

Filed Under: Air Fryer, Recipes

Healthy Banana Bread

January 30, 2024 by Christine Leave a Comment

Healthy Banana Bread is soft, fluffy and moist. It is golden on the outside and packed full of sweet banana flavor on the inside.

Slices of banana bread and the rest of the loaf in the middle, with a knife at the bottom and bananas at the top.

I have had a soft spot for banana bread for as long as I can remember. My mom used to bake banana bread when I was a kid and I remember loving the smell of the bread as it was baking. I couldn’t wait to dig in to it and cut the first slice but mom had a rule…. we couldn’t eat the banana bread until the next day so the crust would be soft and moist. She would wrap it in plastic wrap and foil and let it sit overnight to soften the crust. I have to admit I prefer my banana bread this way but I also enjoy it with the slightly crunchy crust right after it comes out of the oven.

Mom’s banana bread was delicious but she used a whopping one cup of granulated sugar in her recipe as well as butter. Healthy Banana Bread is a lightened up version of one of my favorite childhood snacks. With no butter, oil or refined sugar it makes a great snack at any time of day.

If you are looking for other healthy baking recipes, try my Healthy Zucchini Raisin Muffins or Blueberry Scones.

Ingredients

Ingredients measured and laid out on a brown wooden surface.
  • All-Purpose Flour – I used all-purpose flour for this recipe. I have not tried any other type of flour in this recipe.
  • Baking Soda – Helps the bread to rise.
  • Baking Powder – Helps to give the banana bread that fluffy cake like texture.
  • Mashed Bananas – Make sure to use overripe bananas….the ones with the brown spots on them.
  • Eggs – Helps to bind the ingredients together.
  • Greek Yogurt – I used plain 0%, no sugar added Greek yogurt.
  • Maple Syrup – Adds some sweetness to the bread.
  • Milk – I used skim milk for this recipe.
  • Vanilla – Adds a little extra flavor.

See recipe card for quantities.

Instructions

Preheat oven to 350F. Grease a 9×5 loaf pan with non-stick cooking spray. I like to use an olive oil cooking spray.

Dry ingredients in a medium size bowl with a metal whisk leaning on the side of the bowl.

In a medium size bowl, add flour, baking soda and baking powder. Whisk to combine.

Wet ingredients in a large white bowl with a metal whisk leaning on the side of the bowl.

In a large bowl, add mashed bananas, eggs, Greek yogurt, maple syrup, milk and vanilla. Whisk to combine.

Dry ingredients added to the wet ingredients in a large white bowl.

Add the dry ingredients to the wet ingredients.

Batter in a large white bowl with a blue spatula leaning on the side of the bowl.

Using a spatula, fold dry ingredients into wet ingredients. Fold until the flour mixture is incorporated and there are no lumps in the batter.

Batter in a nonstick metal loaf pan.

Pour batter into prepared baking pan.

Baked banana bread in a nonstick metal loaf pan.

Bake for 50-60 minutes or until a toothpick inserted into the bread comes out clean. Cool in the pan for 10 minutes before transferring to a wire rack to cool completely. Cut into 12 slices.

Hint: Make sure to grease the loaf pan before pouring in the batter. The bread will stick if you do not grease the pan.

Substitutions

  • Greek Yogurt – I used plain, 0% no sugar added Greek yogurt. You can substitute with 2% or higher or varieties with added sugar. Keep in mind the muffins will be sweeter if you choose a Greek yogurt with added sugars.
  • Maple Syrup– Liquid honey can be substituted for the maple syrup.
  • Milk – I used skim milk for this recipe. You can substitute the skim milk with any other type of plant based or non plant based milk.

Equipment

9×5 Non-stick Metal Loaf Pan – I used a 9×5 non-stick metal loaf pan for this recipe. The baking time will change if you use a different size pan.

Storage

Healthy Banana Bread can be stored at room temperature in an airtight container or bag for up to three days.

Healthy Banana Bread freezes well. Wrap bread slices in plastic wrap before placing in a freezer safe container or bag. Freeze up to three months. Thaw bread slices at room temperature when ready to eat.

Top tip

Do not overbake the banana bread. Bake for 50-60 minutes or until a toothpick inserted into the center comes out clean. If you overbake the bread, it will be dry. I recommend checking the bread at 50 minutes.

FAQ

Do I have to use overripe bananas for this recipe?

Yes! The riper the banana the better. Look for little brown spots on the bananas. Overripe bananas are sweeter and they are easier to mash up.

Why is my banana bread dry?

You have overbaked the banana bread. Bake for 50-60 minutes or until a toothpick inserted into the center comes out clean.

Is this banana bread actually healthy?

Yes! One slice has only 111 calories and 1 gram of fat so be sure to enjoy an extra slice.

Related

Looking for other recipes like this? Try these:

Slices of banana bread and the rest of the loaf in the middle, with a knife at the bottom and bananas at the top.
Print Recipe
5 from 1 vote

Healthy Banana Bread

Healthy Banana Bread is soft, fluffy and moist. It is golden on the outside and packed full of sweet banana flavor on the inside.
Prep Time10 minutes mins
Cook Time50 minutes mins
Total Time1 hour hr
Servings: 12 slices
Calories: 111kcal
Author: Christine

Ingredients

  • 1 ½ cups all-purpose flour
  • 2 teaspoons baking soda
  • 1 teaspoon baking powder
  • 1 cup mashed bananas
  • 2 large eggs
  • â…“ cup Greek yogurt plain, 0% no sugar added
  • ¼ cup maple syrup
  • ¼ cup milk
  • 2 teaspoons vanilla

Instructions

  • Preheat oven to 350F. Grease a 9×5 loaf pan with non-stick cooking spray. I like to use an olive oil cooking spray.
  • In a medium size bowl, add flour, baking soda and baking powder. Whisk to combine.
  • In a large bowl, add mashed bananas, eggs, Greek yogurt, maple syrup, milk and vanilla. Whisk to combine.
  • Add the dry ingredients to the wet ingredients.
  • Using a spatula, fold dry ingredients into wet ingredients. Fold until the flour mixture is incorporated and there are no lumps in the batter.
  • Pour batter into prepared baking pan.
  • Bake for 50-60 minutes or until a toothpick inserted into the bread comes out clean. Cool in the pan for 10 minutes before transferring to a wire rack to cool completely. Cut into 12 slices.

Notes

Make sure to use overripe bananas for this recipe!
Make sure to grease the loaf pan before pouring in the batter. The bread will stick if you do not grease the pan.
Do not overbake the banana bread. Bake for 50-60 minutes or until a toothpick inserted into the center comes out clean. If you overbake the bread, it will be dry. I recommend checking the bread at 50 minutes.
Healthy Banana Bread can be stored at room temperature in an airtight container or bag for up to three days.
Healthy Banana Bread freezes well. Wrap bread slices in plastic wrap before placing in a freezer safe container or bag. Freeze up to three months. Thaw bread slices at room temperature when ready to eat.

Nutrition

Serving: 1slice | Calories: 111kcal | Carbohydrates: 22g | Protein: 4g | Fat: 1g | Saturated Fat: 0.3g | Polyunsaturated Fat: 0.2g | Monounsaturated Fat: 0.3g | Trans Fat: 0.003g | Cholesterol: 31mg | Sodium: 179mg | Potassium: 128mg | Fiber: 1g | Sugar: 7g | Vitamin A: 68IU | Vitamin C: 2mg | Calcium: 67mg | Iron: 1mg

Filed Under: Breads, Healthy Snacks, Recipes

Wild Rice and Mushroom Soup

January 22, 2024 by Christine 2 Comments

Wild Rice and Mushroom Soup is warm, hearty and delicious. With tender pieces of wild rice and perfectly seasoned mushrooms, this soup will keep you coming back for more.

A bowl of soup in the center with wild rice and mushrooms on the left and a spoon on the right.

It’s winter here in Northwest Ontario, Canada and the skies are grey with tiny flakes of snow falling to the ground. The temperatures are hovering below freezing and this has my belly screaming comfort foods. This Wild Rice and Mushroom Soup is the perfect way to warm up during these chilly days and nights.

I have always loved Wild Rice and Mushroom Soup but it’s typically made with a heavy cream. I am lightening up this soup by using skim milk in place of the cream. While this soup may be lower in fat than a standard wild rice and mushroom soup, it definitely doesn’t skimp on flavor. This soup will become a part of your meal rotation in those colder months of the year.

This soup recipe pairs well with Homemade Dinner Rolls and Homemade Garlic Butter Breadsticks.

If you are looking for other delicious soup recipes, try my Slow Cooker Chicken Noodle Soup or Slow Cooker Beef and Barley Soup.

Ingredients

Ingredients measured and laid out on a brown wooden surface.
  • Unsalted Butter – Used to sauté the onion, garlic and vegetables.
  • Onion and Garlic – These will be sauteed to add some good flavor to the soup.
  • Celery and Carrot – Vegetables to make the soup hearty.
  • Cremini Mushrooms – These are the brown colored mushrooms in the produce section of the grocery store.
  • Salt, Oregano, Thyme, Ground Black Pepper, Ground Mustard – Spices to add some amazing flavor to the soup.
  • All-Purpose Flour – Used to thicken the soup.
  • Wild Rice – Make sure to use uncooked wild rice.
  • Chicken Broth – I used no salt added chicken broth.
  • Skim Milk – I used skim milk for this recipe.

See recipe card for quantities.

Instructions

Heat butter on the stovetop in a large pot over medium high heat.

Mushrooms, onions and vegetables in a large pot.

Add onions, garlic, mushrooms, celery and carrots. Sautee until the onions are translucent.

Flour and spices on top of the vegetables in a large pot.

Sprinkle vegetables with spices and flour. Use a large spoon to mix in the flour and spices until the flour starts to brown.

Soup mixture with mushrooms floating on the top in a large pot.

Add chicken broth and wild rice. Stir to combine. Bring to a boil and let simmer for 50-60 minutes or until the rice is tender.

Soup mixture in a large pot.

Stir in milk. Cook for an additional 5 minutes or until the soup is heated through. Serve immediately. Makes 12 servings, one cup each.

Hint: Don’t skip the flour in this recipe because it helps the soup to thicken. See the substitution section below if you are looking for an alternative to flour.

Substitutions

  • Unsalted Butter– You can use salted butter instead of unsalted butter but be sure to omit the salt from the recipe.
  • Cremini Mushrooms – You can substitute the cremini mushrooms with white mushrooms if your prefer. I like using cremini mushrooms because they add more flavor to the soup.
  • All-Purpose Flour – You can use 2 tablespoons of cornstarch in place of the all-purpose flour.
  • Skim Milk – You can use cream if you prefer or you may substitute with any type of plant based or non plant based milk.

Variations

  • Spicy – add 1/2 teaspoon of red chili flakes to add some heat to this recipe.

Equipment

Minimal equipment is used in the this recipe! All you need is a knife to cut the vegetables, a large pot and a spoon to stir the soup with.

Storage

Wild Rice and Mushroom Soup can be stored in the fridge in an airtight container for up to four days. Heat soup on the stovetop or in the microwave when ready to eat.

Wild Rice and Mushroom Soup freezes well. I like to portion the soup into freezer safe containers before placing in the freezer so I can pull out a container for a quick meal on those busy days. This soup can be stored in the freezer for up to three months.

Top tip

Remove the pot from the heat immediately after cooking to prevent the rice from continuing to cook. The longer the rice cooks, the more liquid it will absorb.

FAQ

Can I make this soup ahead of time?

Yes! This recipe works well for meal prepping. The soup can be stored in the fridge for up to four days and in the freezer for up to three months. See the storage section above for more details.

What if I can’t find cremini mushrooms?

No problem! You can still make this soup with white mushrooms.

Can I use precooked wild rice?

Unfortunately not. This recipe was designed to use uncooked wild rice.

Why isn’t my soup thickening?

Did you forget to add the flour? Make sure to brown the flour after the vegetables sauté because this will allow the soup to thicken.

Related

Looking for other recipes like this? Try these:

A bowl of soup in the center with wild rice and mushrooms on the left and a spoon on the right.
Print Recipe
5 from 2 votes

Wild Rice and Mushroom Soup

Wild Rice and Mushroom Soup is warm, hearty and delicious. With tender pieces of wild rice and perfectly seasoned mushrooms, this soup will keep you coming back for more.
Prep Time10 minutes mins
Cook Time55 minutes mins
Total Time1 hour hr 5 minutes mins
Servings: 12
Calories: 111kcal
Author: Christine

Ingredients

  • 2 tablespoons butter unsalted
  • ½ cup onion diced
  • 3 cloves garlic minced
  • 1 cup cremini mushrooms sliced
  • 1 cup carrots chopped
  • 1 cup celery chopped
  • ¼ teaspoon salt
  • ½ teaspoon oregano
  • ½ teaspoon thyme
  • ½ teaspoon ground black pepper
  • ½ teaspoon ground mustard
  • ¼ cup all-purpose flour
  • 1 cup wild rice uncooked
  • 6 cups chicken broth
  • 1 cup skim milk

Instructions

  • Heat butter on the stovetop in a large pot over medium high heat.
  • Add onions, garlic, mushrooms, celery and carrots. Sautee until the onions are translucent.
  • Sprinkle vegetables with spices and flour. Use a large spoon to mix in the flour and spices until the flour starts to brown.
  • Add chicken broth and wild rice. Stir to combine. Bring to a boil and let simmer for 50-60 minutes or until the rice is tender.
  • Stir in milk. Cook for an additional 5 minutes or until the soup is heated through. Serve immediately. Makes 12 servings, one cup each.

Notes

Don’t skip the flour in this recipe because it helps the soup to thicken. See the substitution section in the blog post if you are looking for an alternative to flour.
Remove the pot from the heat immediately after cooking to prevent the rice from continuing to cook. The longer the rice cooks, the more liquid it will absorb.
Wild Rice and Mushroom Soup can be stored in the fridge in an airtight container for up to four days. Heat soup on the stovetop or in the microwave when ready to eat.
Wild Rice and Mushroom Soup freezes well. I like to portion the soup into freezer safe containers before placing in the freezer so I can pull out a container for a quick meal on those busy days. This soup can be stored in the freezer for up to three months.

Nutrition

Serving: 1cup | Calories: 111kcal | Carbohydrates: 17g | Protein: 6g | Fat: 3g | Saturated Fat: 1g | Polyunsaturated Fat: 0.4g | Monounsaturated Fat: 1g | Trans Fat: 0.1g | Cholesterol: 6mg | Sodium: 123mg | Potassium: 295mg | Fiber: 2g | Sugar: 3g | Vitamin A: 1928IU | Vitamin C: 2mg | Calcium: 49mg | Iron: 1mg

Filed Under: Recipes

Air Fryer Apple Slices

January 2, 2024 by Christine 2 Comments

Air Fryer Apple Slices are warm, sweet and delicious. They are slightly crispy but packed full of juicy apple flavor.

Cooked apple slices on a small white plate with apples and cinnamon sticks to the left side of the plate.

It’s January…..the time of year when many people evaluate their health and fitness goals. Perhaps you ate too many goodies over the holidays, or you made a New Years resolution to get in shape, or maybe you just want to make better food choices for your overall health. Air Fryer Apple Slices are the perfect snack or dessert if you are looking for a healthy choice.

Air Fryer Apple Slices only require two ingredients and they literally take minutes to make. You can eat them straight out of the air fryer or you can drizzle them with the optional maple syrup. I like to eat mine with a scoop of vanilla frozen yogurt.

Try my Healthy Apple Cinnamon Cake or Healthy Blueberry Muffins for other great healthy snacks or desserts.

Ingredients

Ingredients measured and laid out on a brown wooden surface.
  • Apple – I used a gala apple but feel free to use whatever type of apple you have on hand.
  • Cinnamon – Adds a nice warm spice to the apple slices.
  • Maple Syrup (Optional) – Use this option if your prefer your desserts on the sweeter side.

See recipe card for quantities.

Instructions

Preheat air fryer to 375F.

Apple slices on a white cutting board.

Wash and core apple. Cut apple into slices.

Apple slices sprinkled with cinnamon on a small white place.

Sprinkle cinnamon on the apple slices.

Apple slices sprinkled with cinnamon in an air fryer basket.

Arrange apple slices in a single layer in air fryer basket.

Cooked apple slices in air fryer basket.

Cook for 5-6 minutes or until the apple slices have started to soften but are still slightly firm. Remove apples from air fryer and drizzle with maple syrup if desired. Makes 1 serving.

Hint: There is no need to grease the air fryer prior to adding the apple slices.

Substitutions

  • Apple – I used a gala apple for this recipe. You can use whatever type of apple you have on hand. If you use a granny smith apple, your apple slices will be tart.
  • Maple Syrup – You can substitute honey for the maple syrup if desired.

Equipment

Air Fryer – I used a basket style air fryer for this recipe. You can use any type of air fryer but be sure the apple slices are placed in a single layer in the air fryer.

Storage

Apple slices can be stored in the fridge in an airtight container or bag for up to three days.

I do not recommend freezing the apple slices.

Top tip

Do not overcook the apple slices because they will turn into apple mush! Cook the apple slices until they start to soften but are still slightly firm.

FAQ

Do I have to peel the apple?

There is no need to peel the apple unless it’s your personal preference. Don’t forget the skin adds extra nutrients.

Can I double this recipe?

Yes! Feel free to double the recipe but be sure the apple slices are placed in a single layer in the air fryer.

What pairs well with the apple slices?

A big scoop of vanilla ice cream or frozen yogurt. This is my favorite way to eat the apple slices because they taste like a piece of apple pie without the crust!

Related

Looking for other recipes like this? Try these:

Cooked apple slices on a small white plate with apples and cinnamon sticks to the left side of the plate.
Print Recipe
5 from 1 vote

Air Fryer Apple Slices

Air Fryer Apple Slices are warm, sweet and delicious. They are slightly crispy but packed full of juicy apple flavor.
Prep Time2 minutes mins
Cook Time6 minutes mins
Total Time8 minutes mins
Servings: 1
Calories: 115kcal
Author: Christine

Ingredients

  • 1 medium apple
  • ¼ teaspoon cinnamon
  • 1 teaspoon maple syrup optional

Instructions

  • Preheat air fryer to 375F.
  • Wash and core apple. Cut apple into slices.
  • Sprinkle cinnamon on the apple slices.
  • Arrange apple slices in a single layer in air fryer basket.
  • Cook for 5-6 minutes or until the apple slices have started to soften but are still slightly firm. Remove apples from air fryer and drizzle with maple syrup if desired. Makes 1 serving.

Notes

There is no need to grease the air fryer prior to adding the apple slices.
Do not overcook the apple slices because they will turn into apple mush! Cook the apple slices until they start to soften but are still slightly firm.
Apple slices can be stored in the fridge in an airtight container or bag for up to three days.
I do not recommend freezing the apple slices.

Nutrition

Serving: 1g | Calories: 115kcal | Carbohydrates: 30g | Protein: 0.5g | Fat: 0.3g | Saturated Fat: 0.1g | Polyunsaturated Fat: 0.1g | Monounsaturated Fat: 0.01g | Sodium: 3mg | Potassium: 213mg | Fiber: 5g | Sugar: 23g | Vitamin A: 100IU | Vitamin C: 8mg | Calcium: 24mg | Iron: 0.3mg

Filed Under: Air Fryer, Healthy Snacks, Recipes

Christmas M&M Cookies

December 18, 2023 by Christine Leave a Comment

Christmas M&M Cookies are slightly crispy on the outside and soft and chewy on the inside. They are loaded with chocolate M&M’s for the ultimate holiday treat.

Cookies and M&M's on a white piece of parchment paper.

Are you looking for a last minute holiday baking recipe but you don’t want to buy a bunch of fancy baking ingredients? Christmas M&M Cookies are just the recipe for you! The base of the cookies are simple baking ingredients that you probably already have on hand in your pantry and the Christmas M&M’s are usually found in the holiday chocolate section of your local store.

Christmas M&M Cookies come together in a breeze. You simply mix the dough, fold in the M&M’s and bake in the oven. The dough does not need to be chilled and this means you can enjoy these cookies that much sooner! Christmas M&M Cookies add some nice color to your holiday baking trays and they are sure to become a favorite of whomever you are willing to share them with. Trust me…you might not want to share them after you try a bite!

Try Soft and Chewy Gingerbread Cookies or Butter Tart Squares for other crowd pleasing holiday desserts.

Ingredients

Ingredients measured and laid out on a brown wooden surface.
  • All-Purpose Flour – I used all-purpose flour for this recipe. I haven’t made these cookies using any other type of flour.
  • Baking Soda – Helps the cookies to rise.
  • Salt – Brings out the flavor of the other ingredients.
  • Unsalted Butter – Adds a nice rich flavor to the recipe.
  • Granulated Sugar – Adds some sweetness to the cookies.
  • Brown Sugar – Helps to give the cookies that nice chewy texture.
  • Eggs – Helps to bind the ingredients together.
  • Vanilla – Adds some flavor.
  • Red and Green M&M’s – We are using these to add some candy coated chocolate flavor and some Christmas colors.

See recipe card for quantities.

Instructions

Preheat oven to 350F. Line two large baking sheets with parchment paper.

Melted butter in a small white bowl.

Melt butter in the microwave or on the stovetop. Set aside.

Dry ingredients in a medium size white bowl with a metal whisk leaning on the side of the bowl.

In a medium size bowl, combine flour, baking soda and salt. Whisk to combine.

Creamed butter and sugar in a large white bowl with an electric mixer leaning on the side of the bowl.

In a large bowl, add melted butter, granulated sugar and brown sugar. Beat with an electric mixture at medium speed until the butter and sugars are mixed well.

Eggs and vanilla on top of the dough in a large white bowl.

Add eggs and vanilla. Beat with mixer on medium speed until the eggs and vanilla have been mixed in. Use a spatula to scrape down the sides of the bowl.

Cookie dough in a large white bowl with an electric mixer leaning in the side of the bowl.

Add half of the flour mixture. Beat at low speed until the flour mixture begins to incorporate into the dough. Increase the speed to medium and continue to beat until the flour is mixed into the dough. Repeat with remaining flour mixture. Use a spatula to scrape down the sides of the bowl as necessary.

Cookie dough with red and green M&M's in a large white bowl with a blue spatula leaning on the side of the bowl.

Add M&M’s to the cookie dough. Fold in the M&M’s using a spatula.

Cookie dough balls on a baking sheet lined with parchment paper.

Use a cookie scoop or large spoon to drop cookies dough balls onto prepared baking sheets. Use about 1 ½ tablespoons of dough for each cookie.

Baked cookies on a pan lined with parchment paper.

Bake for 10-12 minutes or until the tops of the cookies start to turn golden brown. Remove cookies from the oven and let cool for 10 minutes before transferring to a wire rack to cool completely. Makes 30 cookies.

Hint: Make sure the line the baking sheets with parchment paper as this will prevent the bottoms of the cookies from burning.

Substitutions

  • Unsalted Butter – Salted butter can be substituted for the unsalted butter. If you are using salted butter, be sure to omit the salt from the recipe.
  • Red and Green M&M’s – If you can’t find red and green M&M’s, you can use any color of M&M’s but keep in mind the cookies won’t have those classic Christmas colors.

Equipment

Large Non-Stick Baking Pans – I used two large non-stick metal baking pans for this recipe. Feel free to use smaller baking pans but you won’t be able to fit as many cookies on a pan.

Electric Mixer – I used an electric mixer for this recipe. I highly recommend using an electric mixer for this recipe because the cookie dough is quite thick. You can try mixing by hand but you will need some good elbow grease!

Cookie Scoop – I used a cookie scoop for this recipe. Feel free to use a large spoon if you do not have a cookie scoop. Use the spoon to scoop 1 ½ tablespoons of cookie dough. Gently shape the dough into a ball before placing on prepared baking sheet.

Storage

Christmas M&M Cookies can be stored in an airtight container or bag for up to three days at room temperature.

Christmas M&M Cookies freeze well. Place cookies in a freezer safe container or bag and freeze up to three months. Thaw at room temperature when ready to eat.

Top tip

Do not overbake the cookies or they won’t be soft and chewy. Bake the cookies for 10-12 minutes or until the tops start to turn golden brown. The cookies will look slightly underbaked but they will continue cooking after you remove them from the oven.

FAQ

Do I have to chill the cookie dough before baking?

No! This cookie dough does not require chilling and this means you get to eat the cookies that much sooner.

Can I make these cookies ahead of time for a holiday party?

Yes! These cookies will retain maximum freshness if you freeze them. I recommend baking the cookies and letting them cool to room temperature before transferring to a freezer safe container or bag. Thaw cookies at room temperature a couple of hours before serving. Your guests won’t be able to tell the cookies were frozen!

Why are my cookies hard?

You have baked the cookies too long. Bake cookies for 10-12 minutes or until the tops turn golden brown. They will look slightly undercooked but don’t let this convince you to bake them longer. The cookies will continue baking after you have removed them from the oven.

Related

Looking for other recipes like this? Try these:

Cookies and M&M's on a white piece of parchment paper.
Print Recipe
5 from 1 vote

Christmas M&M Cookies

Christmas M&M Cookies are slightly crispy on the outside and soft and chewy on the inside. They are loaded with chocolate M&M's for the ultimate holiday treat.
Prep Time15 minutes mins
Bake Time10 minutes mins
Total Time25 minutes mins
Servings: 30 cookies
Calories: 157kcal
Author: Christine

Ingredients

  • 2 ½ cups all-purpose flour
  • 2 teaspoons baking soda
  • ¼ teaspoon salt
  • ½ cup unsalted butter
  • ¼ cup granulated sugar
  • 1 cup brown sugar
  • 2 large eggs
  • 2 teaspoons vanilla
  • 1 ½ cups red and green M&M's

Instructions

  • Preheat oven to 350F. Line two large baking sheets with parchment paper.
  • Melt butter in the microwave or on the stovetop. Set aside.
  • In a medium size bowl, combine flour, baking soda and salt. Whisk to combine.
  • In a large bowl, add melted butter, granulated sugar and brown sugar. Beat with an electric mixture at medium speed until the butter and sugars are mixed well.
  • Add eggs and vanilla. Beat with mixer on medium speed until the eggs and vanilla have been mixed in. Use a spatula to scrape down the sides of the bowl.
  • Add half of the flour mixture. Beat at low speed until the flour mixture begins to incorporate into the dough. Increase the speed to medium and continue to beat until the flour is mixed into the dough. Repeat with remaining flour mixture. Use a spatula to scrape down the sides of the bowl as necessary.
  • Add M&M's to the cookie dough. Fold in the M&M's using a spatula.
  • Use a cookie scoop or large spoon to drop cookies dough balls onto prepared baking sheets. Use about 1 ½ tablespoons of dough for each cookie.
  • Bake for 10-12 minutes or until the tops of the cookies start to turn golden brown. Remove cookies from the oven and let cool for 10 minutes before transferring to a wire rack to cool completely. Makes 30 cookies.

Notes

Make sure the line the baking sheets with parchment paper as this will prevent the bottoms of the cookies from burning.
Do not overbake the cookies or they won’t be soft and chewy. Bake the cookies for 10-12 minutes or until the tops start to turn golden brown. The cookies will look slightly underbaked but they will continue cooking after you remove them from the oven.
Christmas M&M Cookies can be stored in an airtight container or bag for up to three days at room temperature.
Christmas M&M Cookies freeze well. Place cookies in a freezer safe container or bag and freeze up to three months. Thaw at room temperature when ready to eat.

Nutrition

Serving: 1cookie | Calories: 157kcal | Carbohydrates: 24g | Protein: 2g | Fat: 6g | Saturated Fat: 4g | Polyunsaturated Fat: 0.2g | Monounsaturated Fat: 1g | Trans Fat: 0.1g | Cholesterol: 22mg | Sodium: 107mg | Potassium: 27mg | Fiber: 1g | Sugar: 15g | Vitamin A: 136IU | Vitamin C: 0.1mg | Calcium: 23mg | Iron: 1mg

Filed Under: Cookies, Recipes

Butter Tart Squares

December 13, 2023 by Christine Leave a Comment

With a rich buttery crust and a sweet gooey top, Butter Tart Squares are sure to become a holiday baking favorite.

A stack of butter tart squares in the foreground and uncut butter tart squares in the background.

Butter Tart Squares are a classic Canadian holiday dessert. They are very similar to a butter tart but in bar form and far simpler to make. First we assemble the crust and bake it until it smells fragrant. Next we make the topping and pour it over the crust. Finally we bake the squares until the edges start to set. My holiday baking list is never complete unless Butter Tart Squares are included! They are sweet and oh so gooey delicious and guaranteed to become a part of your holiday baking year after year.

Try my Skor Fudge and Soft and Chewy Gingerbread Cookies if you are looking for other holiday baking recipes to try.

Ingredients

Ingredients measured and laid out on a wooden surface.

Crust

  • Unsalted Butter – Make sure the butter is at room temperature so it’s soft and easy to mix.
  • Brown Sugar – Adds some sweetness to the crust.
  • Vanilla – Adds a boost of flavor to the crust.
  • All-Purpose Flour – I used all-purpose flour for this recipe. I haven’t tried this recipe using any other type of flour.

Topping

  • Unsalted Butter – Mixed with the eggs and brown sugar to create the topping.
  • Eggs – I used large eggs in this recipe.
  • Brown Sugar – Helps to make that sweet and gooey delicious topping.
  • All-Purpose Flour – A touch of flour to make sure the topping isn’t too runny.
  • Salt – Brings out the flavor of the other ingredients.
  • Raisins – A perfect addition to these delicious bars.

See recipe card for quantities.

Instructions

Preheat oven to 350F. Line an 8×8 baking pan with parchment paper.

Crust mixture in a large white bowl with an electric mixer leaning on the side of the bowl.

In a medium size bowl, add softened butter, brown sugar and vanilla. Use an electric mixture to beat at medium speed until combined.

Crust is pressed into a metal pan lined with parchment paper.

Add flour. Beat until the flour is completely mixed in. The mixture will be dry and crumbly. Use your hands to press mixture into prepared baking pan. Bake for 10-12 minutes or until the crust starts to turn golden brown. Remove from oven and set aside.

Melted butter in a small white bowl.

Melt butter in the microwave or on the stovetop. Set aside to cool slightly.

Topping mixture in a large white bowl with an electric mixer leaning on the side of the bowl.

Add melted butter, brown sugar and eggs to a large bowl. Use an electric mixer to beat on medium speed until combined. Use a spatula to scrape down the sides of the bowl as necessary.

Flour sprinkled over the batter in a large white bowl.

Sprinkle the salt and flour on top of the mixture. Beat at medium speed until combined.

Raisins on top of the batter in a large white bowl.

Add raisins. Use a spatula to fold in the raisins.

Topping has been poured onto crust in a metal baking pan lined with parchment paper.

Pour mixture on top of baked crust.

Baked butter tart squares in a metal pan lined with parchment paper.

Bake for 28-30 minutes or until the edges of the topping start to set. The center will still be slightly jiggly when you remove it from the oven. Cool on the counter for one hour then transfer to the refrigerator to chill for 2 hours. Cut into 16 squares. Enjoy!

Hint: Make sure to line the baking sheet with parchment paper. This will prevent the crust from burning and it will make the squares easier to remove from the pan after they have been baked.

Substitutions

  • Unsalted Butter – You can substitute with salted butter if you prefer in both the crust and the topping but be sure to omit the salt from the recipe.
  • Raisins – You could substitute dates for the raisins. Be sure to cut the dates into small pieces before adding them to the topping mixture.

Equipment

8×8 Baking Pan – I used an 8×8 baking pan for this recipe. You could use a 9×9 baking pan but I would not use anything larger because there won’t be enough crust and topping to fill the pan.

Electric Mixer – I used an electric mixer to make it easier to mix the crust and topping. If you don’t have an electric mixer, you can use a fork or pastry cutter to mix the crust and a whisk to mix the topping.

Storage

Butter Tart Squares can be stored in the fridge in an airtight container or bag for up to five days.

Butter Tart Squares Freeze well. Place tarts in a freezer safe container or bag and freeze up to three months. Thaw in the fridge or at room temperature when ready to eat.

Top tip

Do not overcook the topping. Cook the topping until the edges are set and the middle is still slightly jiggly. If you overcook the topping, you will miss out on that sweet ooey gooey deliciousness.

FAQ

Why is the crust really crunchy?

You have overbaked the crust. Bake the crust until it just starts to turn golden brown. Remember the crust doesn’t have to be fully baked because it will continue to bake with the topping.

Why is the topping falling apart when I cut the squares?

The topping hasn’t had a chance to set. Let the squares cool for one hour at room temperature before transferring to the fridge to chill for two hours. This will ensure the topping has a chance to set.

Related

Looking for other recipes like this? Try these:

A stack of butter tart squares in the foreground and uncut butter tart squares in the background.
Print Recipe
5 from 1 vote

Butter Tart Squares

With a rich buttery crust and a sweet gooey top, Butter Tart Squares are sure to become a holiday baking favorite.
Prep Time15 minutes mins
Bake Time40 minutes mins
Total Time55 minutes mins
Servings: 16 squares
Calories: 268kcal
Author: Christine

Ingredients

Crust

  • ½ cup unsalted butter softened
  • ½ cup brown sugar
  • 1 teaspoon vanilla
  • 1 ½ cups all-purpose flour

Topping

  • ¼ cup unsalted butter
  • 3 large eggs
  • 1 ½ cups brown sugar
  • 2 tablespoons all-purpose flour
  • ¼ teaspoon salt
  • 1 cup raisins

Instructions

  • Preheat oven to 350F. Line an 8×8 baking pan with parchment paper.
  • In a medium size bowl, add softened butter, brown sugar and vanilla. Use an electric mixture to beat at medium speed until combined.
  • Add flour. Beat until the flour is completely mixed in. The mixture will be dry and crumbly. Use your hands to press mixture into prepared baking pan. Bake for 10-12 minutes or until the crust starts to turn golden brown. Remove from oven and set aside to.
  • Melt butter in the microwave or on the stovetop. Set aside to cool slightly.
  • Add melted butter, brown sugar and eggs to a large bowl. Use an electric mixer to beat on medium speed until combined. Use a spatula to scrape down the sides of the bowl as necessary.
  • Sprinkle the salt and flour on top of the mixture. Beat at medium speed until combined.
  • Add raisins. Use a spatula to fold in the raisins.
  • Pour mixture on top of baked crust.
  • Bake for 28-30 minutes or until the edges of the topping start to set. The center will still be slightly jiggly when you remove it from the oven. Cool on the counter for one hour then transfer to the refrigerator to chill for 2 hours. Cut into 16 squares. Enjoy!

Notes

Make sure to line the baking sheet with parchment paper. This will prevent the crust from burning and it will make the squares easier to remove from the pan after they have been baked.
Do not overcook the topping. Cook the topping until the edges are set and the middle is still slightly jiggly. If you overcook the topping, you will miss out on that sweet ooey gooey deliciousness.
Butter Tart Squares can be stored in the fridge in an airtight container or bag for up to five days.
Butter Tart Squares Freeze well. Place tarts in a freezer safe container or bag and freeze up to three months. Thaw in the fridge or at room temperature when ready to eat.

Nutrition

Serving: 1square | Calories: 268kcal | Carbohydrates: 44g | Protein: 3g | Fat: 10g | Saturated Fat: 6g | Polyunsaturated Fat: 1g | Monounsaturated Fat: 3g | Trans Fat: 0.4g | Cholesterol: 58mg | Sodium: 61mg | Potassium: 141mg | Fiber: 1g | Sugar: 27g | Vitamin A: 317IU | Vitamin C: 0.5mg | Calcium: 35mg | Iron: 1mg

Filed Under: Desserts, Recipes

Soft and Chewy Gingerbread Cookies

December 7, 2023 by Christine 2 Comments

Soft and Chewy Gingerbread Cookies are slightly crispy on the outside and soft and chewy on the inside. The warm spices and molasses create that classic gingerbread flavor.

Cookies on a black cooling rack with a white and grey dish towel beside the rack.

Gingerbread cookies have been one of my favorite holiday treats for as long as I can remember. I have fond memories of eating gingerbread cookies and even entire gingerbread houses. The only downfall was the cookies and houses were always hard and I am a soft and chewy kind of girl. These Soft and Chewy Gingerbread Cookies offer the best of both worlds. They have that classic gingerbread flavor but in a soft and chewy cookie form.

Making classic gingerbread cookies can be a lot of work. You have to mix the dough, roll it out flat and use cookie cutters to shape the cookies. These Soft and Chewy Gingerbread Cookies offer that same great flavor in just a fraction of the time. You simply mix the dough and drop the cookies on a baking sheet. No rolling pin or cookie cutters required here.

These Soft and Chewy Gingerbread Cookies will quickly become a holiday baking favorite. If you are looking for other holiday baking recipes try my Skor Fudge or No Bake Cookies.

If you prefer other soft and chewy cookies recipes, try my Caramel Stuffed Chocolate Chip Cookies or Double Chocolate Chip Cookies.

Ingredients

Ingredients measured and laid out on a brown wooden surface.
  • All-Purpose Flour – I used all-purpose flour for this recipe. I haven’t tried this recipe using any other type of flour.
  • Baking Soda – Helps the cookies to rise.
  • Salt – Brings out the flavor of the other ingredients.
  • Cinnamon, Ginger and Nutmeg – Warm spices to help create that gingerbread flavor.
  • Unsalted Butter – Make sure the butter is at room temperature.
  • Granulated Sugar – Adds some sweetness to the cookies.
  • Brown Sugar – Gives the cookies that nice chewy texture.
  • Molasses – I used fancy molasses for this recipe.
  • Eggs – Helps to bind the ingredients together.

See recipe card for quantities.

Instructions

Preheat oven to 350F. Line two large baking sheets with parchment paper.

Flour mixture in a medium size bowl.

In a medium size bowl, add flour, baking soda, salt, cinnamon, ginger and nutmeg. Stir to combine.

Butter and sugar mixture in a large white bowl with an electric mixer leaning on the side of the bowl.

In a large bowl, add softened butter, granulated sugar and brown sugar. Beat with an electric mixture at medium speed until the butter and sugars are mixed well.

Eggs and molasses on top of the dough in a large white bowl.

Add eggs and molasses. Beat with mixer on medium speed until the eggs and molasses have been mixed in. Use a spatula to scrape down the sides of the bowl.

Cookie dough in a large white bowl with an electric mixer leaning on the side of the bowl.

Add half of the flour mixture. Beat at low speed until the flour mixture begins to incorporate into the dough. Increase the speed to medium and continue to beat. Repeat with remaining flour mixture. Scrape down the sides of the bowl with a spatula as necessary.

Dough balls on a metal baking pan lined with parchment paper.

Use a cookie scoop or large spoon to drop cookies dough balls onto prepared baking sheets. Use about 1 1/2 tablespoons of dough for each cookie.

Baked cookies on a metal baking pan lined with parchment paper.

Bake for 10-12 minutes or until the tops of the cookies start to form small cracks. Remove cookies from the oven and let cool for 10 minutes before transferring to a wire rack to cool completely. Makes 30 cookies.

Hint: Make sure to line the baking sheets with parchment paper. This will prevent the bottoms of the cookies from burning.

Cookies on a large white plate with a white and grey dish towel beside the plate.

Substitutions

  • Unsalted Butter – Salted butter can be substituted for the unsalted butter. If you are using salted butter, be sure to omit the salt from the recipe.
  • Molasses – I used fancy molasses for this recipe. You can substitute with other types of molasses if you choose. I have tried cooking molasses but I prefer the taste of fancy molasses because it’s on the sweeter side.

Equipment

Large Non-Stick Baking Pans – I used two large non-stick metal baking pans for this recipe. Feel free to use smaller baking pans but you won’t be able to fit as many cookies on a pan.

Electric Mixer – I used an electric mixer for this recipe. I highly recommend using an electric mixer for this recipe because the cookie dough is quite thick. You can try mixing by hand but you will need some good elbow grease!

Cookie Scoop – I used a cookie scoop for this recipe. Feel free to use a large spoon if you do not have a cookie scoop. Use the spoon to scoop 1 1/2 tablespoons of cookie dough. Gently shape the dough into a ball before placing on prepared baking sheet.

Storage

Soft and Chewy Gingerbread Cookies can be stored in an airtight container or bag for up to three days at room temperature.

Soft and Chewy Gingerbread Cookies freeze well. Place cookies in a freezer safe container or bag and freeze up to three months. Thaw at room temperature when ready to eat.

Top tip

Bake the cookies until small cracks start to form on the tops. The cracks are a sign the cookies are done baking.

FAQ

Do I need to chill the cooking dough before baking?

No! Gingerbread cookie dough does not need to be chilled before baking. This means they can get in your belly that much sooner!

I want to take these cookies to a holiday party. Can I make them in advance?

Yes! Soft and Chewy Gingerbread Cookies stay fresh on the counter for up to three days. Just make sure they are stored in an airtight container or bag. You could also freeze the cookies and remove them from the freezer a couple of hours before serving. This will allow for maximum freshness.

Why aren’t my cookies soft and chewy?

You have baked the cookies for too long. Bake cookies for 10-12 minutes or until the tops of the cookies start to form small cracks.

Related

Looking for other recipes like this? Try these:

Cookies on a black cooling rack with a white and grey dish towel beside the rack.
Print Recipe
5 from 2 votes

Soft and Chewy Gingerbread Cookies

Soft and Chewy Gingerbread Cookies are slightly crispy on the outside and soft and chewy on the inside. The warm spices and molasses create that classic gingerbread flavor.
Prep Time15 minutes mins
Bake Time10 minutes mins
Total Time25 minutes mins
Servings: 30 cookies
Calories: 105kcal
Author: Christine

Ingredients

  • 2 ½ cups all-purpose flour
  • 2 teaspoons baking soda
  • ¼ teaspoon salt
  • 1 teaspoon cinnamon
  • 1 teaspoon ground ginger
  • ¼ teaspoon nutmeg
  • ½ cup unsalted butter room temperature
  • ½ cup granulated sugar
  • ½ cup brown sugar
  • ¼ cup molasses
  • 2 large eggs

Instructions

  • Preheat oven to 350F. Line two large baking sheets with parchment paper.
  • In a medium size bowl, add flour, baking soda, salt, cinnamon, ginger and nutmeg. Stir to combine.
  • In a large bowl, add softened butter, granulated sugar and brown sugar. Beat with an electric mixture at medium speed until the butter and sugars are mixed well.
  • Add eggs and molasses. Beat with mixer on medium speed until the eggs and molasses have been mixed in. Use a spatula to scrape down the sides of the bowl.
  • Add half of the flour mixture. Beat at low speed until the flour mixture begins to incorporate into the dough. Increase the speed to medium and continue to beat. Repeat with remaining flour mixture. Scrape down the sides of the bowl with a spatula as necessary.
  • Use a cookie scoop or large spoon to drop cookies dough balls onto prepared baking sheets. Use about 1 1/2 tablespoons of dough for each cookie.
  • Bake for 10-12 minutes or until the tops of the cookies start to form small cracks. Remove cookies from the oven and let cool for 10 minutes before transferring to a wire rack to cool completely. Makes 30 cookies.

Notes

Make sure to line the baking sheets with parchment paper. This will prevent the bottoms of the cookies from burning.
Bake the cookies until small cracks start to form on the tops. The cracks are a sign the cookies are done baking.
Soft and Chewy Gingerbread Cookies can be stored in an airtight container or bag for up to three days at room temperature.
Soft and Chewy Gingerbread Cookies freeze well. Place cookies in a freezer safe container or bag and freeze up to three months. Thaw at room temperature when ready to eat.

Nutrition

Serving: 1cookie | Calories: 105kcal | Carbohydrates: 17g | Protein: 2g | Fat: 4g | Saturated Fat: 2g | Polyunsaturated Fat: 0.2g | Monounsaturated Fat: 1g | Trans Fat: 0.1g | Cholesterol: 21mg | Sodium: 100mg | Potassium: 64mg | Fiber: 0.3g | Sugar: 9g | Vitamin A: 113IU | Vitamin C: 0.003mg | Calcium: 14mg | Iron: 1mg

Filed Under: Cookies, Recipes

Skor Fudge

November 24, 2023 by Christine Leave a Comment

Skor Fudge is rich, decadent and delicious. The melt in your mouth chocolate mixed with yummy bits of toffee make this a perfect dessert for any occasion.

Pieces of skor fudge on a white piece of parchment paper.

It’s officially holiday baking season and what better way to kick it off then with Skor Fudge! I’ll admit I used to be very intimidated to make fudge because it seemed so complicated. I have learned a lot since that time and I will never go back to buying store bought fudge.

Skor Fudge is really easy to make and the best part is it requires only three ingredients! Simply melt the chocolate and condensed milk, stir in the toffee bits and chill to set the fudge. You will have a rich and decadent dessert that is sure to please any crowd.

If you are looking for other easy no bake recipes, try my No Bake Cookies for another crowd pleasing dessert.

Ingredients

Ingredients measured and laid out on a wooden surface.
  • Milk Chocolate Chips – I used milk chocolate chips for this recipe. I have tried other types of chocolate chips in this recipe and I think milk chocolate chips taste the best.
  • Condensed Milk – I used a low fat variety but feel free to use whatever variety you choose.
  • Toffee Bits – These can be found in the chocolate chip section of the grocery store. I used Chipits brand.

See recipe card for quantities.

Instructions

Line an 8×8 baking pan with parchment paper.

Chocolate chips and condensed milk in a large saucepan.

Add chocolate chips and condensed milk to a large saucepan.

Melted chocolate in a large saucepan.

Stir with a large spoon over medium heat until the chocolate is melted.

Toffee bits on top of melted chocolate in a large saucepan.

Remove pan from heat and add toffee bits.

Melted chocolate and toffee bits in a large saucepan.

Stir until combined.

Fudge mixture in a square pan lined with parchment paper.

Pour mixture into prepared baking pan. Use the back of a large spoon to gently spread the fudge to the sides of the pan.

Fudge in a square baking pan lined with parchment paper.

Chill in the fridge or freezer for 30-60 minutes or until set. The mixture should feel firm to touch. Cut into 25 pieces and enjoy!

Hint: Make sure to line the baking pan with parchment paper. This will make it easy to remove the fudge from the pan once it has set.

Substitutions

  • Milk Chocolate Chips – You can substitute your favorite type of chocolate chip for the milk chocolate chips. I have tested the recipe with semisweet chocolate chips and I personally prefer milk chocolate chips.

Equipment

8×8 Baking Pan – I used an 8×8 baking pan for this recipe. You can also use a 9×9 baking pan. I wouldn’t use anything larger because there won’t be enough fudge to spread around the pan.

Large Saucepan – I used a large non-stick saucepan for this recipe. You can also use a large non-stick pot.

Storage

Skor Fudge can be stored in fridge in an airtight container or bag for up to one week. Simply remove the fudge from the fridge when you are ready to eat it.

Skor Fudge freezes well. Place fudge in a freezer safe container or bag and freeze up to three months. I prefer to keep my fudge in the freezer because it’s very addicting!

Top tip

Do not cut the fudge until it has set. The fudge will be firm to the touch when it is ready to cut.

FAQ

Can i use evaporated milk instead of condensed milk?

No! Condensed milk has a much different consistency than evaporated milk. Condensed milk should be used in this recipe for the best results.

Why is the fudge difficult to cut into pieces?

The fudge hasn’t set yet. The chocolate needs to cool in order for the fudge to set. If you have placed the fudge in the freezer to set, let it sit at room temperature for 10 minutes before cutting.

Related

Looking for other recipes like this? Try these:

Fudge pieces on a white surface.
Print Recipe
5 from 1 vote

Skor Fudge

Skor Fudge is rich, decadent and delicious. The melt in your mouth chocolate mixed with yummy bits of toffee make this a perfect dessert for any occasion.
Prep Time10 minutes mins
Set Time30 minutes mins
Total Time40 minutes mins
Servings: 25
Calories: 173kcal
Author: Christine

Ingredients

  • 3 cups milk chocolate chips
  • 1 can condensed milk 300ml
  • â…“ cups toffee bits

Instructions

  • Line an 8×8 baking pan with parchment paper.
  • Add chocolate chips and condensed milk to a large saucepan.
  • Stir with a large spoon over medium heat until the chocolate is melted.
  • Remove pan from heat and add toffee bits.
  • Stir until combined.
  • Pour mixture into prepared baking pan. Use the back of a large spoon to gently spread the fudge to the sides of the pan.
  • Chill in the fridge or freezer for 30-60 minutes or until set. The mixture should feel firm to touch. Cut into 25 pieces and enjoy!

Notes

Make sure to line the baking pan with parchment paper. This will make it easy to remove the fudge from the pan once it has set.
Do not cut the fudge until it has set. The fudge will be firm to the touch when it is ready to cut.
Skor Fudge can be stored in fridge in an airtight container or bag for up to one week. Simply remove the fudge from the fridge when you are ready to eat it.
Skor Fudge freezes well. Place fudge in a freezer safe container or bag and freeze up to three months. I prefer to keep my fudge in the freezer because it’s very addicting!

Nutrition

Serving: 1piece | Calories: 173kcal | Carbohydrates: 25g | Protein: 1g | Fat: 8g | Saturated Fat: 5g | Polyunsaturated Fat: 0.04g | Monounsaturated Fat: 0.3g | Trans Fat: 0.02g | Cholesterol: 5mg | Sodium: 20mg | Potassium: 63mg | Sugar: 23g | Vitamin A: 76IU | Vitamin C: 0.01mg | Calcium: 56mg | Iron: 0.001mg

Filed Under: Desserts, Recipes

Slow Cooker Apple Cinnamon Oatmeal

November 15, 2023 by Christine Leave a Comment

Slow Cooker Apple Cinnamon Oatmeal is warm, delicious, and nutritious.  With a touch of cinnamon and a slightly chewy texture, it’s the perfect comfort food for the cooler winter months.

A bowl of oatmeal with sliced apples on top in the middle of the photo, with an apple, cinnamon sticks and a spoon surrounding the bowl.

Slow Cooker Apple Cinnamon Oatmeal is one of my go to recipes in the fall and winter months.  It’s great for those slower weekend mornings when you have time to lounge around.  You simply add all the ingredients to the slow cooker and ninety minutes later you will have a warm and delicious breakfast. This recipe works great when you want to enjoy that second cup of coffee in the morning. Your tastebuds will be tantalized as you smell the delicious aroma of the oatmeal as it’s cooking.

Slow Cooker Apple Cinnamon Oatmeal is great for meal prepping.  Simply cook the oatmeal and divide it into portions for future meals.  I like to pair my oatmeal with Greek yogurt for an added protein boost.  You can also drizzle it with maple syrup if you like the added sweetness.

If you are looking for other healthy breakfast recipes, try Pumpkin Pie Overnight Oats or Egg White Breakfast Bites.

Ingredients

Ingredients for Slow Cooker Apple Cinnamon Oatmeal measured and laid out on a wooden surface.
  • Rolled Oats – We are using rolled oats for this recipe.  I use a gluten free variety but you can use whatever type of rolled oats you prefer.
  • Ground Flax Seeds and Chia Seeds – We are adding these for their nutritional value because they give us some great heart healthy fats among other benefits.
  • Cinnamon – Adds a nice warm flavor to the oatmeal.
  • Almond Milk – Helps to give the oatmeal a creamier texture. I used unsweetened vanilla almond milk.
  • Water – Because we need more liquid to cook the oats.
  • Peeled and Shredded Apple – Adds some good flavor and sweetness to the oatmeal.
  • Maple Syrup (Optional) – If you prefer your oats on the sweeter side, I recommend adding the maple syrup.

See recipe card for quantities.

Instructions

Rolled oats, flax seeds, chia seeds and cinnamon in a black slow cooker.

Add rolled oats, ground flax seed, chia seeds and cinnamon to the slow cooker. Stir to combine.

A white and brown liquid in a black slow cooker.

Add almond milk and water. Stir to combine.

Shredded apple on top of the liquid in a black slow cooker.

Add shredded apple and mix well.

Cooked oatmeal in a black slow cooker.

Cook on low for 1 1/2 hours or until the oatmeal looks thick but still has a fair amount of liquid in it. Stir occasionally during cooking. Makes 8 servings, 1/2 cup each.

Hint: Make sure to stir the oats occasionally while they are cooking. This will prevent the oats from sticking to the side of the slow cooker.

Substitutions

  • Rolled Oats – Steel cut oats can be substituted for the rolled oats but you will have to increase the cooking time. I do not recommend substituting quick oats or minute oats because they will be quite soggy due to their quick cooking time.
  • Almond Milk – I used unsweetened vanilla almond milk but you can substitute with any type of plant based or non-plant based milk.
  • Maple Syrup – You can substitute honey 1:1 for the maple syrup.

Equipment

Slow Cooker – I used a 6 quart slow cooker for this recipe.  This recipe could easily fit in a 4 quart slow cooker. 

Storage

Slow Cooker Apple Cinnamon Oatmeal can be stored in the refrigerator for up to five days.  You can simply eat the oatmeal straight from the fridge or you can give it a quick warm in the microwave or on the stovetop. 

Slow Cooker Apple Cinnamon Oatmeal freezes well.  I recommend dividing the oatmeal into portion sizes before freezing so you can pull out one serving at a time.  A muffin pan works well for this.  Simply divide the oatmeal into the muffin pan according to your desired serving sizes.  Place the muffin pan in the freezer.  Once the oatmeal is frozen, remove portions from muffin pan and place in a freezer safe container or bag.  Slow Cooker Apple Cinnamon Oatmeal can be stored in the freezer for up to three months.

Top tip

Do not overcook the oatmeal. If you overcook the oatmeal it will congeal together. Cook until the oatmeal looks thick but still has a fair amount of liquid in it. If you are unsure, do a taste test and turn off the slow cooker when the oatmeal is at your desired consistency.

FAQ

What if I don’t have ground flax seeds or chia seeds?

No problem! You can simply omit them from the recipe and the oatmeal will still taste amazing.

What kind of apple should I use in this recipe?

I used a Gala apple but feel free to use whatever kind of apple you have on hand.

Related

Looking for other recipes like this? Try these:

A bowl of oatmeal with sliced apples on top in the middle of the photo, with an apple, cinnamon sticks and a spoon surrounding the bowl.
Print Recipe
5 from 1 vote

Slow Cooker Apple Cinnamon Oatmeal

Slow Cooker Apple Cinnamon Oatmeal is warm, delicious, and nutritious.  With a touch of cinnamon and a slightly chewy texture, it’s the perfect comfort food for the cooler winter months.
Prep Time5 minutes mins
Cook Time1 hour hr 30 minutes mins
Total Time1 hour hr 35 minutes mins
Servings: 8
Calories: 107kcal
Author: Christine

Ingredients

  • 1 ½ cups rolled oats
  • 2 tablespoons flax seeds ground
  • 2 tablespoons chia seeds
  • 2 teaspoons cinnamon
  • 2 cups almond milk
  • 2 cups water
  • 1 medium apple peel and shredded
  • ¼ cup maple syrup (optional)

Instructions

  • Add rolled oats, ground flax seed, chia seeds and cinnamon to the slow cooker. Stir to combine.
  • Add almond milk and water. Stir to combine.
  • Add shredded apple and mix well.
  • Cook on low for 1 1/2 hours or until the oatmeal looks thick but still has a fair amount of liquid in it. Stir occasionally during cooking. Makes 8 servings, 1/2 cup each.

Notes

Make sure to stir the oats occasionally while they are cooking. This will prevent the oats from sticking to the side of the slow cooker.
Do not overcook the oatmeal. If you overcook the oatmeal it will congeal together. Cook until the oatmeal looks thick but still has a fair amount of liquid in it. If you are unsure, do a taste test and turn off the slow cooker when the oatmeal is at your desired consistency.
Slow Cooker Apple Cinnamon Oatmeal can be stored in the refrigerator for up to five days.  You can simply eat the oatmeal straight from the fridge or you can give it a quick warm in the microwave or on the stovetop. 
Slow Cooker Apple Cinnamon Oatmeal freezes well.  I recommend dividing the oatmeal into portion sizes before freezing so you can pull out one serving at a time.  A muffin pan works well for this.  Simply divide the oatmeal into the muffin pan according to your desired serving sizes.  Place the muffin pan in the freezer.  Once the oatmeal is frozen, remove portions from muffin pan and place in a freezer safe container or bag.  Slow Cooker Apple Cinnamon Oatmeal can be stored in the freezer for up to three months.

Nutrition

Calories: 107kcal | Carbohydrates: 16g | Protein: 3g | Fat: 4g | Saturated Fat: 0.4g | Polyunsaturated Fat: 2g | Monounsaturated Fat: 1g | Trans Fat: 0.004g | Sodium: 87mg | Potassium: 114mg | Fiber: 4g | Sugar: 3g | Vitamin A: 15IU | Vitamin C: 1mg | Calcium: 116mg | Iron: 1mg

Filed Under: Breakfast, Recipes

Caramel Stuffed Chocolate Chip Cookies

November 6, 2023 by Christine Leave a Comment

Caramel Stuffed Chocolate Chip Cookies are soft, chewy and delicious. Each cookie is stuffed with ooey gooey caramel for a rich and decadent treat.

A chocolate chip cookie broken in half with caramel oozing out of the inside in the center with other chocolate chip cookies surrounding the center cookie.

I love a good soft and chewy chocolate chip cookie but I also love a good chewy caramel. I thought why not have the best of both worlds and combine the two to create Caramel Stuffed Chocolate Chip Cookies.

Caramel Stuffed Chocolate Chip Cookies sound like a complicated recipe but they are actually quite easy to make. The best part about these cookies is you don’t even know the caramel is there until you you starting eating one. Your guests will be surprised when they bite into the pure decadent deliciousness of these cookies. You might even decide these cookies are too good to share with others.

Try my Soft and Chewy Chocolate Chip Cookies if you prefer a chocolate chip cookie without the caramel.

Soft and Chewy Oatmeal Raisin Cookies and Double Chocolate Chip Cookies are also great recipes to satisfy those sweet tooth cravings.

Ingredients

Ingredients for caramel stuffed chocolate chips cookies measured and laid out on a wooden surface.
  • Caramels – We will cut these up and use them to stuff the chocolate chip cookies. Make sure to use a good quality caramel for this recipe. Some caramels are tough and chewy and they won’t work well in this recipe. I used Werther’s Soft Creme Caramels and they worked well for creating that ooey gooey caramel texture.
  • All-Purpose Flour – I used all-purpose flour for this recipe. I haven’t made these cookies using any other type of flour.
  • Baking Soda – Helps the cookies to rise.
  • Salt – Brings out the flavor of the other ingredients.
  • Unsalted Butter – I used unsalted butter in this recipe.
  • Granulated Sugar – Adds some sweetness to the cookies.
  • Brown Sugar – Helps to give the cookies that nice and chewy texture.
  • Eggs – Helps to bind the other ingredients together.
  • Vanilla – Adds some flavor.
  • Chocolate Chips– I used semi-sweet chocolate chips for this recipe.

See recipe card for quantities.

Instructions

Preheat oven to 350F. Line two large baking sheets with parchment paper.

Melted butter in a small white bowl.

Melt butter in the microwave or on the stovetop. Set aside.

Cut up caramels on a white plate.

Prepare the caramels. Cut caramels in half using a knife or scissors. If the caramels are soft enough you can use your hands to break them in half.

Dry ingredients in a white medium size bowl with a metal whisk leaning on the side of the bowl.

In a medium size bowl, combine flour, baking soda and salt. Whisk to combine.

Batter in a large white bowl with an electric mixer leaning on the side of the bowl.

In a large bowl, add melted butter, granulated sugar and brown sugar. Beat with an electric mixture at medium speed until the butter and sugars are mixed well.

Eggs and vanilla on top of the batter in a large white bowl.

Add eggs and vanilla. Beat with mixer on medium speed until the eggs and vanilla have been mixed in. Use a spatula to scrape down the sides of the bowl.

Cookie dough in a large white bowl.

Add half of the flour mixture. Beat at low speed until the flour mixture begins to incorporate into the dough. Increase the speed to medium and continue to beat. Repeat with remaining flour mixture. Use a spatula to scrape down the sides of the bowl as necessary.

Cookie dough in a large white bowl with a blue spatula leaning on the side of the bowl.

Add chocolate chips. Use a spatula to fold in the chocolate chips. The mixture will be quite thick so you will have to use some good elbow grease here.

Flattened cookie dough disc on an open hand.

Use a cookie scoop or a spoon to scoop up approximately two tablespoons of the cookie dough. Shape into a circle and then flatten into a disc.

Flattened cookie dough disc with a caramel in the center on an open hand.

Place a caramel into the center of the disc.

Cookie dough ball on a open hand.

Gently shape the dough around the caramel. Repeat with remaining dough and caramels.

Cookie dough balls on a baking sheet lined with parchment paper.

Drop cookie dough balls onto prepared baking sheet.

Baked cookies on a cookie sheet lined with parchment paper.

Bake for 12-14 minutes or until the tops of the cookies start to turn golden. Remove cookies from the oven and let cool for 10 minutes before transferring to a wire rack to cool completely. Makes 24 cookies.

Hint: Make sure to line the baking sheets with parchment paper because this will help to prevent the bottoms of the cookies from burning.

Substitutions

  • Unsalted Butter – You can substitute salted butter for the unsalted butter but be sure to omit the salt from the recipe.
  • Chocolate Chips – I used semi-sweet chocolate chips for this recipe but feel free to use whatever type of chocolate chip you have on hand.

Equipment

Large Non-Stick Baking Pans – I used two large non-stick metal baking pans for this recipe. You can use smaller baking pans but you won’t be able to fit as many cookies on a pan.

Electric Mixer – I used an electric mixer for this recipe. I highly recommend using an electric mixer for this recipe because the cookie dough is quite thick. You can try mixing by hand but you will need some good elbow grease!

Storage

Caramel Stuffed Chocolate Chip Cookies can be stored in an airtight container or bag for up to three days at room temperature.

Caramel Stuffed Chip Cookies freeze well. Place cookies in a freezer safe container or bag and freeze up to three months. Thaw at room temperature when ready to eat.

Top tip

The quality of the caramel matters! Some caramels are quite tough and chewy. We are going for an ooey gooey caramel center so soft caramels work the best. I like using Werther’s Soft Creme Caramels because they have a melt in your mouth like texture.

FAQ

Why are my cookies hard?

You have baked the cookies too long. Bake the cookies for 12-14 minutes or until the tops start to turn golden. The cookies will look slightly underbaked when you remove them from the oven but they will continue baking on the pan.

Do I have to chill the dough before baking?

No! Caramel Stuffed Chocolate Chip Cookie dough does not require chilling before baking. That means these delicious cookies can be in your mouth that much sooner!

How do I keep the cookies soft after baking?

Store the cookies in an airtight container or bag and they will stay soft.

Related

Looking for other recipes like this? Try these:

A cookie split in half in the center with chocolate chips and cookies around the outside.
Print Recipe
5 from 1 vote

Caramel Stuffed Chocolate Chip Cookies

Caramel Stuffed Chocolate Chip Cookies are soft, chewy and delicious. Each cookie is stuffed with ooey gooey caramel for a rich and decadent treat.
Prep Time15 minutes mins
Bake Time10 minutes mins
Total Time25 minutes mins
Servings: 24
Calories: 194kcal
Author: Christine

Ingredients

  • 12 caramels
  • 2 ½ cups all-purpose flour
  • 2 teaspoons baking soda
  • ¼ teaspoon salt
  • ½ cup butter unsalted
  • ¼ cup granulated sugar
  • 1 cup brown sugar
  • 2 large eggs
  • 2 teaspoons vanilla
  • 1 cup chocolate chips

Instructions

  • Preheat oven to 350F. Line two large baking sheets with parchment paper.
  • Melt butter in the microwave or on the stovetop. Set aside.
  • Prepare the caramels. Cut caramels in half using a knife or scissors. If the caramels are soft enough you can use your hands to break them in half.
  • In a medium size bowl, combine flour, baking soda and salt. Whisk to combine.
  • In a large bowl, add melted butter, granulated sugar and brown sugar. Beat with an electric mixture at medium speed until the butter and sugars are mixed well.
  • Add eggs and vanilla. Beat with mixer on medium speed until the eggs and vanilla have been mixed in. Use a spatula to scrape down the sides of the bowl.
  • Add half of the flour mixture. Beat at low speed until the flour mixture begins to incorporate into the dough. Increase the speed to medium and continue to beat. Repeat with remaining flour mixture. Use a spatula to scrape down the sides of the bowl as necessary.
  • Add chocolate chips. Use a spatula to fold in the chocolate chips.
  • Use a cookie scoop or a spoon to scoop up approximately two tablespoons of the cookie dough. Shape into a circle and then flatten into a disc.
  • Place a caramel into the center of the disc.
  • Gently shape the dough around the caramel. Repeat with remaining dough and caramels.
  • Drop cookie dough balls onto prepared baking sheet.
  • Bake for 12-14 minutes or until the tops of the cookies start to turn golden. Remove cookies from the oven and let cool for 10 minutes before transferring to a wire rack to cool completely. Makes 24 cookies.

Notes

Make sure to line the baking sheets with parchment paper because this will help to prevent the bottoms of the cookies from burning.
Caramel Stuffed Chocolate Chip Cookies can be stored in an airtight container or bag for up to three days at room temperature.
Caramel Stuffed Chip Cookies freeze well. Place cookies in a freezer safe container or bag and freeze up to three months. Thaw at room temperature when ready to eat.
The quality of the caramel matters! Some caramels are quite tough and chewy. We are going for an ooey gooey caramel center so soft caramels work the best. I like using Werther’s Soft Creme Caramels because they have a melt in your mouth like texture.

Nutrition

Serving: 1cookie | Calories: 194kcal | Carbohydrates: 29g | Protein: 3g | Fat: 8g | Saturated Fat: 4g | Polyunsaturated Fat: 1g | Monounsaturated Fat: 2g | Trans Fat: 0.2g | Cholesterol: 26mg | Sodium: 168mg | Potassium: 87mg | Fiber: 1g | Sugar: 17g | Vitamin A: 147IU | Vitamin C: 0.02mg | Calcium: 25mg | Iron: 1mg

Filed Under: Cookies, Recipes

Slow Cooker Chicken Noodle Soup

October 30, 2023 by Christine Leave a Comment

Slow Cooker Chicken Noodle Soup is warm, hearty and delicious. The combination of slow cooked chicken, vegetables and spices make this soup the perfect comfort food.

Chicken noodle soup in white bowl on a wooden surface with parsley and a piece of bread above the bowl and a spoon on the right side of the bowl.

It’s fall here in Northwestern Ontario, Canada and the days and nights are quite chilly. Cool weather has me craving comfort foods. I love warming up a nice hearty bowl of soup after an outdoor adventure in the cool weather.

Slow Cooker Chicken Noodle Soup is super easy to make and requires minimal supervision while it’s cooking. Simply place all of the ingredients in the slow cooker with the exception of the egg noodles. Cover and cook on high for 4 hours. Remove lid, dice the cooked chicken and add the egg noodles. In another 10 minutes you will have a warm and hearty soup to warm you up on those cool days or simply when you need a bowl of comfort food. This recipe works great for meal prepping and it pairs well with Homemade Garlic Butter Breadsticks.

If you are looking for other comfort foods try my Slow Cooker Beef and Barley Soup for another warm and hearty meal.

Ingredients

Ingredients for slow cooker chicken noodle soup laid out on a wooden surface.
  • Boneless/Skinless Chicken Breasts – We are using boneless/skinless chicken breasts for this recipe. You can also use boneless/skinless chicken thighs if you prefer.
  • Carrots and Celery – These will be chopped up and added to the soup.
  • Onions and Garlic – To add some good flavor to the soup.
  • Parsley, Basil, Salt, Pepper, Rosemary and Bay Leaves – Spices to add even more flavor to the soup. You can choose to omit the salt for a lower sodium soup.
  • Chicken Broth – I used a no salt added variety. Feel free to use whatever chicken broth you have on hand.
  • Egg Noodles – Because you can’t have chicken noodle soup without the noodles!

See recipe card for quantities.

Instructions

Cut up vegetables on a white cutting board with a knife on the top left of the cutting board.

Peel and chop the carrots. Wash and slice the celery. Dice the onion into small pieces and mince the garlic.

Chicken breasts in the bottom of a slow cooker.

Add chicken breasts to the bottom of the slow cooker.

Vegetables and spices in a black slow cooker.

Add carrots, celery, onion and garlic. Sprinkle with spices.

Uncooked chicken noodle soup in a black slow cooker.

Pour chicken broth over vegetables. Cook on high for 4 hours or low for 6 hours.

Cut up chicken pieces on a white plate.

Remove chicken from the slow cooker. Dice the chicken and then add it back to the soup mixture.

Chicken noodle soup in a black slow cooker on a wooden surface.

Add eggs noodles. Cook for an additional 8-10 minutes or until the egg noodles are tender. Serve immediately. Makes 6 servings, 1 1/2 cups each.

Hint: Remove the insert from the slow cooker immediately after the noodles are tender and serve soup immediately. This will prevent the noodles from going soggy.

Substitutions

  • Boneless/Skinless Chicken Breasts – You can use boneless/skinless chicken thighs for this recipe if you do not have boneless/skinless chicken breasts on hand.
  • Eggs Noodles – Feel free to substitute the egg noodles with what ever type of noodle you prefer.

Variations

  • Spicy – add 1/4 – 1/2 teaspoon of cayenne pepper or red chili flakes if you like a little heat!

Equipment

Slow Cooker – I used a 6 quart slow cooker for this recipe. I do not recommend using a smaller slow cooker as the 6 quart slow cooker was quite full. If you do not have a 6 quart slow cooker, you could cut the recipe in half.

Storage

Slow Cooker Chicken Noodle Soup can be stored in an airtight container in the fridge for up to three days. Simply reheat on the stovetop or in the microwave when ready to eat.

Slow Cooker Chicken Noodle Soup freezes well. Place soup in a freezer safe container and freeze up to three months. I like to portion the soup into serving sizes before freezing it so I can take out one serving at a time.

Top tip

Cooking times for the noodles will vary with the type of noodle used. Cook just until the noodles are tender or your desired consistency.

FAQ

Can I use frozen chicken breasts for this recipe?

Absolutely! Frozen chicken breasts work well in this recipe. Just make sure the chicken reaches an internal temperature of 165F.

Related

Looking for other recipes like this? Try these:

Chicken noodle soup in white bowl on a wooden surface with parsley and a piece of bread above the bowl and a spoon on the right side of the bowl.
Print Recipe
5 from 1 vote

Slow Cooker Chicken Noodle Soup

Slow Cooker Chicken Noodle Soup is warm, hearty and delicious. The combination of slow cooked chicken, vegetables and spices make this soup the perfect comfort food.
Prep Time15 minutes mins
Cook Time4 hours hrs
Total Time4 hours hrs 15 minutes mins
Servings: 6
Calories: 157kcal
Author: Christine

Ingredients

  • 1 pound boneless skinless chicken breasts about 2 medium size breasts
  • 2 cups carrots about 3-4 medium size carrots
  • 1 cup celery about 2-3 medium size stalks
  • 1 small onion
  • 3 cloves garlic
  • 2 bay leaves
  • 1 teaspoon parsley
  • 1 teaspoon basil
  • ½ teaspoon salt
  • ½ teaspoon rosemary
  • ½ teaspoon ground black pepper
  • 8 cups chicken broth
  • 1 cup egg noodles uncooked

Instructions

  • Peel and chop the carrots. Wash and slice the celery. Dice the onion into small pieces and mince the garlic.
  • Add chicken breasts to the bottom of the slow cooker.
  • Add carrots, celery, onion and garlic. Sprinkle with spices.
  • Pour chicken broth over vegetables. Cook on high for 4 hours or low for 6 hours.
  • Remove chicken from the slow cooker. Dice the chicken and then add it back to the soup mixture.
  • Add eggs noodles. Cook for an additional 8-10 minutes or until the egg noodles are tender. Serve immediately. Makes 6 servings, 1 ½ cups each.

Notes

Remove the insert from the slow cooker immediately after the noodles are tender and serve soup immediately. This will prevent the noodles from going soggy.
Cooking times for the noodles will vary with the type of noodle used. Cook just until the noodles are tender or your desired consistency.
Slow Cooker Chicken Noodle Soup can be stored in an airtight container in the fridge for up to three days. Simply reheat on the stovetop or in the microwave when ready to eat.
Slow Cooker Chicken Noodle Soup freezes well. Place soup in a freezer safe container and freeze up to three months.

Nutrition

Serving: 1.5cups | Calories: 157kcal | Carbohydrates: 12g | Protein: 20g | Fat: 3g | Saturated Fat: 1g | Polyunsaturated Fat: 0.5g | Monounsaturated Fat: 1g | Trans Fat: 0.01g | Cholesterol: 60mg | Sodium: 1489mg | Potassium: 562mg | Fiber: 2g | Sugar: 4g | Vitamin A: 7242IU | Vitamin C: 5mg | Calcium: 50mg | Iron: 1mg

Filed Under: Recipes

Roasted Pumpkin Seeds

October 26, 2023 by Christine Leave a Comment

Roasted Pumpkin Seeds are crunchy, savory and delicious. They are a great alternative to processed snacks and they can be enjoyed at any time of day.

Roasted pumpkin seeds in a small white bowl, seeds scattered around the bowl and part of a pumpkin in the background.

It’s October and Halloween is quickly approaching and that means it’s time to carve pumpkins! I love carving pumpkins and I am excited to try out some new pumpkin carving patterns this year. Of course with carving pumpkins comes loads of pumpkin seeds. Instead of throwing away those seeds, try these easy Roasted Pumpkin Seeds.

Roasted Pumpkin Seeds are really easy to make. Simply wash and dry the seeds, sprinkle them with spices and bake them in the oven. You will have a super delicious snack in less than 20 minutes!

Ingredients

Ingredients for roasted pumpkin seeds in small white bowls on a wooden surface.
  • Pumpkin Seeds – Make sure the pumpkin seeds have been washed and dried before using.
  • Seasoning Salt, Garlic Powder and Paprika – Spices to flavor the seeds.

See recipe card for quantities.

Instructions

Preheat oven to 375F. Line a small baking pan with parchment paper.

Pumpkin seeds in a metal colander with a white paper towel underneath the colander.

Wash pumpkin seeds. I like to place the seeds in a strainer to wash them because the strainer will catch all of that gooey pumpkin that is attached to the seeds.

Pumpkin seeds placed on a paper towel to dry.

Place pumpkin seeds on a clean dish towel or paper towels and pat them dry. Transfer seeds to a medium size bowl.

Spices sprinkled on top of the seeds in a small white bowl.

Sprinkle seeds with spices. Use a spoon to mix the seeds. Keep mixing until the spices are evenly distributed on the seeds. Transfer seeds to prepared baking pan.

Roasted pumpkin seeds on a pan lined with parchment paper.

Bake seeds for 12 -15 minutes or until the seeds turn golden. Remove seeds from the oven. Let them cool slightly before serving. Makes 1 cup of pumpkin seeds or 8 servings, 2 tablespoons each.

Hint: Make sure to cook the seeds until they turn golden brown. This will ensure they have a good crunch to them!

Substitutions

  • Seasoning Salt – Any kind of salt can be substituted for the seasoning salt.

Variations

  • Spicy – Add 1/4 teaspoon of cayenne pepper if you like some heat!

Equipment

Strainer – I used a metal strainer for this recipe. If you do not have a strainer you can simply place the pumpkin seeds in a bowl of water to wash them.

Storage

Roasted Pumpkin Seeds can be stored in an airtight container or bag on the counter for up to two weeks.

I do not recommend freezing Roasted Pumpkin Seeds.

Top tip

Do not overbake the seeds. If you bake the seeds too long they will be dry and brittle.

FAQ

Why aren’t my pumpkin seeds crunchy?

You haven’t baked the seeds long enough. Bake seeds for 12-15 minutes or until they start to turn golden.

What if I have more than one cup of pumpkin seeds?

You can easily double or triple the recipe and enjoy more delicious roasted pumpkin seeds!

Related

Looking for other recipes like this? Try these:

Roasted pumpkin seeds in a small white bowl, seeds scattered around the bowl and part of a pumpkin in the background.
Print Recipe
5 from 1 vote

Roasted Pumpkin Seeds

Roasted Pumpkin Seeds are crunchy, savory and delicious. They are a great alternative to processed snacks and they can be enjoyed at any time of day.
Prep Time5 minutes mins
Bake Time15 minutes mins
Total Time20 minutes mins
Servings: 8
Calories: 46kcal
Author: Christine

Ingredients

  • 1 cup pumpkin seeds raw
  • ½ teaspoon seasoning salt
  • ½ teaspoon garlic powder
  • ¼ teaspoon paprika

Instructions

  • Wash pumpkin seeds. I like to place the seeds in a strainer to wash them because the strainer will catch all of that gooey pumpkin that is attached to the seeds.
  • Place pumpkin seeds on a clean dish towel or paper towels and pat them dry. Transfer seeds to a medium size bowl.
  • Sprinkle seeds with spices. Use a spoon to mix the seeds. Keep mixing until the spices are evenly distributed on the seeds. Transfer seeds to prepared baking pan.
  • Bake seeds for 12 -15 minutes or until the seeds turn golden. Remove seeds from the oven. Let them cool slightly before serving. Makes 1 cup of pumpkin seeds or 8 servings, 2 tablespoons each.

Notes

Make sure to cook the seeds until they turn golden brown. This will ensure they have a good crunch to them!
Do not overbake the seeds. If you bake the seeds too long they will be dry and brittle.
Roasted Pumpkin Seeds can be stored in an airtight container or bag on the counter for up to two weeks.
I do not recommend freezing Roasted Pumpkin Seeds.

Nutrition

Calories: 46kcal | Carbohydrates: 1g | Protein: 2g | Fat: 4g | Saturated Fat: 1g | Polyunsaturated Fat: 2g | Monounsaturated Fat: 1g | Trans Fat: 0.01g | Sodium: 146mg | Potassium: 68mg | Fiber: 1g | Sugar: 0.1g | Vitamin A: 32IU | Vitamin C: 0.2mg | Calcium: 4mg | Iron: 1mg

Filed Under: Healthy Snacks, Recipes

Pumpkin Cheesecake

October 2, 2023 by Christine Leave a Comment

Pumpkin Cheesecake is creamy, rich and decadent. The combination of cream cheese, pumpkin and spices make it the perfect fall dessert.

Pumpkin Cheesecake topped with whipped cream and drizzled with caramel on a white plate with a silver pie lifter on the left side and a pumpkin on the right side.

Cheesecake is one of my favorite desserts. I have always shied away from baking a cheesecake because there are so many steps and it seems very complicated. I mean come on…you have to give the cheesecake a water bath? Say what???

I brought this Pumpkin Cheesecake to a fall dinner last year. The rave reviews started pouring in and I knew I had made a winner. Many people have requested the recipe so this post is long overdue….sorry!

With a gingersnap crust, pumpkin cheesecake is a delectable dessert and it tastes even better with dollop of whipped cream on top.

A piece of pumpkin cheesecake with whipped cream and caramel drizzled over the top on a white plate in the foreground with a pumpkin and fork in the background.

If you are looking for other recipes that use pumpkin because after all it is pumpkin season, try my Pumpkin Pie Overnight Oats or my Vegan Pumpkin Muffins.

Ingredients

Ingredients for pumpkin cheesecake measured and laid out on a wooden surface.
  • Gingersnap Cookies – Finely ground gingersnap cookies are used in the crust.
  • Unsalted Butter – Melted and mixed with the gingersnap crumbs to create the crust.
  • Cream Cheese – Use regular full fat cream cheese bricks. Do not use the spreadable kind. Make sure the cream cheese has been brought to room temperature before using.
  • Brown Sugar – Used to sweeten the cheesecake.
  • Eggs – Helps to bind the ingredients together.
  • Canned Pumpkin – Make sure to use regular canned pumpkin and not pumpkin pie filling.
  • Sour Cream – Use regular full fat sour cream. I used 14% MF.
  • Pumpkin Pie Spice – This can be found in the spice section of the grocery store.
  • Cinnamon – Adds a nice warm flavor.
  • Vanilla – Adds more flavor.
  • Flour – Gives the cheesecake a slightly cake like texture.
  • Whipped Cream, Caramel Sauce (Optional) – You can top the cheesecake with whipped cream and drizzle with caramel sauce if you want.

See recipe card for quantities.

Instructions

Preheat oven to 350F. Prepare the pan for the water bath.

A springform pan with aluminum foil covering the outside of the pan.

Wrap the bottom and sides of a 9 inch springform pan with two layers of heavy duty aluminum foil. I recommend using heavy duty foil as the sheets are wider than standard aluminum foil. Trim the tops of the foil if necessary. Make sure there are no holes in the foil. Grease the inside of the springform pan. I used olive oil cooking spray and then spread it around with a paper towel to ensure all of the surfaces were well greased.

Gingersnap crumbs in a medium size white bowl.

Place gingersnaps in a food processor and pulse until the cookies resemble fine crumbs. Transfer gingersnap crumbs to a medium size bowl.

Gingersnap crumb mixture in a medium size white bowl.

Melt butter in the microwave or on the stovetop. Add melted butter to gingersnap crumbs and mix with a fork until well combined.

Gingersnap crust in a springform pan with foil on the outside of the pan.

Transfer gingersnap mixture to the bottom of the springform pan. Use your hands or the bottom of a measuring cup to firmly press the mixture down and partially up the sides of the pan. Bake for 10 minutes. Remove from oven and set aside to cool.

Ingredients for cheesecake batter in a large white bowl.

Set oven temperature to 325F. In a large bowl, combine cream cheese, brown sugar, eggs, canned pumpkin, sour cream, pumpkin pie spice, cinnamon, vanilla and flour.

Cheesecake batter in a large white bowl.

Use an electric mixer to beat until well combined. Use a spatula to scrape down the sides of the bowl as necessary. There shouldn’t be any lumps in the batter.

Cheesecake batter in a springform pan covered with foil on the outside of the pan.

Pour mixture on top of cooled gingersnap crust. Smooth the top with the back of a spoon.

Unbaked cheesecake in a springform pan has been placed in a large foil baking pan.

Prepare the water bath. Place the cheesecake into a pan big enough to allow the springform pan to sit flat. Pour hot water into the pan. The water should be about one inch up the side of the springform pan.

Bake cheesecake for 1.5 hours. Do not open the oven while the cheesecake is baking. Turn the oven off and allow the cheesecake to sit in the oven for another hour. The slow cooking and cooling time is essential to prevent the cheesecake from cracking.

Remove cheesecake from oven and let it rest on the counter until it comes to room temperature. Cover with plastic wrap. Transfer cheesecake to the fridge and let sit overnight. Top with whipped cream and drizzle with caramel sauce if desired. Use a knife to cut cheesecake into slices. Makes 16 slices.

Hint: Don’t skip the water bath! The water bath helps to prevent the cheesecake from cracking.

Substitutions

  • Gingersnap Cookies – Graham crackers or graham crumbs can be substituted for the gingersnap cookies.
  • Canned Pumpkin – Fresh pumpkin puree can be substituted for the canned pumpkin.

Equipment

Springform Pan – Use a springform pan for this recipe for two reasons:

1. The sides of the pan are higher on a springform pan than a regular cake pan and this is necessary because the cheesecake will be quite tall.

2. The sides of the pan pop off making it super easy to slice the cheesecake. I used a 9 inch springform pan.

Food Processer – A food processor is used to make the gingersnap crumbs. If you do not have a food processor, you can substitute graham crumbs for the gingersnap crumbs.

Storage

Pumpkin Cheesecake can be stored in the refrigerator for up to three days. Remove from the fridge when ready to eat.

Pumpkin Cheesecake freezes well. Slice cheesecake and wrap individual slices in plastic wrap or foil before placing in a freezer safe container or bag. Freeze up to three months. Thaw in the fridge or at room temperature when ready to eat.

Top tip

Do not open the oven while the cheesecake is baking! The slow cooking and cooling time will keep the cheesecake from cracking.

FAQ

Can I bake this cheesecake in advance?

Yes! The cheesecake can be stored in the fridge for up to three days before serving.

What if I can’t find gingersnap cookies in the store?

No problem! Use graham crackers or crumbs instead of the gingersnap cookies.

Why are there lumps in my batter?

The cream cheese is too cold. Make sure the cream cheese is at room temperature before using.

Related

Looking for other recipes like this? Try these:

Pumpkin Cheesecake topped with whipped cream and drizzled with caramel on a white plate with a silver pie lifter on the left side and a pumpkin on the right side.
Print Recipe
5 from 1 vote

Pumpkin Cheesecake

Pumpkin Cheesecake is creamy, rich and decadent. The combination of cream cheese, pumpkin and spices make it the perfect fall dessert.
Prep Time30 minutes mins
Cook Time2 hours hrs 30 minutes mins
Refrigeration Time8 hours hrs
Total Time11 hours hrs
Servings: 16
Calories: 370kcal
Author: Christine

Ingredients

  • 1 ½ cups gingersnap crumbs about 18 gingersnap cookies
  • 6 tablespoons butter
  • 4 packages cream cheese room temperature
  • 1 cup brown sugar
  • 4 large eggs
  • 1 ½ cups canned pumpkin
  • â…“ cup sour cream
  • 2 teaspoons pumpkin pie spice
  • 1 teaspoon cinnamon
  • 1 teaspoon vanilla
  • 1 tablespoon all-purpose flour
  • Whipped cream optional
  • Caramel sauce optional

Instructions

  • Preheat oven to 350F.
  • Prepare the pan for the water bath. Wrap the outside of a 9 inch springform pan with two layers of heavy duty aluminum foil. Grease the bottom and sides of the springform pan.
  • Place gingersnaps in a food processor and pulse until the cookies resemble fine crumbs. Transfer gingersnap crumbs to a medium size bowl.
  • Melt butter in the microwave or on the stovetop. Add melted butter to gingersnap crumbs and mix with a fork until well combined.
  • Transfer gingersnap mixture to the bottom of the springform pan. Use your hands or the bottom of a measuring cup to firmly press the mixture down and partially up the sides of the pan.
  • Bake for 10 minutes. Remove from oven and set aside to cool.
  • Set oven temperature to 325F. In a large bowl, combine cream cheese, brown sugar, eggs, canned pumpkin, sour cream, pumpkin pie spice, cinnamon, vanilla and flour.
  • Use an electric mixer to beat until well combined. Use a spatula to scrape down the sides of the bowl as necessary. There shouldn't be any lumps in the batter.
  • Pour mixture on top of cooled gingersnap crust. Smooth the top with the back of a spoon.
  • Prepare the water bath. Place the cheesecake into a pan big enough to allow the springform pan to sit flat. Pour hot water into the pan. The water should be about one inch up the side of the springform pan.
  • Bake cheesecake for 1.5 hours. Do not open the oven while the cheesecake is baking. Turn the oven off and allow the cheesecake to sit in the oven for another hour.
  • Remove cheesecake from oven and let it rest on the counter until it comes to room temperature. Cover with plastic wrap.
  • Transfer cheesecake to the fridge and let sit overnight. Top with whipped cream and drizzle with caramel sauce if desired. Use a knife to cut cheesecake into slices. Makes 16 slices.

Notes

I highly recommend you read the entire blog post for more detailed instructions if this is your first time making this recipe.
Don’t skip the water bath! The water bath helps to prevent the cheesecake from cracking.
Do not open the oven while the cheesecake is baking! The slow cooking and cooling time will keep the cheesecake from cracking.
Pumpkin Cheesecake can be stored in the refrigerator for up to three days. Remove from the fridge when ready to eat.
Pumpkin Cheesecake freezes well. Slice cheesecake and wrap individual slices in plastic wrap or foil before placing in a freezer safe container or bag. Freeze up to three months. Thaw in the fridge or at room temperature when ready to eat.

Nutrition

Serving: 1slice | Calories: 370kcal | Carbohydrates: 28g | Protein: 6g | Fat: 27g | Saturated Fat: 15g | Polyunsaturated Fat: 1g | Monounsaturated Fat: 7g | Trans Fat: 0.2g | Cholesterol: 118mg | Sodium: 294mg | Potassium: 204mg | Fiber: 1g | Sugar: 19g | Vitamin A: 4563IU | Vitamin C: 1mg | Calcium: 97mg | Iron: 1mg

Filed Under: Desserts, Recipes

Pumpkin Pie Overnight Oats

September 26, 2023 by Christine Leave a Comment

Pumpkin Pie Overnight Oats are healthy and delicious. They come together in a breeze and they taste just like pumpkin pie.

A glass jar of overnight oats in the foreground and another jar of oats and a pumpkin in the background.

Pumpkin season is well under way so it’s a great time to share the recipe for these Pumpkin Pie Overnight Oats. If you know me well, you know I absolutely love pumpkin pie. I could eat a piece every day if I were given the opportunity. I could even eat it for breakfast because I love it that much. Pumpkin Pie Overnight Oats are a quick and healthy breakfast and they taste like you are eating a piece of pumpkin pie!

Pumpkin Pie Overnight Oats are really easy to make. Simply mix all of the ingredients in a bowl or jar, cover and refrigerate overnight. This recipe is perfect for meal prepping and it’s a great grab and go breakfast or snack when you are in a rush.

If you love overnight oat recipes, try my Strawberry Overnight Oats for another quick and healthy breakfast idea.

Ingredients

Ingredients for Pumpkin Pie Overnight Oats measured and laid out on a wooden surface.
  • Rolled Oats – Also known as old fashioned oats. Rolled oats are the best type of oats to use for this recipe.
  • Chia Seeds – Adds some heart healthy fats to this recipe.
  • Pumpkin Pie Spice – Helps the oats to taste just like pumpkin pie!
  • Almond Milk – I used unsweetened vanilla almond milk.
  • Canned Pumpkin – Make sure to use canned pumpkin and not pumpkin pie filling.
  • Maple Syrup – Used to sweeten the oats.

See recipe card for quantities.

Instructions

Oats, chia seeds and pumpkin pie spice in a glass jar.

Add rolled oats, chia seeds and pumpkin pie spice to a small bowl or jar. Stir to combine.

Oat mixture in a clear glass jar with a scoop of pumpkin sitting on top of the mixture.

Add almond milk and canned pumpkin. Stir to combine.

All ingredients mixed in a clear glass jar.

Add 1 teaspoon of maple syrup and stir to combine. Optional: Add an extra teaspoon of maple syrup if you prefer sweeter oats.

A green and white checkered lid on top of the glass jar.

Put lid on jar or cover bowl with plastic wrap or the cover of your choosing. Refrigerate overnight. Makes 1 serving.

Hint: Make sure to cover the oats before putting them in the fridge to maximize their freshness.

Substitutions

  • Rolled Oats – Rolled oats work the best for this recipe. You can substitute quick oats but the consistency won’t be quite the same. Do not use steel cut oats for this recipe. Use certified gluten-free oats to keep this recipe gluten free.
  • Almond Milk – Any type of milk can be substituted for the almond milk.

Equipment

Pumpkin Pie Overnight Oats are super easy to make with limited equipment required. Just grab a small bowl or jar, measuring cups and spoons and you are good to go!

Storage

Overnight Oats can be stored in the fridge for up to three days. When ready to eat, remove from the fridge and enjoy.

I do not recommend freezing overnight oats.

Top tip

Be sure to let the oats sit overnight so the oats and the chia seeds have a chance to absorb the milk.

FAQ

Do you have to use rolled oats for this recipe?

Rolled oats work the best in this recipe but you can substitute quick oats in a pinch. See the substitutions section above for further tips.

Do I actually have to let the oats sit overnight before I eat them?

No! Just make sure they sit for 8 hours so the oats and chia seeds can soak up the liquid.

How many servings does this recipe make?

I designed this recipe to make one serving but you can easily double, triple, etc. the recipe to make the desired amount of servings you choose.

Related

Looking for other recipes like this? Try these:

Print Recipe
5 from 1 vote

Pumpkin Pie Overnight Oats

Pumpkin Pie Overnight Oats are healthy and delicious. They come together in a breeze and they taste just like pumpkin pie.
Prep Time5 minutes mins
Refrigeration Time8 hours hrs
Servings: 1
Calories: 184kcal
Author: Christine

Ingredients

  • â…“ cup rolled oats
  • 2 teaspoons chia seeds
  • ¼ teaspoon pumpkin pie spice
  • â…“ cup almond milk
  • 2 tablespoons canned pumpkin
  • 1-2 teaspoons maple syrup

Instructions

  • Add rolled oats, chia seeds and pumpkin pie spice to a small bowl or jar. Stir to combine.
  • Add almond milk and canned pumpkin. Stir to combine.
  • Add 1 teaspoon of maple syrup and stir to combine. Optional: Add an extra teaspoon of maple syrup if you prefer sweeter oats.
  • Put lid on jar or cover bowl with plastic wrap or the cover of your choosing. Refrigerate overnight. Makes 1 serving.

Notes

Make sure to cover the oats before putting them in the fridge to maximize their freshness.
Be sure to let the oats sit overnight so the oats and the chia seeds have a chance to absorb the milk.
Overnight Oats can be stored in the fridge for up to three days. When ready to eat, remove from the fridge and enjoy.
I do not recommend freezing overnight oats.

Nutrition

Serving: 1bowl | Calories: 184kcal | Carbohydrates: 30g | Protein: 6g | Fat: 5g | Saturated Fat: 1g | Polyunsaturated Fat: 3g | Monounsaturated Fat: 1g | Trans Fat: 0.01g | Sodium: 114mg | Potassium: 211mg | Fiber: 7g | Sugar: 6g | Vitamin A: 4675IU | Vitamin C: 2mg | Calcium: 183mg | Iron: 2mg

Filed Under: Breakfast, Recipes

Vegan Pumpkin Muffins

September 18, 2023 by Christine Leave a Comment

Vegan Pumpkin Muffins are soft, fluffy and moist. They are packed full of warm spices and that classic pumpkin flavor.

A vegan pumpkin muffin with raisins sprinkled around it on a white cutting board in the foreground with two vegan muffins and a pumpkin in the background.

It’s fall here in Northwestern Ontario, Canada and that means it’s pumpkin season! There is no better way to kick off pumpkin season than with these Vegan Pumpkin Muffins. Vegan Pumpkin Muffins come together easily. Simply fold the dry ingredients into the wet ingredients, add the raisins and the batter is ready for the muffin pan.

Vegan Pumpkin Muffins have no oil or refined sugars. They taste like a rich dessert without all of the extra fats and sugars. You won’t even be able to tell these muffins are healthy. They make a great snack at any time of day (including breakfast)!

Ingredients

Ingredients for vegan pumpkin muffins measured and laid out on a wooden surface.
  • Ground Flax Seed – Do not use whole flax seeds.
  • Water – Mixed with the ground flax seeds to create flax eggs. We are substituting flax eggs in place of eggs to keep this recipe vegan.
  • All-Purpose Flour – I used all purpose-flour for this recipe. I haven’t tried this recipe using any other type of flour.
  • Baking Powder – Helps to give the muffins a nice fluffy texture.
  • Baking Soda – Helps the muffins to rise.
  • Pumpkin Pie Spice – Warm spices to pair with the pumpkin.
  • Maple Syrup – Used to sweeten the muffins.
  • Canned Pumpkin – Make sure to use canned pumpkin and not canned pumpkin pie filling.
  • Almond Milk – I used unsweetened vanilla almond milk.
  • Raisins – Add a touch more sweetness.

See recipe card for quantities.

Instructions

Preheat oven to 350F. Grease a muffin pan with non-stick cooking spray.

Ground flax seed and water mixed in a small white bowl with a spoon leaning on the side of the bowl.

Add ground flax seed and water to a small bowl to create flax eggs. Whisk to combine. Place bowl in fridge.

Dry ingredients in a white bowl with a metal whisk leaning on the side of the bowl.

In a medium size bowl, add flour, baking soda, baking powder and pumpkin pie spice. Whisk to combine.

Wet ingredients in a large white bowl with a metal whisk leaning on the side of the bowl.

In a large bowl, add maple syrup, canned pumpkin, almond milk and flax egg mixture. Whisk to combine.

Batter in a large white bowl with a blue spatula leaning on the side of the bowl.

Add the dry ingredients to the wet ingredients. Using a spatula, fold dry ingredients into wet ingredients. Fold until the flour mixture is incorporated and there are no lumps in the batter.

Raisins on top of the batter in a large white bowl.

Add raisins.

Raisins folded into the batter in a large white bowl with a blue spatula leaning on the side of the bowl.

Use a spatula to fold in the raisins.

Batter is evenly divided into a blue and white silicone muffin pan.

Using a cookie scoop, divide batter evenly into prepared muffin pan.

Baked vegan muffins in a white and blue silicone muffin pan.

Bake for 28-30 minutes or until a toothpick inserted into the center of a muffin comes out clean. Let muffins cool for 10 minutes before transferring to a wire rack to cool completely. Makes 12 muffins.

Hint: Make sure to used canned pumpkin and not pumpkin pie filling.

Substitutions

  • Maple Syrup – Liquid honey can be substituted for the maple syrup but keep in mind the muffins will no longer be vegan.
  • Almond Milk – Any type of plant based milk can be substituted for the almond milk. You can also substitute with non plant based milk but the recipe will no longer be vegan.

Equipment

Silicone Muffin Pan – I used a silicone muffin pan for this recipe because it makes it super easy to pop the muffins out of the pan. You can use a metal non-stick muffin pan but be sure to grease it liberally as the muffins tend to stick.

Cookie Scoop – I used a cookie scoop to divide the batter into the muffin pan. If you do not have a cookie scoop, feel free to use a large spoon.

Storage

Vegan Pumpkin Muffins can be stored at room temperature in an airtight container or bag for up to three days.

Vegan Pumpkin Muffins freeze well. Place muffins in a freezer safe container or bag and freeze up to three months. Thaw muffins at room temperature when ready to eat.

Top tip

Do not use muffin liners in the pan! This recipe has very little fat in it so the muffins will easily stick to the liners. I have tried greasing the liners but I find it easier to just grease the pan with some olive oil cooking spray.

FAQ

Can I use fresh pumpkin puree for this recipe?

Yes! Fresh pumpkin puree can be substituted 1-1 for the canned pumpkin.

Where can I find pumpkin pie spice?

Pumpkin pie spice is often located in the spices/seasonings section of many grocery stores.

Related

Looking for other recipes like this? Try these:

A vegan pumpkin muffin with raisins sprinkled around it on a white cutting board in the foreground with two vegan muffins and a pumpkin in the background.
Print Recipe
5 from 1 vote

Vegan Pumpkin Muffins

Vegan Pumpkin Muffins are soft, fluffy and moist. They are packed full of warm spices and that classic pumpkin flavor.
Prep Time10 minutes mins
Bake Time32 minutes mins
Total Time42 minutes mins
Servings: 12 muffins
Calories: 131kcal
Author: Christine

Ingredients

  • 2 tablespoons ground flax seed
  • 6 tablespoons water
  • 1 ½ cups all-purpose flour
  • 2 teaspoons baking powder
  • 2 teaspoons baking soda
  • 2 teaspoons pumpkin pie spice
  • ¼ cup maple syrup
  • 1 ½ cups canned pumpkin
  • ¾ cup almond milk
  • 1 cup raisins

Instructions

  • Preheat oven to 350F. Grease a muffin pan with non-stick cooking spray.
  • Add ground flax seed and water to a small bowl to create flax eggs. Whisk to combine. Place bowl in fridge.
  • In a medium size bowl, add flour, baking soda, baking powder and pumpkin pie spice. Whisk to combine.
  • In a large bowl, add maple syrup, canned pumpkin, almond milk and flax egg mixture. Whisk to combine.
  • Add the dry ingredients to the wet ingredients. Using a spatula, fold dry ingredients into wet ingredients. Fold until the flour mixture is incorporated and there are no lumps in the batter.
  • Add raisins.
  • Use a spatula to fold in the raisins.
  • Using a cookie scoop, divide batter evenly into prepared muffin pan.
  • Bake for 28-30 minutes or until a toothpick inserted into the center of a muffin comes out clean. Let muffins cool for 10 minutes before transferring to a wire rack to cool completely. Makes 12 muffins.

Notes

Make sure to used canned pumpkin and not pumpkin pie filling.
Do not use muffin liners in the pan! This recipe has very little fat in it so the muffins will easily stick to the liners. I have tried greasing the liners but I find it easier to just grease the pan with some olive oil cooking spray.
Vegan Pumpkin Muffins can be stored at room temperature in an airtight container or bag for up to three days.
Vegan Pumpkin Muffins freeze well. Place muffins in a freezer safe container or bag and freeze up to three months. Thaw muffins at room temperature when ready to eat.

Nutrition

Calories: 131kcal | Carbohydrates: 29g | Protein: 3g | Fat: 1g | Saturated Fat: 0.2g | Polyunsaturated Fat: 1g | Monounsaturated Fat: 0.2g | Sodium: 189mg | Potassium: 206mg | Fiber: 3g | Sugar: 5g | Vitamin A: 4767IU | Vitamin C: 2mg | Calcium: 84mg | Iron: 2mg

Filed Under: Healthy Snacks, Muffins, Recipes

Carrot Raisin Muffins

September 6, 2023 by Christine 1 Comment

Carrot Raisin Muffins are soft, fluffy and moist. They are golden on the outside and full of warm cinnamon raisin flavor on the inside.

A carrot raisin muffin on a white surface in the foreground with two carrot raisin muffins and pieces of shredded carrots and raisins in the background.

I have a lot of carrots in my garden this year and I am already trying to create recipes to use up some of those extra carrots. This Carrot Raisin Muffin recipe is just one way to use up some of that bounty!

Carrot Raisin Muffins are are made with no butter, oil or refined sugars. They make a great snack or healthy dessert. They are also a great snack to pop into lunchboxes for that back to school season. The kids won’t even taste the carrots in the muffins and they are guaranteed to ask for more! If you want to sneak some more vegetables into your kid’s snacks, try my Healthy Zucchini Raisin Muffins for another great lunchbox treat.

Ingredients

Ingredients for Carrot Raisin Muffins laid out on a wooden surface.
  • Carrot – We will shred the carrot to add to the batter.
  • All-purpose flour – I used all-purpose flour for this recipe. I have not tried this recipe using any other type of flour.
  • Baking Soda – Helps the muffins to rise.
  • Baking Powder – Gives the muffins that soft cake like texture.
  • Cinnamon and Nutmeg– Adds some nice warm flavor.
  • Greek Yogurt – I used plain, 0% no sugar added.
  • Eggs – Helps to bind the ingredients together.
  • Maple Syrup – Used to sweeten the muffins.
  • Almond Milk – I used unsweetened vanilla almond milk.
  • Raisins – They add a touch more sweetness.

See recipe card for quantities.

Instructions

Preheat oven to 350F. Grease a muffin pan with non-stick cooking spray.

Shredded carrot on a white cutting board.

Peel and shred carrot. Set aside.

Dry ingredients in a white bowl with a metal whisk leaning on the side of the bowl.

In a medium size bowl, add flour, baking soda, baking powder, cinnamon and nutmeg. Whisk to combine.

Wet ingredients in a large white bowl with a metal whisk leaning on the side of the bowl.

In a large bowl, add Greek yogurt, eggs, maple syrup and almond milk. Whisk to combine.

Batter in a large white bowl with a blue spatula leaning on the side of the bowl.

Add the dry ingredients to the wet ingredients. Using a spatula, fold dry ingredients into wet ingredients. Fold until the flour mixture is incorporated and there are no lumps in the batter.

Shredded carrots and raisins on top of the batter in a large white bowl.

Add shredded carrot and raisins.

Batter with folded in carrots and raisins in a large white bowl with a blue spatula leaning on the side of the bowl.

Use a spatula to fold in the carrots and raisins.

Batter divided evenly in a silicone muffin pan.

Using a cookie scoop, divide batter evenly into prepared muffin pan.

Baked muffins in a silicone muffin pan.

Bake for 16-18 minutes or until a toothpick inserted into the center comes out clean. Let muffins cool for 10 minutes before transferring muffins to a wire rack to cool completely. Makes 12 muffins.

Hint: Do not overmix the batter. Overmixing the batter will cause the muffins to be dense.

Substitutions

  • Almond Milk – I used almond milk in this recipe. You can substitute the almond milk for any other type of plant based or non plant based milk.
  • Maple Syrup– Liquid honey can be substituted for the maple syrup.
  • Greek Yogurt – I used plain 0%, no sugar added Greek yogurt. You can substitute with 2% or higher or varieties with added sugar. Keep in mind the muffins will be sweeter if you choose a Greek yogurt with added sugars.

Equipment

Silicone Muffin Pan – I used a silicone muffin pan for this recipe because it makes it super easy to pop the muffins out of the pan. You can use a metal non-stick muffin pan but be sure to grease it liberally as the muffins tend to stick.

Cookie Scoop – I used a cookie scoop to divide the batter into the muffin pan. If you do not have a cookie scoop, feel free to use a large spoon.

Storage

Carrot Raisin Muffins can be stored at room temperature in an airtight container or bag for up to three days.

Carrot Raisin Muffins freeze well. Place muffins in a freezer safe container or bag and freeze up to three months. Thaw muffins at room temperature when ready to eat.

Top tip

Do not use muffin liners in the pan! This recipe has very little fat in it so the muffins will easily stick to the liners. I have tried greasing the liners but I find it easier to just grease the pan with some olive oil cooking spray.

FAQ

Why are my muffins sticking to the pan?

You didn’t grease the muffin pan or you didn’t use enough non-stick cooking spray to grease the pan. I find an olive oil cooking spray works really well.

Why are my muffins dry?

You have overbaked the muffins. Do not overbake the muffins or they will be dry. Carrot Raisin Muffins only need to be baked until a toothpick inserted into the center of a muffin comes out clean. As oven temperatures vary, I recommend checking the muffins at 16 minutes.

Related

Looking for other recipes like this? Try these:

A carrot raisin muffin on a white surface in the foreground with two carrot raisin muffins and pieces of shredded carrots and raisins in the background.
Print Recipe
5 from 2 votes

Carrot Raisin Muffins

Carrot Raisin Muffins are soft, fluffy and moist. They are golden on the outside and full of warm cinnamon raisin flavor on the inside.
Prep Time10 minutes mins
Bake Time18 minutes mins
Total Time28 minutes mins
Servings: 12
Calories: 133kcal
Author: Christine

Ingredients

  • 1 cup shredded carrot about 1 medium carrot
  • 1 ½ cups all-purpose flour
  • 2 teaspoons baking soda
  • 1 teaspoon baking powder
  • 1 teaspoon cinnamon
  • ¼ teaspoon nutmeg
  • â…“ cup Greek yogurt plain, 0% no sugar added
  • 2 large eggs
  • ¼ cup maple syrup
  • ½ cup almond milk
  • 1 cup raisins

Instructions

  • Preheat oven to 350F. Grease a muffin pan with non-stick cooking spray.
  • Peel and shred carrot. Set aside.
  • In a medium size bowl, add flour, baking soda, baking powder, cinnamon and nutmeg. Whisk to combine.
  • In a large bowl, add Greek yogurt, eggs, maple syrup and almond milk. Whisk to combine.
  • Add the dry ingredients to the wet ingredients. Using a spatula, fold dry ingredients into wet ingredients. Fold until the flour mixture is incorporated and there are no lumps in the batter.
  • Add shredded carrot and raisins.
  • Use a spatula to fold in the carrots and raisins.
  • Using a cookie scoop, divide batter evenly into prepared muffin pan.
  • Bake for 16-18 minutes or until a toothpick inserted into the center comes out clean. Let muffins cool for 10 minutes before transferring muffins to a wire rack to cool completely. Makes 12 muffins.

Notes

Do not overmix the batter. Overmixing the batter will cause the muffins to be dense.
Do not use muffin liners in the pan! This recipe has very little fat in it so the muffins will easily stick to the liners. I have tried greasing the liners but I find it easier to just grease the pan with some olive oil cooking spray.
Carrot Raisin Muffins can be stored at room temperature in an airtight container or bag for up to three days.
Carrot Raisin Muffins freeze well. Place muffins in a freezer safe container or bag and freeze up to three months. Thaw muffins at room temperature when ready to eat.

Nutrition

Serving: 1muffin | Calories: 133kcal | Carbohydrates: 27g | Protein: 4g | Fat: 1g | Saturated Fat: 0.3g | Polyunsaturated Fat: 0.3g | Monounsaturated Fat: 0.4g | Trans Fat: 0.003g | Cholesterol: 31mg | Sodium: 257mg | Potassium: 186mg | Fiber: 2g | Sugar: 5g | Vitamin A: 1828IU | Vitamin C: 1mg | Calcium: 61mg | Iron: 1mg

Filed Under: Healthy Snacks, Muffins, Recipes

Air Fryer Spring Rolls

August 22, 2023 by Christine 2 Comments

Air Fryer Spring Rolls are crispy on the outside and packed full of delicious flavor on the inside. They are a perfect appetizer to feed to a crowd or you might just want to keep them all to yourself.

Spring rolls on a small white plate in the foreground and a large plate of spring rolls in the background with a small bowl of red chili sauce.

We love spring rolls in our house and we frequently like to pair spring rolls with homemade stir-fry. In the past we would pop prepackaged spring rolls into the oven but unfortunately they are often loaded with excess sodium and fats. I decided to create a spring roll recipe that could be enjoyed guilt free.

Air Fryer Spring Rolls are actually really easy to make. Don’t let the number of steps in this recipe intimidate you. Once you get the hang of rolling the spring rolls, the rest is a breeze. Air Fryer Spring Rolls taste great on their own but you can also serve them with a garlic chili sauce or a dipping sauce of your choosing.

Ingredients

Ingredients for Air Fryer Spring Rolls measured and laid out on a wooden surface.
  • Carrot – the carrot will be shredded to add to the filling.
  • Onion – Adds some great flavor to the filling.
  • Coleslaw Mix – We use a whole bag of this for the filling.
  • Garlic Powder, Ground Ginger, and Ground Black Pepper – Spices to add to the filling mixture.
  • Sodium Reduced Soy Sauce – Adds even more flavor to the filling.
  • Rice Paper Rolls – Used instead of spring roll pastry.
  • Warm Water – Used to soften the rice paper rolls.

See recipe card for quantities.

Instructions

Diced onions and shredded carrot on a white cutting board.

Peel and shred carrot. Dice onion into small pieces. Set shredded carrot and diced onion aside.

Filling ingredients have been added to a saucepan.

Add coleslaw mix, shredded carrot, diced onion, spices and soy sauce to a large saucepan. Cover and cook over medium heat until the filling is soft and the onions are translucent. Remove pan from heat and set aside.

Water in a shallow pot.

Add warm water to a shallow dish or saucepan. The dish needs to be wide enough to fit a rice paper roll. Fill until there is about an inch of water in the bottom.

Wet rice paper roll on a white plate.

Gently place one rice paper roll in the water. Remove it from water, place on a large plate and let sit for 30 seconds or until the rice paper roll softens.

Filling has been spooned onto the top of a wet rice paper roll on a white plate.

Spoon 3 tablespoons of filling onto the top of the rice paper roll. Leave about a 1/2 inch of space at the top.

The top of a rice paper roll has been folded over the filling on a white plate.

Gently fold the top of the rice paper roll on top of the filling.

One side of the rice paper roll has been folded over.

Gently fold over one side of the rice paper roll.

The second side of the rice paper roll has been rolled on top of the first side.

Repeat with the other side.

Prepared spring roll on a white plate.

Starting at the top of the roll where the filling is, gently roll the filling and rice paper until you get to the bottom of the roll. Use fingers to gently seal the roll. Place roll on a lightly greased plate or pan.

Prepared spring rolls on a white plate.

Repeat with remaining rice paper rolls or until all of the filling has been used. You may need to rewarm the water if it has cooled as the rice paper rolls need warm water to soften.

Spring rolls placed in a single layer in air fryer basket.

Heat air fryer to 375F. Once air fryer is heated, place spring rolls in a single layer ensuring you leave some space between the spring rolls.

Air Fryer Spring Rolls in air fryer basket after they have been cooked.

Cook for 7 minutes. Use tongs to gently flip spring rolls and cook for an additional 3 minutes or until the spring rolls are golden and crispy. Remove spring rolls from air fryer and let cool slightly before eating. Repeat with remaining spring rolls. Makes 18 spring rolls.

Hint: If you prefer extra crispy spring rolls, spray rolls with olive oil cooking spray before cooking.

Substitutions

  • Coleslaw Mix – Diced cabbage can be substituted for the coleslaw mix.
  • Sodium Reduced Soy Sauce – Regular soy sauce can be used but keep in mind the amount of sodium in the spring rolls will be higher.

Variations

  • Spicy – add 1/4 teaspoon of red chili flakes to the filling if you like a little heat.

Equipment

Air Fryer – I used a basket style air fryer for this recipe. You can use other styles of air fryers, just make sure the spring rolls are cooked in a single layer.

Storage

Air Fryer Spring Rolls can be stored in an airtight container or bag in the fridge for up to three days. To reheat spring rolls, place in the air fryer or oven until they reach your desired temperature.

Air Fryer Spring Rolls freeze well. Place rolls on a baking sheet and freeze until solid. Transfer rolls to a freezer safe container or bag and freeze up to three months. Air Fryer Spring Rolls can be removed from the freezer and placed directly into the oven or air fryer when you are ready to eat more. It won’t be long….trust me!

Top tip

Be sure to cook the spring rolls in a single layer in the air fryer. This allows the rolls to get crispy and it will also allow them to cook evenly.

FAQ

What can you serve with spring rolls?

Spring rolls can be served as an appetizer with a garlic chili sauce or a dipping sauce of your choosing. We also like to eat ours with a stir-fry.

Are air fryer spring rolls healthy?

Yes! One spring roll has only 67 calories so be sure to eat more than one! They also contain less sodium than a standard pre-packaged spring roll.

Related

Looking for other recipes like this? Try these:

Spring rolls on a small white plate in the foreground and a large plate of spring rolls in the background with a small bowl of red chili sauce.
Print Recipe
5 from 1 vote

Air Fryer Spring Rolls

Air Fryer Spring Rolls are crispy on the outside and packed full of delicious flavor on the inside. They are a perfect appetizer to feed to a crowd or you might just want to keep them all to yourself.
Prep Time30 minutes mins
Cook Time10 minutes mins
Total Time40 minutes mins
Servings: 16
Calories: 67kcal
Author: Christine

Ingredients

  • 1 medium carrot
  • ½ small onion
  • 1 bag coleslaw mix 14 ounces
  • 1 teaspoon garlic powder
  • ¼ teaspoon ground ginger
  • ¼ teaspoon ground black pepper
  • 2 tablespoons sodium reduced soy sauce
  • 3 cups warm water
  • 16 rice paper rolls

Instructions

  • Peel and shred carrot. Dice onion into small pieces. Set shredded carrot and diced onion aside.
  • Add coleslaw mix, shredded carrot, diced onion, spices and soy sauce to a large saucepan. Cover and cook over medium heat until the filling is soft and the onions are translucent. Remove pan from heat and set aside.
  • Add warm water to a shallow dish or saucepan. The dish needs to be wide enough to fit a rice paper roll. Fill until there is about an inch of water in the bottom.
  • Gently place one rice paper roll in the water. Remove it from water, place on a large plate and let sit for 30 seconds or until the rice paper roll softens.
  • Place rice paper roll on a plate. Spoon 3 tablespoons of filling onto the top of the rice paper roll. Leave about a 1/2 inch of space at the top.
  • Gently fold the top of the rice paper roll on top of the filling.
  • Gently fold over one side of the rice paper roll.
  • Repeat with the other side.
  • Starting at the top of the roll where the filling is, gently roll the filling and rice paper until you get to the bottom of the roll. Use fingers to gently seal the roll. Place roll on a lightly greased plate or pan.
  • Repeat with remaining rice paper rolls or until all of the filling has been used.
  • Heat air fryer to 375F. Once air fryer is heated, place spring rolls in a single layer ensuring you leave some space between the spring rolls.
  • Cook for 7 minutes. Use tongs to gently flip spring rolls and cook for an additional 3-5 minutes or until the spring rolls are golden and crispy. Remove spring rolls from air fryer and let cool slightly before eating. Repeat with remaining spring rolls. Makes 18 spring rolls.

Notes

If you prefer extra crispy spring rolls, spray rolls with olive oil cooking spray before cooking.
Be sure to cook the spring rolls in a single layer in the air fryer. This allows the rolls to get crispy and it will also allow them to cook evenly.
Air Fryer Spring Rolls can be stored in an airtight container or bag in the fridge for up to three days. To reheat spring rolls, place in the air fryer or oven until they reach your desired temperature.
Air Fryer Spring Rolls freeze well. Place rolls on a baking sheet and freeze until solid. Transfer rolls to a freezer safe container or bag and freeze up to three months. Air Fryer Spring Rolls can be removed from the freezer and placed directly into the oven or air fryer when you are ready to eat more. It won’t be long….trust me!

Nutrition

Serving: 1roll | Calories: 67kcal | Carbohydrates: 13g | Protein: 2g | Fat: 0.3g | Saturated Fat: 0.1g | Polyunsaturated Fat: 0.1g | Monounsaturated Fat: 0.04g | Cholesterol: 2mg | Sodium: 191mg | Potassium: 89mg | Fiber: 1g | Sugar: 1g | Vitamin A: 667IU | Vitamin C: 11mg | Calcium: 24mg | Iron: 1mg

Filed Under: Air Fryer, Recipes

Mint Chocolate Chip Cookies

August 9, 2023 by Christine Leave a Comment

Mint Chocolate Chip Cookies are rich, decadent and chocolatey. They are slightly crispy on the outside with a soft, chewy texture on the inside.

Mint Chocolate Chip Cookies on a piece of parchment paper with mint chocolate chips scattered around the cookies.

There is just something about the combination of mint and chocolate that makes my mouth water. And who doesn’t like a soft and chewy cookie? I thought why not have the best of both worlds and combine the two to make a rich and chewy cookie. Mint Chocolate Chip Cookies are the perfect dessert for any occasion. You might not even be able to wait for dessert to try one! I recommend trying a cookie shortly after you remove them from the oven because they will disappear quickly if they are left unattended. These Mint Chocolate Chip Cookies are similar to my Double Chocolate Chip Cookies but with a few tweaks to the ingredients.

If you are looking for other cookie recipes, try my Soft and Chewy Chocolate Chip Cookies or my Soft and Chewy Oatmeal Raisin Cookies for other crowd pleasing desserts.

Ingredients

Ingredients for Mint Chocolate Chip Cookies measured and laid out on a wooden surface.
  • All-purpose Flour – I used all-purpose flour for this recipe. I haven’t tried this recipe using any other type of flour.
  • Cocoa Powder – Gives the cookies that rich chocolatey flavor.
  • Baking Soda – Helps the cookies to rise.
  • Salt – Brings out the flavor of the other ingredients.
  • Unsalted Butter, Melted – Helps to give the cookies a rich flavor.
  • Brown Sugar – Helps to keep the cookies soft and moist and of course adds some sweetness.
  • Granulated Sugar – Adds a touch more sweetness.
  • Eggs – Helps to bind the ingredients together.
  • Vanilla – Adds some extra flavor.
  • Mint Chocolate Chips – Gives the cookies that nice mint flavor.

See recipe card for quantities.

Instructions

Preheat oven to 350F. Line two large baking sheets with parchment paper.

Dry ingredients in a medium size white bowl with a metal whisk leaning on the side of the bowl.

Add flour, cocoa, baking soda and salt to a medium size bowl. Whisk to combine.

Butter and sugar mixture in a large white bowl with an electric mixer leaning on the side of the bowl.

In a large bowl, add melted butter, brown sugar and granulated sugar. Beat with electric mixture on medium speed for one minute.

Eggs and vanilla on top of the cookie dough in a large white bowl.

Add eggs and vanilla. Beat with electric mixture on medium speed for one minute or until the batter is smooth. Use a spatula to scrape down the sides of the bowl.

Cookie dough in a large bowl with an electric mixer leaning on the side of the bowl.

Add half of the flour mixture to the batter. Turn electric mixer to low and mix until the flour mixture starts to incorporate into the batter. As the flour mixture starts to incorporate, you can increase the speed of the electric mixer to medium. Use a spatula to scrape down the sides of the bowl as necessary. Repeat with remaining flour mixture.

Mint chocolate chips on top of the dough in a large white bowl.

Add mint chocolate chips.

Mint Chocolate Chip Cookie dough in a large white bowl with a blue spatula leaning on the side of the bowl.

Use a spatula to fold in the mint chocolate chips.

Mint Chocolate Chip Cookie dough balls on a baking sheet lined with parchment paper.

Using a spoon or your hands, shape approximately 2 tablespoons of dough into a ball. Place dough ball onto baking pan. Repeat until the baking sheets are full. Leave 1.5 to 2 inches between cookies so they have room to spread as they bake.

Baked Mint Chocolate Chip Cookies on a metal baking pan lined with parchment paper.

Place baking pan into preheated oven and bake for 10-12 minutes. The cookies are ready when small cracks start to form on the tops. Remove pan from oven. Let cookies cool slightly before transferring to a wire rack to cool completely. Repeat with other baking sheet. Makes 24 cookies. Enjoy!

Hint: Make sure the baking sheets are lined with parchment paper. This will help prevent the bottoms of the cookies from burning.

Substitutions

  • Mint Chocolate Chips – If you can’t find mind chocolate chips, you can substitute semi-sweet chocolate chips. To still achieve the mint flavor, substitute mint extract for the vanilla extract.
  • Unsalted Butter – Salted butter can be substituted for the unsalted butter but be sure to omit the salt from the recipe.

Equipment

Large Non-Stick Baking Pans – I used two large non-stick metal baking pans for this recipe. You can use smaller baking pans but you won’t be able to fit as many cookies on a pan.

Electric Mixer – I used an electric mixer for this recipe. I highly recommend using an electric mixer for this recipe because the cookie dough is quite thick. You can try mixing by hand but you will need some good elbow grease!

Storage

Mint Chocolate Chip Cookies can be stored in an airtight container or bag for up to three days at room temperature.

Mint Chocolate Chip Cookies freeze well. Place cookies in a freezer safe container or bag and freeze up to three months. Thaw at room temperature when ready to eat.

Top tip

Do not overbake the cookies! Otherwise they won’t be soft and chewy.  The cookies are ready when small cracks start to form on the tops of the cookies.

FAQ

Do I have to chill the cookie dough before baking?

No! Mint Chocolate Chip Cookie dough does not require chilling before baking. 

Can I still make these cookies if I can’t find mint chocolate chips?

Yes! You can use mint extract. See the substitution section of the blog post for full instructions.

How do I keep my cookies soft after baking?

Store Mint Chocolate Chip Cookies in an airtight container or sealed bag and they will stay soft.

Related

Looking for other recipes like this? Try these:

Mint Chocolate Chip Cookies on a piece of parchment paper with mint chocolate chips scattered around the cookies.
Print Recipe
5 from 1 vote

Mint Chocolate Chip Cookies

Mint Chocolate Chip Cookies are rich, decadent and chocolatey. They are slightly crispy on the outside with a soft, chewy texture on the inside.
Prep Time15 minutes mins
Bake Time12 minutes mins
Total Time27 minutes mins
Servings: 24 cookies
Calories: 183kcal
Author: Christine

Ingredients

  • 1 â…” cup all-purpose flour
  • â…“ cup cocoa powder
  • 2 teaspoons baking soda
  • ¼ teaspoon salt
  • ½ cup unsalted butter melted
  • 1 cup brown sugar
  • ¼ cup granulated sugar
  • 2 large eggs
  • 2 teaspoons vanilla
  • 1 ½ cups mint chocolate chips

Instructions

  • Preheat oven to 350F. Line two large baking sheets with parchment paper.
  • Add flour, cocoa, baking soda and salt to a medium size bowl. Whisk to combine.
  • In a large bowl, add melted butter, brown sugar and granulated sugar. Beat with electric mixture on medium speed for one minute.
  • Add eggs and vanilla. Beat with electric mixture on medium speed for one minute or until the batter is smooth. Use a spatula to scrape down the sides of the bowl.
  • Add half of the flour mixture to the batter. Turn electric mixer to low and mix until the flour mixture starts to incorporate into the batter. As the flour mixture starts to incorporate, you can increase the speed of the electric mixer to medium. Use a spatula to scrape down the sides of the bowl as necessary. Repeat with remaining flour mixture.
  • Add mint chocolate chips.
  • Use a spatula to fold in the mint chocolate chips.
  • Using a spoon or your hands, shape approximately 2 tablespoons of dough into a ball. Place dough ball onto baking pan. Repeat until the baking sheets are full. Leave 1.5 to 2 inches between cookies so they have room to spread as they bake.
  • Place baking pan into preheated oven and bake for 10-12 minutes. The cookies are ready when small cracks start to form on the tops. Remove pan from oven. Let cookies cool slightly before transferring to a wire rack to cool completely. Repeat with other baking sheet. Makes 24 cookies.
  • Enjoy!

Notes

Make sure the baking sheets are lined with parchment paper. This will help prevent the bottoms of the cookies from burning.
Do not overbake the cookies! Otherwise they won’t be soft and chewy.  The cookies are ready when small cracks start to form on the tops of the cookies.
Mint Chocolate Chip Cookies can be stored in an airtight container or bag for up to three days at room temperature.
Mint Chocolate Chip Cookies freeze well. Place cookies in a freezer safe container or bag and freeze up to three months. Thaw at room temperature when ready to eat.

Nutrition

Serving: 1cookie | Calories: 183kcal | Carbohydrates: 24g | Protein: 2g | Fat: 9g | Saturated Fat: 5g | Polyunsaturated Fat: 0.4g | Monounsaturated Fat: 3g | Trans Fat: 0.2g | Cholesterol: 26mg | Sodium: 126mg | Potassium: 111mg | Fiber: 2g | Sugar: 15g | Vitamin A: 146IU | Calcium: 21mg | Iron: 1mg

Filed Under: Cookies, Recipes

Toffee Chocolate Almond Cups

August 3, 2023 by Christine Leave a Comment

Toffee Chocolate Almond Cups are rich, chocolatey and decadent. The combination of toffee bits and crushed almonds with a melt in your mouth chocolate make these a delectable dessert for any occasion.

A stack of three Toffee Chocolate Almond Cups and toffee bits in the foreground and more Toffee Chocolate Almond Bites in the background.

I bought a large bag of almonds from Costco a while ago with the intent of learning how to make chocolate covered almonds. I started experimenting but I wasn’t satisfied with the end result. I continued to experiment with various ingredients and textures and I came up with these rich and delicious Toffee Chocolate Almond Cups.

I used to shy away from making homemade chocolates because I thought it was too difficult. These Toffee Chocolate Almond Cups are actually really easy to make. Simply melt the chocolate, add the toffee bits and chopped almonds and pour into a mini muffin pan to set. Toffee Chocolate Almond Cups are sure to be a crowd pleasing dessert for any occasion.

Ingredients

Ingredients for Toffee Chocolate Almond Cups in small white bowls on a wooden surface.
  • Milk Chocolate Chips – I used Chipits brand.
  • Unsalted Almonds – Be sure to read the label when buying almonds as they often have added salt and seasonings on them. You want to buy plain unsalted almonds.
  • Skor Toffee Bits – These can be found in the chocolate chip section of the grocery store.

See recipe card for quantities.

Instructions

Grease a mini muffin pan with nonstick cooking spray. I like to use an olive oil or avocado oil cooking spray.

Chopped almonds in a small white bowl.

Pulse almonds in food processor until they are chopped into fine pieces.

Melted chocolate in a small stainless steel bowl with a small blue spatula leaning on the side of the bowl.

Bring water to a gentle boil in a double boiler. Add chocolate chips. Stir until all of the chocolate chips are melted.

Melted chocolate in a small stainless steel bowl with a small blue spatula leaning on the side of the bowl.

Remove double boiler from heat. Add chopped almonds and toffee bits. Stir until the almonds and toffee bits are evenly mixed in.

Mixture for Toffee Chocolate Almond Cups is divided evenly into metal mini muffin pan.

Use a small spatula to evenly distribute chocolate mixture into prepared mini muffin pan. Place pan in freezer for 1-2 hours to set the chocolate. Turn pan over and gently tap on the counter to remove chocolate cups from the pan. Makes 12 chocolate cups.

Hint: Make sure to grease the mini muffin pan before adding the chocolate because this will allow the Toffee Chocolate Almond Cups to easily pop out of the pan once they have set.

Substitutions

  • Milk Chocolate Chips – You can substitute dark chocolate chips in place of the milk chocolate chips.

Equipment

Double Boiler – If you do not have a double boiler, you can place a small stainless steel bowl over a pot. If you use this method, be sure to use an oven mitt because the bowl will get hot.

Food Processor – If you do not have a food processor, you can buy plain slivered almonds and chop them with a knife.

Small Spatula – You can use a small spoon to evenly divide the chocolate mixture into the mini muffin pan if you do not have a small spatula.

Storage

Toffee Chocolate Almond Cups are best kept in the fridge. They can be stored in an airtight container or bag for up to four weeks.

Toffee Chocolate Almond Cups freeze well. Place cups in a freezer safe container or bag and freeze up to three months.

Top tip

Be sure to use a double boiler for this recipe! It can be tempting to melt the chocolate in the microwave or directly in a pot on the stove. Do not do this! Melting chocolate is a science and if the chocolate gets too hot, it will turn into a thick paste. If you do not have a double boiler, see the equipment section of this blog post.

FAQ

Do I have to use milk chocolate chips for this recipe?

No! Feel free to use your favorite type of chocolate chip for this recipe.

Is this recipe gluten free?

Yes it can be but some almonds are processed in a facility with wheat so be sure to read the label first.

Related

Looking for other recipes like this? Try these:

A stack of three Toffee Chocolate Almond Cups and toffee bits in the foreground and more Toffee Chocolate Almond Bites in the background.
Print Recipe
5 from 1 vote

Toffee Chocolate Almond Cups

Toffee Chocolate Almond Cups are rich, chocolatey and decadent. The combination of toffee bits and crushed almonds with a melt in your mouth chocolate make these a delectable dessert for any occasion.
Prep Time15 minutes mins
Set Time2 hours hrs
Servings: 12
Calories: 183kcal
Author: Christine

Ingredients

  • 1 ½ cups milk chocolate chips
  • 3 tablespoons unsalted almonds, chopped about ¼ cup whole almonds
  • 3 tablespoons Skor toffee bits

Instructions

  • Grease a mini muffin pan with nonstick cooking spray.
  • Pulse almonds in food processor until they are chopped into fine pieces.
  • Bring water to a gentle boil in a double boiler. Add chocolate chips. Stir until all of the chocolate chips are melted.
  • Remove double boiler from heat. Add chopped almonds and toffee bits. Stir until the almonds and toffee bits are evenly mixed in.
  • Use a small spatula to evenly distribute chocolate mixture into prepared mini muffin pan. Place pan in freezer for 1-2 hours to set the chocolate. Turn pan over and gently tap on the counter to remove chocolate cups from the pan. Makes 12 chocolate cups

Notes

Make sure to grease the mini muffin pan before adding the chocolate because this will allow the Toffee Chocolate Almond Cups to easily pop out of the pan once they have set.
Be sure to use a double boiler for this recipe! It can be tempting to melt the chocolate in the microwave or directly in a pot on the stove. Do not do this! Melting chocolate is a science and if the chocolate gets too hot, it will turn into a thick paste. If you do not have a double boiler, see the equipment section of this blog post.
Toffee Chocolate Almond Cups are best kept in the fridge. They can be stored in an airtight container or bag for up to four weeks.
Toffee Chocolate Almond Cups freeze well. Place cups in a freezer safe container or bag and freeze up to three months.

Nutrition

Serving: 1chocolate cup | Calories: 183kcal | Carbohydrates: 22g | Protein: 1g | Fat: 11g | Saturated Fat: 6g | Polyunsaturated Fat: 0.4g | Monounsaturated Fat: 1g | Trans Fat: 0.03g | Cholesterol: 4mg | Sodium: 5mg | Potassium: 105mg | Fiber: 0.3g | Sugar: 19g | Vitamin A: 43IU | Vitamin C: 0.01mg | Calcium: 29mg | Iron: 0.1mg

Filed Under: Desserts, Recipes

Blueberry Scones

July 31, 2023 by Christine Leave a Comment

Blueberry Scones are soft, moist, and delicious.  They are golden on the outside and full of sweet juicy blueberry flavor on the inside.

A Blueberry Scone on a small white plate in the foreground, additional scones and a bowl of blueberries in the background.

I have a soft spot for blueberry scones, and I like to treat myself to one on occasion.  However, I know scones are often loaded with butter and processed sugars, so I set out to create a blueberry scone recipe that is free of butter and processed sugars. This recipe required a lot of fine tuning and of course a ton of not so perfect scones in my house but the result is far from disappointing.  Blueberry Scones are sweet and delicious, and they make a great breakfast or snack when you are on the go!

If you are looking for other recipes with blueberries, try my Healthy Blueberry Muffins or Gluten Free Blueberry Oatmeal Breakfast Bars.

Ingredients

Ingredients for Blueberry Scones measured and laid out on a wooden surface.
  • All-purpose Flour – I used all-purpose flour for this recipe. I haven’t made this recipe using any other type of flour.
  • Baking Powder – Used to create that classic scone texture.
  • Coconut Sugar – Adds some sweetness.
  • Cinnamon – Adds a subtle warm flavor.
  • Greek Yogurt – I used plain, 0% no sugar added.
  • Eggs – Helps to bind the ingredients together.
  • Almond Milk – I used unsweetened vanilla almond milk.
  • Blueberries – I used fresh blueberries in this recipe.

See recipe card for quantities.

Instructions

Preheat oven to 400F.   Line a medium size baking sheet with parchment paper.

Dry ingredients in a large white bowl with a metal whisk leaning on the side of the bowl.

In a medium size bowl, add flour, baking powder, coconut sugar and cinnamon. Whisk to combine.

Shaggy dough in a large white bowl with a fork leaning on the side of the bowl.

Add Greek yogurt, egg, and almond milk.  Mix with a fork until the dough starts to look shaggy.

Blueberries on top of the dough in a large white bowl.

Add blueberries.

Dough bowl in a large white bowl.

Use hands to continue gently mixing the dough until all the flour has been mixed in.  The result will be a sticky wet dough.

Dough is shaped into a round flat disc on a piece of parchment paper.

Place dough on a piece of parchment paper and shape into a flat disc approximately one inch high.

Round disk of dough is cut into 8 wedges on a piece of parchment paper.

Use a pizza cutter to slice dough into 8 equal wedges.

Dough wedges are placed on a baking sheet lined with parchment paper.

Place dough wedges on prepared baking sheet.

Baked Blueberry Scones on a baking pan lined with parchment paper.

Bake for 14-16 minutes or until the scones turn golden on the tops. Cool for 5 minutes before transferring to a wire rack to cool completely. Makes 8 scones.

Hint: Make sure to gently mix the dough once the blueberries have been added because the blueberries tend to squish very easily.

Substitutions

Coconut Sugar – Any type of granulated sugar can be substituted for the coconut sugar.

Greek Yogurt – I used plain 0%, no sugar added Greek yogurt. You can substitute with 2% or higher or varieties with added sugar. Keep in mind the scones will be sweeter if you choose a Greek yogurt with added sugars.

Almond Milk – Any type of milk can be substituted for the almond milk.

Equipment

Pizza Cutter – A pizza cutter is used to slice the dough into wedges. If you do not have a pizza butter, you can use a knife instead.

Storage

Blueberry Scones can be stored at room temperature in an airtight container or bag for up to three days.

Blueberry Scones freeze well. Place scones in a freezer safe container or bag and freeze up to three months. Thaw in the fridge or at room temperature when ready to eat.

Top tip

Be sure to use parchment paper when shaping the dough into a round flat disc as the dough will be quite sticky. The dough is easily removed from the parchment paper.

FAQ

Can I use frozen blueberries for this recipe?

Yes! Frozen blueberries can be substituted for the fresh blueberries but be sure to add two extra minutes to the baking time.

Related

Looking for other recipes like this? Try these:

A Blueberry Scone on a small white plate in the foreground, additional scones and a bowl of blueberries in the background.
Print Recipe
5 from 1 vote

Blueberry Scones

Blueberry Scones are soft, moist, and delicious.  They are golden on the outside and full of sweet juicy blueberry flavor on the inside.
Prep Time10 minutes mins
Bake Time16 minutes mins
Total Time26 minutes mins
Servings: 8 scones
Calories: 151kcal
Author: Christine

Ingredients

  • 2 cups all-purpose flour
  • 2 teaspoons baking powder
  • 3 tablespoons coconut sugar
  • ½ teaspoon cinnamon
  • â…“ cup Greek yogurt plain 0%, no sugar added
  • 1 large egg
  • ½ cup almond milk
  • ½ cup blueberries

Instructions

  • Preheat oven to 400F.   Line a medium size baking sheet with parchment paper.
  • In a medium size bowl, add flour, baking powder, coconut sugar and cinnamon. Whisk to combine.
  • Add Greek yogurt, egg, and almond milk.  Mix with a fork until the dough starts to look shaggy.
  • Add blueberries.
  • Use hands to continue gently mixing the dough until all the flour has been mixed in.  The result will be a sticky wet dough.
  • Place dough on a piece of parchment paper and shape into a flat disc approximately one inch high.
  • Use a pizza cutter to slice dough into 8 equal wedges.
  • Place dough wedges on prepared baking sheet.
  • Bake for 14-16 minutes or until the scones turn golden on the tops. Cool for 5 minutes before transferring to a wire rack to cool completely. Makes 8 scones.

Notes

Make sure to gently mix the dough once the blueberries have been added because the blueberries tend to squish very easily.
Be sure to use parchment paper when shaping the dough into a round flat disc as the dough will be quite sticky. The dough is easily removed from the parchment paper.
Blueberry Scones can be stored at room temperature in an airtight container or bag for up to three days.
Blueberry Scones freeze well. Place scones in a freezer safe container or bag and freeze up to three months. Thaw in the fridge or at room temperature when ready to eat.

Nutrition

Calories: 151kcal | Carbohydrates: 30g | Protein: 5g | Fat: 1g | Saturated Fat: 0.3g | Polyunsaturated Fat: 0.4g | Monounsaturated Fat: 0.4g | Trans Fat: 0.003g | Cholesterol: 24mg | Sodium: 148mg | Potassium: 62mg | Fiber: 1g | Sugar: 4g | Vitamin A: 40IU | Vitamin C: 1mg | Calcium: 97mg | Iron: 2mg

Filed Under: Breakfast, Healthy Snacks, Recipes

Healthy Blueberry Muffins

July 20, 2023 by Christine 2 Comments

Healthy Blueberry Muffins are soft, fluffy and moist. They are slightly golden on the outside and bursting full of sweet blueberry flavor on the inside.

A Healthy Blueberry Muffin with blueberries scattered around it in the foreground and three blueberry muffins and a bowl of blueberries in the background.

It’s blueberry season here in Northwestern Ontario, Canada and the wild blueberries are plentiful this year! We have been out picking loads of juicy blueberries.

A close up of fresh picked blueberries.

Wild blueberries are so much sweeter than any store bought varieties and they are well worth the irritation of the deer flies buzzing at your head while you are picking. This Healthy Blueberry Muffin recipe is perfect if you are looking for ways to use up some extra blueberries. Healthy Blueberry Muffins are made with no butter, oil or refined sugar. They are a great snack when you are on the go or if you are looking for a healthy sweet treat.

If you are looking for another recipe with blueberries, try my Gluten Free Blueberry Oatmeal Breakfast Bars.

Ingredients

Ingredients for Healthy Blueberry Muffins measured and laid out on a wooden surface.
  • Milk – I used skim milk for this recipe.
  • Lemon Juice – Mixed with the milk to create a buttermilk.
  • All-purpose Flour – I used all-purpose flour for this recipe.
  • Baking Soda – Helps the muffins to rise.
  • Baking Powder – Gives the muffins that cake like texture.
  • Salt – Brings out the flavor of the other ingredients.
  • Maple Syrup – Adds some sweetness to the muffins.
  • Greek Yogurt – I used plain 0%, no sugar added.
  • Eggs – Helps to bind the ingredients together.
  • Vanilla – Adds some flavor.
  • Blueberries – Because you can’t have blueberry muffins without the blueberries!

See recipe card for quantities.

Instructions

Preheat oven to 350F. Grease muffin pan with cooking spray.

Milk mixture in a small measuring cup on a wooden surface.

In a small bowl or measuring cup, mix together milk and lemon juice to create a buttermilk.

Dry ingredient mixture in a white medium bowl with a metal whisk leaning on the side of the bowl.

In a medium size bowl, add flour, baking soda, baking powder and salt. Whisk to combine.

Wet ingredient mixture in a large white bowl with a metal whisk leaning on the side of the bowl.

In a large bowl, add maple syrup, Greek yogurt, eggs, vanilla and buttermilk mixture.

Batter for Healthy Blueberry Muffins in a large white bowl with a blue spatula leaning on the side of the bowl.

Add the dry ingredients to the wet ingredients. Using a spatula, fold dry ingredients into wet ingredients. Fold until the flour mixture is incorporated and there are no lumps in the batter.

Blueberries on top of the batter in a large white bowl.

Add blueberries.

Batter for Healthy Blueberry Muffins in a large white bowl with a blue spatula leaning on the side of the bowl.

Use a spatula to fold in the blueberries.

Batter for Healthy Blueberry Muffins divided evenly in a grey and blue silicone muffin pan.

Using a cookie scoop, divide batter evenly into prepared muffin pan.

Baked Healthy Blueberry Muffins in a grey and white silicone muffin pan.

Bake for 18-20 minutes or until a toothpick inserted into the center comes out clean. Let muffins cool for 10 minutes before transferring muffins to a wire rack to cool completely. Makes 12 muffins.

Hint: Do not overmix the batter. Overmixing the batter will cause the muffins to be dense.

Substitutions

  • Skim Milk – I used skim milk in this recipe. You can substitute the skim milk for any other type of milk.
  • Blueberries– I used fresh blueberries for this recipe. You can substitute frozen blueberries but you will need to add two extra minutes to the cooking time.
  • Maple Syrup– Liquid honey can be substituted for the maple syrup.
  • Greek Yogurt – I used plain 0%, no sugar added Greek yogurt. You can substitute with 2% or higher or varieties with added sugar. Keep in mind the muffins will be sweeter if you choose a Greek yogurt with added sugars.

Equipment

Silicone Muffin Pan – I used a silicone muffin pan for this recipe because it makes it super easy to pop the muffins out of the pan. You can use a metal non-stick muffin pan but be sure to grease it liberally as the muffins tend to stick.

Cookie Scoop – I used a cookie scoop to divide the batter into the muffin pan. If you do not have a cookie scoop, feel free to use a large spoon.

Storage

Healthy Blueberry Muffins can be stored at room temperature in an airtight container or bag for up to three days.

Healthy Blueberry Muffins freeze well. Place muffins in a freezer safe container or bag and freeze up to three months. Thaw muffins at room temperature when ready to eat.

Top tip

Do not use muffin liners in the pan! This recipe has very little fat in it so the muffins will easily stick to the liners. I have tried greasing the liners but I find it easier to just grease the pan with some olive oil cooking spray.

FAQ

Why are my muffins dry?

You have overbaked the muffins. Do not overbake the muffins or they will be dry. Healthy Blueberry Muffins only need to be baked until a toothpick inserted into the center of a muffin comes out clean. As oven temperatures vary, I recommend checking the muffins at 18 minutes.

Are these muffins actually healthy?

Yes! Each muffin only contains 111 calories and 1 gram of fat. They are much healthier than any store bought variety.

Related

Looking for other recipes like this? Try these:

A Healthy Blueberry Muffin with blueberries scattered around it in the foreground and three blueberry muffins and a bowl of blueberries in the background.
Print Recipe
5 from 1 vote

Healthy Blueberry Muffins

Healthy Blueberry Muffins are soft, fluffy and moist. They are slightly golden on the outside and bursting full of sweet blueberry flavor on the inside.
Prep Time10 minutes mins
Bake Time20 minutes mins
Total Time30 minutes mins
Servings: 12
Calories: 111kcal
Author: Christine

Ingredients

  • ½ cup milk skim
  • 1 teaspoon lemon juice
  • 1 ½ cups all-purpose flour
  • 2 teaspoons baking soda
  • 1 teaspoon baking powder
  • ¼ teaspoon salt
  • â…“ cup maple syrup
  • â…“ cup Greek yogurt plain 0%, no sugar added
  • 2 large eggs
  • 1 teaspoon vanilla
  • 1 cup blueberries

Instructions

  • Preheat oven to 350F. Grease muffin pan with cooking spray.
  • In a small bowl or measuring cup, mix together milk and lemon juice to create a buttermilk.
  • In a medium size bowl, add flour, baking soda, baking powder and salt. Whisk to combine.
  • In a large bowl, add maple syrup, Greek yogurt, eggs, vanilla and buttermilk mixture.
  • Add the dry ingredients to the wet ingredients. Using a spatula, fold dry ingredients into wet ingredients. Fold until the flour mixture is incorporated and there are no lumps in the batter.
  • Add blueberries.
  • Use a spatula to fold in the blueberries.
  • Using a cookie scoop, divide batter evenly into prepared muffin pan.
  • Bake for 18-20 minutes or until a toothpick inserted into the center comes out clean. Let muffins cool for 10 minutes before transferring muffins to a wire rack to cool completely. Makes 12 muffins.

Notes

Do not overmix the batter. Overmixing the batter will cause the muffins to be dense.
Healthy Blueberry Muffins can be stored at room temperature in an airtight container or bag for up to three days.
Healthy Blueberry Muffins freeze well. Place muffins in a freezer safe container or bag and freeze up to three months. Thaw muffins at room temperature when ready to eat.
Do not use muffin liners in the pan! This recipe has very little fat in it so the muffins will easily stick to the liners. I have tried greasing the liners but I find it easier to just grease the pan with some olive oil cooking spray.

Nutrition

Serving: 1muffin | Calories: 111kcal | Carbohydrates: 21g | Protein: 4g | Fat: 1g | Saturated Fat: 0.5g | Polyunsaturated Fat: 0.3g | Monounsaturated Fat: 0.4g | Trans Fat: 0.003g | Cholesterol: 32mg | Sodium: 285mg | Potassium: 82mg | Fiber: 1g | Sugar: 7g | Vitamin A: 69IU | Vitamin C: 1mg | Calcium: 56mg | Iron: 1mg

Filed Under: Healthy Snacks, Muffins, Recipes

Chocolate Chip Blondies

July 15, 2023 by Christine Leave a Comment

Chocolate Chip Blondies are rich, chocolatey and decadent. The gooey melt in your mouth cookie flavor makes these a delicious and delectable dessert for any occasion.

Cut up pieces of Chocolate Chip Blondies on a white surface with chocolate chips scattered around the blondies.

Chocolate Chip Blondies are a huge hit because they are like a cross between a brownie and a chocolate chip cookie so you get the best of both worlds with this recipe. They are simple to make and only require 7 ingredients. Simply mix up the dough, press it into the pan and pop it into the oven. Chocolate Chip Blondies are gooey, chocolatey and decadent and they make a great dessert when you are looking for something on the richer side. They taste amazing with a scoop of vanilla ice cream or frozen yogurt.

If you prefer brownies or chocolate chip cookies rather than a cross between the two, try my Soft and Chewy Chocolate Chip Cookies or Brownies for some other crowd pleasing desserts.

Ingredients

Ingredients for Chocolate Chip Blondies are laid out on a wooden surface.
  • Unsalted Butter, Melted – Helps to give the blondies that nice rich flavor.
  • Brown Sugar – Helps to keep the blondies soft and moist.
  • Eggs – Helps to bind the ingredients together.
  • Vanilla – Adds some flavor.
  • Flour – I used all-purpose flour for this recipe. I have also tried this recipe with oat flour but it did not turn out.
  • Salt – Brings out the flavor of the other ingredients.
  • Chocolate Chips – Use your favorite type of chocolate chip.

See recipe card for quantities.

Instructions

Preheat oven to 350F. Line an 8×8 baking sheet with parchment paper.

Dough in a large white bowl with an electric mixer leaning on the side of the bowl.

Add melted butter and brown sugar to a medium size bowl. Using an electric mixer, beat at medium speed for one minute.

Eggs and vanilla on top of the dough in a large white bowl.

Add eggs and vanilla. Use mixer to beat for another minute. Use a spatula to scrape down the sides of the bowl as necessary.

Dough in a large white bowl with an electric mixer leaning on the side of the bowl.

Sprinkle salt over the dough. Add flour. Set electric mixer to low and beat until the flour starts to incorporate. As the flour mixture starts to incorporate, you can increase the speed to medium. Use a spatula to scrape down the sides of the bowl.

Chocolate chips on top of the dough in a large white bowl.

Add chocolate chips. Use a spatula to fold in the chocolate chips.

Dough is spread into a square metal baking pan lined with parchment paper.

Add dough to prepared baking pan. Use a spatula to spread the dough to the edges of the pan.

Baked Chocolate Chip Blondies in a square metal baking pan lined with parchment paper.

Bake at 350F for 20-23 minutes. The blondies will still look undercooked in the middle but they will continue cooking after they have been removed from the oven. Cool for one hour before slicing into bars. Makes 16 blondies.

Hint: Let the melted butter cool slightly before mixing with the brown sugar.

Substitutions

  • Unsalted Butter – Salted butter can be substituted for the unsalted butter. If you use salted butter then omit the salt from the recipe.

Equipment

Electric Mixer – I used an electric mixer for this recipe. If you do not have an electric mixture, you can use a large spoon to mix the dough. Just be sure to mix it thoroughly.

Storage

Chocolate Chip Blondies for can be stored in an airtight container at room temperature for up to three days.

Chocolate Chip Blondies freeze well. Place blondies in a freezer safe container or bag and freeze up to three months. Thaw in the fridge or at room temperature when ready to eat.

Top tip

Do not overbake the blondies. If you overbake the blondies, they will be dry. Bake for 25 minutes or until the edges look set. The middle will still look underbaked but it will continue to bake after you remove it from the oven.

FAQ

Are blondies supposed to be gooey in the middle?

Yes! These Chocolate Chip Blondies are meant to be soft and gooey in the middle.

Why are my blondies hard?

You have baked the blondies too long. Bake for 20-23 minutes or until the edges look set. The middle will continue baking after you remove it from the oven.

Related

Looking for other recipes like this? Try these:

Cut up pieces of Chocolate Chip Blondies on a white surface with chocolate chips scattered around the blondies.
Print Recipe
5 from 1 vote

Chocolate Chip Blondies

Chocolate Chip Blondies are rich, chocolatey and decadent. The gooey melt in your mouth cookie flavor makes these a delicious and delectable dessert for any occasion.
Prep Time10 minutes mins
Bake Time20 minutes mins
Total Time30 minutes mins
Servings: 16 blondies
Calories: 198kcal
Author: Christine

Ingredients

  • ½ cup unsalted butter melted
  • 1 cup brown sugar
  • 2 large eggs
  • 2 teaspoons vanilla
  • ¼ teaspoon salt
  • 1 cup all-purpose flour
  • 1 cup chocolate chips

Instructions

  • Preheat oven to 350F. Line an 8×8 baking sheet with parchment paper.
  • Add melted butter and brown sugar to a medium size bowl. Using an electric mixer, beat at medium speed for one minute.
  • Add eggs and vanilla. Use mixer to beat for another minute. Use a spatula to scrape down the sides of the bowl as necessary.
  • Sprinkle salt over the dough. Add flour. Set electric mixer to low and beat until the flour starts to incorporate. As the flour mixture starts to incorporate, you can increase the speed to medium. Use a spatula to scrape down the sides of the bowl.
  • Add chocolate chips. Use a spatula to fold in the chocolate chips.
  • Add dough to prepared baking pan. Use a spatula to spread the dough to the edges of the pan.
  • Bake at 350F for 20-23 minutes. The blondies will still look undercooked in the middle but they will continue cooking after they have been removed from the oven. Cool for one hour before slicing into bars. Makes 18 blondies.

Notes

Let the melted butter cool slightly before mixing with the brown sugar.
Do not overbake the blondies. If you overbake the blondies, they will be dry. Bake for 25 minutes or until the edges look set. The middle will still look underbaked but it will continue to bake after you remove it from the oven.
Chocolate Chip Blondies for can be stored in an airtight container at room temperature for up to three days.
Chocolate Chip Blondies freeze well. Place blondies in a freezer safe container or bag and freeze up to three months. Thaw in the fridge or at room temperature when ready to eat.

Nutrition

Serving: 1blondie | Calories: 198kcal | Carbohydrates: 27g | Protein: 2g | Fat: 10g | Saturated Fat: 6g | Polyunsaturated Fat: 0.4g | Monounsaturated Fat: 2g | Trans Fat: 0.2g | Cholesterol: 39mg | Sodium: 50mg | Potassium: 70mg | Fiber: 0.2g | Sugar: 20g | Vitamin A: 211IU | Calcium: 26mg | Iron: 1mg

Filed Under: Desserts, Recipes

Strawberry Overnight Oats

July 4, 2023 by Christine Leave a Comment

Strawberry Overnight Oats are healthy, sweet and delicious. They come together in a breeze and they are a great breakfast option for warm summer days.

Strawberry Overnight Oats in a small glass jar on a wooden cutting board with strawberries around the jar in the foreground and two small jars of Strawberry Overnight Oats in the background.

The heat in Northwestern Ontario, Canada came early this year. My house has been hot and humid so I have been experimenting with various recipes that do not require cooking or baking. Strawberry Overnight Oats is one of these recipes.

Strawberry Overnight Oats are really easy to make. Simply mix the ingredients in a jar or bowl, cover and let sit in the fridge overnight. Remove from the fridge in the morning and you have a delicious breakfast that’s ready to eat. This recipe works well for meal prepping. I like to add Greek yogurt to my overnight oats for a protein boost and a more well-rounded breakfast. This recipe pairs well with my Egg White Breakfast Bites.

If you are looking for other recipes with strawberries, try my Healthy Strawberry Rhubarb Crisp or Strawberry Rhubarb Muffins.

Ingredients

Ingredients for strawberry overnight oats laid out on a wooden surface.
  • Strawberries – I used fresh strawberries.
  • Rolled Oats – Rolled oats work the best in this recipe.
  • Chia Seeds – Adds some heart healthy fats to this recipe.
  • Almond Milk – I used vanilla unsweetened almond milk.
  • Maple Syrup – Adds some sweetness to the oats.

See recipe card for quantities.

Instructions

Oats and chia seeds in a small glass jar on a wooden surface.

Add rolled oats and chia seeds to a small bowl or jar. Stir to combine.

Oat mixture in a small glass jar with a spoon beside the jar.

Add almond milk and 1 teaspoon of maple syrup and stir to combine. Optional: Add an extra teaspoon of maple syrup if you prefer sweeter oats.

Oat mixture with diced strawberries in a small glass jar.

Add diced strawberries. Mix until the strawberries are evenly distributed in the oat mixture.

Green and white lid on the small glass jar.

Put lid on jar or cover bowl with plastic wrap or the cover of your choosing. Refrigerate overnight. Makes 1 serving.

Hint: Make sure to cover the oats before putting them in the fridge to maximize their freshness.

Substitutions

  • Rolled Oats – Rolled oats work the best for this recipe. You can substitute quick oats but the consistency won’t be quite the same. Do not use steel cut oats for this recipe. Use certified gluten-free oats to keep this recipe gluten free.
  • Almond Milk – Any type of milk can be substituted for the almond milk.

Equipment

Strawberry Overnight Oats are super easy to make with limited equipment required. Just grab a small bowl or jar, measuring cups and spoons and you are good to go!

Storage

Overnight Oats can be stored in the fridge for up to three days. When ready to eat, remove from the fridge and enjoy.

I do not recommend freezing overnight oats.

Top tip

Be sure to let the oats sit overnight so the oats and the chia seeds have a chance to absorb the milk.

FAQ

Do you have to use rolled oats for this recipe?

Rolled oats work the best in this recipe but you can substitute quick oats in a pinch. See the substitutions section above for further tips.

How many servings does this recipe make?

I designed this recipe to make one serving but you can easily double, triple, etc. the recipe to make the desired amount of servings you choose.

Related

Looking for other recipes like this? Try these:

Strawberry Overnight Oats in a small glass jar on a wooden cutting board with strawberries around the jar in the foreground and two small jars of Strawberry Overnight Oats in the background.
Print Recipe
5 from 1 vote

Strawberry Overnight Oats

Strawberry Overnight Oats are healthy, sweet and delicious. They come together in a breeze and they are a great breakfast option for warm summer days.
Prep Time5 minutes mins
Refrigeration Time8 hours hrs
Total Time8 hours hrs 5 minutes mins
Servings: 1
Calories: 183kcal
Author: Christine

Ingredients

  • ¼ cup strawberries about 2-3 medium strawberries
  • â…“ cup rolled oats
  • 2 teaspoons chia seeds
  • â…“ cup almond milk
  • 1-2 teaspoons maple syrup

Instructions

  • Add rolled oats and chia seeds to a small bowl or jar. Stir to combine.
  • Add almond milk and 1 teaspoon of maple syrup and stir to combine. Optional: Add an extra teaspoon of maple syrup if you prefer sweeter oats.
  • Add diced strawberries. Mix until the strawberries are evenly distributed in the oat mixture.
  • Put lid on jar or cover bowl with plastic wrap or the cover of your choosing. Refrigerate overnight. Makes 1 serving.

Notes

Be sure to let the oats sit overnight so the oats and the chia seeds have a chance to absorb the milk.
Make sure to cover the oats before putting them in the fridge to maximize their freshness.
Overnight Oats can be stored in the fridge for up to three days. When ready to eat, remove from the fridge and enjoy.
I do not recommend freezing overnight oats.

Nutrition

Serving: 1bowl | Calories: 183kcal | Carbohydrates: 29g | Protein: 6g | Fat: 5g | Saturated Fat: 1g | Polyunsaturated Fat: 3g | Monounsaturated Fat: 1g | Trans Fat: 0.01g | Sodium: 112mg | Potassium: 201mg | Fiber: 6g | Sugar: 6g | Vitamin A: 9IU | Vitamin C: 21mg | Calcium: 178mg | Iron: 2mg

Filed Under: Breakfast, Recipes

Healthy Strawberry Rhubarb Crisp

June 28, 2023 by Christine Leave a Comment

Healthy Strawberry Rhubarb Crisp is the perfect balance of sweet and tart. The crumble topping paired with the berries and rhubarb make this a delicious summer dessert.

A piece of Healthy Strawberry Rhubarb Crisp with strawberry slices on a small white plate in the center of the photo, with a fork, rhubarb stalks, a small bowl of strawberries and other strawberry rhubarb slices around the plate.

It is officially strawberry season! I haven’t gone out to pick strawberries yet but it’s only a matter of time until my fridge is full of sweet and juicy fresh picked strawberries. Fresh picked strawberries don’t keep well in the fridge very long so I am often left scrambling with what to do with all of the berries. Healthy Strawberry Rhubarb Crisp is a great recipe for using up some of those berries. The sweet and juicy flavor of the berries combined with the tartness of the rhubarb make Healthy Strawberry Rhubarb Crisp a great summer treat. In fact this recipe is so healthy you could even choose to eat it for breakfast!

If you are looking for another recipe to use up some extra strawberries, try my Strawberry Rhubarb Muffins.

Ingredients

Ingredients for Healthy Strawberry Rhubarb Crisp laid out on a wooden surface.
  • Strawberries – I used fresh strawberries for this recipe.
  • Rhubarb – Adds a slightly tart flavor to the crisp.
  • Maple Syrup – Adds some sweetness to the berries and rhubarb.
  • Cornstarch – Helps to thicken the liquid from the berries as they cook.
  • Rolled Oats – Used as the base for the crumble topping.
  • Oat Flour – Pulse oats in a blender or food processor to make your own oat flour.
  • Cinnamon – Adds some flavor.
  • Maple Syrup – Used to sweeten the crumble topping.

See recipe card for quantities.

Instructions

Preheat oven to 350F. Lightly grease an 8×8 baking pan.

Chopped strawberries and rhubarb on a white cutting board with a small knife on the right side of the cutting board.

Wash strawberries and rhubarb. Remove stems from strawberries. Roughly chop strawberries and rhubarb. Transfer berries and rhubarb to a medium size bowl.

Strawberries and rhubarb in a medium size white bowl with a spoon resting on the side of the bowl.

Optional: Add maple syrup to to the berries and rhubarb. Use a spoon to gently mix the maple syrup until it coats the berries and rhubarb. Skip this step if you prefer a more tart crisp.

Strawberries and rhubarb in a medium size white bowl.

Add cornstarch to to the berries and rhubarb. Use your hands to gently toss the berries and rhubarb until the cornstarch is evenly distributed.

Crumble topping in a white medium size bowl with a spoon resting on the side of the bowl.

In a medium size bowl, add oats, oat flour and cinnamon. Stir to combine. Add maple syrup. Use a spoon to mix the crumb mixture until the maple syrup is completely incorporated. The mixture will be quite sticky.

Crumble on top of strawberries and rhubarb in a square metal baking pan.

Add berry mixture to prepared baking pan. Spread mixture to the edges of the pan. Use your hands to evenly distribute the oat mixture on top of the berries. Cover the pan with foil.

Strawberry Rhubarb Crisp in a square metal baking pan.

Bake for 40 minutes. Remove foil and bake for an additional 15 minutes to brown the crisp. Remove from oven and let cool before cutting into slices. Makes 16 slices.

Hint: Make sure to cool the crisp completely before slicing because this allows the crisp to set. If you don’t want to wait, you can serve the crisp while it’s still warm but it will be a tad messy!

Substitutions

  • Strawberries – In a pinch frozen strawberries can be substituted for the fresh strawberries. If using frozen strawberries be sure to thaw and drain the liquid from the strawberries before adding the other ingredients. If you do not drain the liquid, the crisp will be really messy.
  • Rolled Oats – Quick oats can be substituted for the rolled oats. Do not use steel cut oats for this recipe.
  • Oat Flour – All purpose flour can be used instead of oat flour.

Variations

  • Gluten Free – Use certified gluten free oats and oat flour made from gluten free oats.

Equipment

8×8 Baking Pan – Be sure to use an 8×8 baking pan as the cooking time will change if you use a different size.

Storage

Healthy Strawberry Rhubarb Crisp can be stored in an airtight container in the fridge for up to three days.

Strawberry Rhubarb Crisp can be frozen in a freezer safe container for up to three months, however the topping will not maintain the crispiness after it has been frozen. Thaw in the fridge or at room temperature when ready to eat.

Top tip

Be sure to cover the pan with foil for the first 40 minutes of baking time. If you do not cover the pan, the crumble topping will dry out.

FAQ

Can I use frozen strawberries for this recipe?

Yes frozen strawberries can be substituted for the fresh strawberries. Be sure to read the substitutions section above for tips.

How many calories does Healthy Strawberry Rhubarb Crisp have?

Each slice has only 67 calories so be sure to indulge in more than one slice!

Why is my strawberry rhubarb crisp runny?

The crisp hasn’t had a chance to set. Let crisp cool completely before serving.

Related

Looking for other recipes like this? Try these:

A piece of Healthy Strawberry Rhubarb Crisp with strawberry slices on a small white plate in the center of the photo, with a fork, rhubarb stalks, a small bowl of strawberries and other strawberry rhubarb slices around the plate.
Print Recipe
5 from 1 vote

Healthy Strawberry Rhubarb Crisp

Healthy Strawberry Rhubarb Crisp is the perfect balance of sweet and tart. The crumble topping paired with the berries and rhubarb make this a delicious summer dessert.
Prep Time15 minutes mins
Cook Time55 minutes mins
Total Time1 hour hr 10 minutes mins
Servings: 16
Calories: 67kcal
Author: Christine

Ingredients

  • 4 cups strawberries about 28 medium size strawberries
  • 1 cup rhubarb about 2 medium size stalks
  • 1 tablespoon maple syrup optional
  • 1 tablespoon cornstarch
  • 1 cup rolled oats
  • ½ cup oat flour
  • 1 teaspoon cinnamon
  • ¼ cup maple syrup

Instructions

  • Preheat oven to 350F. Lightly grease an 8×8 baking pan.
  • Wash strawberries and rhubarb. Remove stems from strawberries. Roughly chop strawberries and rhubarb. Transfer berries and rhubarb to a medium size bowl.
  • Optional: Add maple syrup to to the berries and rhubarb. Use a spoon to gently mix the maple syrup until it coats the berries and rhubarb. Skip this step if you prefer a more tart crisp.
  • Add cornstarch to to the berries and rhubarb. Use your hands to gently toss the berries and rhubarb until the cornstarch is evenly distributed.
  • In a medium size bowl, add oats, oat flour and cinnamon. Stir to combine. Add maple syrup. Use a spoon to mix the crumb mixture until the maple syrup is completely incorporated. The mixture will be quite sticky.
  • Add berry mixture to prepared baking pan. Spread mixture to the edges of the pan. Use your hands to evenly distribute the oat mixture on top of the berries. Cover the pan with foil.
  • Bake for 40 minutes. Remove foil and bake for an additional 15 minutes to brown the crisp. Remove from oven and let cool before cutting into slices. Makes 16 slices.

Notes

Make sure to cool the crisp completely before slicing because this allows the crisp to set. If you don’t want to wait, you can serve the crisp while it’s still warm but it will be a tad messy!
Healthy Strawberry Rhubarb Crisp can be stored in an airtight container in the fridge for up to three days.
Strawberry Rhubarb Crisp can be frozen in a freezer safe container for up to three months, however the topping will not maintain the crispiness after it has been frozen. Thaw in the fridge or at room temperature when ready to eat.
Be sure to cover the pan with foil for the first 40 minutes of baking time. If you do not cover the pan, the crumble topping will dry out.

Nutrition

Serving: 1slice | Calories: 67kcal | Carbohydrates: 14g | Protein: 2g | Fat: 1g | Saturated Fat: 0.1g | Polyunsaturated Fat: 0.3g | Monounsaturated Fat: 0.2g | Sodium: 2mg | Potassium: 124mg | Fiber: 2g | Sugar: 6g | Vitamin A: 12IU | Vitamin C: 22mg | Calcium: 25mg | Iron: 1mg

Filed Under: Healthy Snacks, Recipes

Healthy Zucchini Raisin Muffins

June 21, 2023 by Christine Leave a Comment

Healthy Zucchini Raisin Muffins are soft, fluffy and moist. They are slightly golden on the outside with a warm cinnamon raisin flavor on the inside.

A healthy zucchini raisin muffin on a white plate in the foreground, with a metal rack of muffins, a zucchini, and a bowl of raisins in the background.

Summertime is here in Northwestern Ontario, Canada and that means fresh and delicious garden vegetables. I love when I am able to start harvesting my vegetables because I enjoy incorporating them into my meals and there is nothing like fresh picked vegetables. I could eat handfuls of fresh vegetables everyday with the exception of zucchini. The first few zucchinis from the garden are fantastic but then I start to get tired of them unless of course they are added to baked goods. Healthy Zucchini Raisin Muffins are a great way to use up those extra zucchinis and you can’t even taste the zucchini in the muffins! With no added butter or oil, Healthy Zucchini Raisin Muffins make a great breakfast or healthy snack.

Try my Healthy Chocolate Chip Zucchini Bread for another sweet treat made with zucchini.

Ingredients

Ingredients for Healthy Zucchini Raisin Muffins laid out on a wood surface.
  • Zucchini – you can’t even taste the zucchini in these muffins!
  • All-purpose flour – I used all-purpose flour for this recipe. I haven’t tried this recipe using any other type of flour.
  • Baking Soda – Helps the muffins to rise.
  • Baking Powder – Gives the muffins a cake like texture.
  • Cinnamon – Adds a nice warm flavor.
  • Salt – Brings out the flavor of the other ingredients.
  • Coconut Sugar – Adds some sweetness.
  • Greek Yogurt – Used to replace the oil or butter.
  • Eggs – Helps to bind the ingredients together.
  • Almond Milk – I used unsweetened vanilla almond milk.
  • Vanilla – adds some extra flavor.
  • Raisins – You can’t have Zucchini Raisin Muffins without the raisins!

See recipe card for quantities.

Instructions

Preheat oven to 350F. Grease a muffin pan with non-stick cooking spray.

Shredded zucchini on a white cutting board.

Use a grater to shred the zucchini. Set aside.

Dry ingredients in a medium size white bowl with a metal whisk leaning on the side of the bowl.

In a medium size bowl, add flour, baking soda, baking powder, cinnamon and salt. Whisk to combine.

Wet ingredients in a large white bowl with a metal whisk leaning on the side of the bowl.

In a large bowl, add coconut sugar, Greek yogurt, eggs, almond milk and vanilla. Whisk to combine.

Dry ingredients on top of wet ingredients in a large white bowl.

Add the dry ingredients to the wet ingredients. Using a spatula, fold dry ingredients into wet ingredients. Fold until the flour mixture is incorporated and there are no lumps in the batter.

Shredded zucchini and raisins on top of the batter in a large white bowl.

Add zucchini and raisins.

Batter for Healthy Zucchini Raisin Muffins in a large white bowl with a blue spatula leaning on the right side of the bowl.

Use a spatula to fold in the zucchini and raisins.

Batter evenly divided into a grey and blue silicone muffin pan.

Using a cookie scoop, divide batter evenly into prepared muffin pan.

Baked zucchini raisin muffins in a grey and blue muffin pan.

Bake for 20-22 minutes or until a toothpick inserted into the center of a muffin comes out clean. Let muffins cool in the pan for 10 minutes before removing and transferring to a wire rack to cool completely. Makes 12 muffins.

Hint: Do not overmix the batter. Overmixing the batter will cause the muffins to be dense.

Substitutions

  • Almond Milk – I used unsweetened vanilla almond milk for this recipe. You can substitute the almond milk with any type of milk.
  • Coconut Sugar – Any type of granulated sugar can be substituted for the coconut sugar.
  • Greek Yogurt – I used plain 0%, no sugar added Greek yogurt. You can substitute with 2% or higher or varieties with added sugar. Keep in mind the muffins will be sweeter if you choose a Greek yogurt with added sugars.

Equipment

Silicone Muffin Pan – I used a silicone muffin pan for this recipe because it makes it super easy to pop the muffins out of the pan. You can use a metal non-stick muffin pan but be sure to grease it liberally as the muffins tend to stick.

Cookie Scoop – I used a cookie scoop to divide the batter into the muffin pan. If you do not have a cookie scoop, feel free to use a large spoon.

Storage

Healthy Zucchini Raisin Muffins can be stored in an airtight container or bag for up three days at room temperature.

Healthy Zucchini Raisin Muffins freeze well. Place muffins in a freezer safe container or bag and freeze up to three months. Thaw in the fridge or at room temperature when ready to eat.

Top tip

Do not use muffin liners in the pan! This recipe has very little fat in it so the muffins will easily stick to the liners. I have tried greasing the liners but I find it easier to just grease the pan with some olive oil cooking spray.

FAQ

Do I need to peel the zucchini before shredding it?

There is no need to peel the zucchini before shredding it! Just wash the zucchini and start shredding it.

Are zucchini raisin muffins actually healthy?

Yes! Each muffin has only 130 calories and 1 gram of fat. They make a great healthy breakfast or on the go snack.

Related

Looking for other recipes like this? Try these:

A healthy zucchini raisin muffin on a white plate in the foreground, with a metal rack of muffins, a zucchini, and a bowl of raisins in the background.
Print Recipe
5 from 1 vote

Healthy Zucchini Raisin Muffins

Healthy Zucchini Raisin Muffins are soft, fluffy and moist. They are slightly golden on the outside with a warm cinnamon raisin flavor on the inside.
Prep Time15 minutes mins
Cook Time20 minutes mins
Total Time35 minutes mins
Servings: 12
Calories: 130kcal
Author: Christine

Ingredients

  • 1 cup shredded zucchini about 1 small zucchini
  • 1 ½ cups all-purpose flour
  • 2 teaspoons baking soda
  • 1 teaspoon baking powder
  • 1 teaspoon cinnamon
  • ¼ teaspoon salt
  • â…“ cup coconut sugar
  • â…“ cup plain Greek yogurt 0%, no sugar added
  • 2 large eggs
  • 1 cup almond milk
  • 2 teaspoons vanilla
  • 1 cup raisins

Instructions

  • Preheat oven to 350F. Grease a muffin pan with non-stick cooking spray.
  • Use a grater to shred the zucchini. Set aside.
  • In a medium size bowl, add flour, baking soda, baking powder, cinnamon and salt. Whisk to combine.
  • In a large bowl, add coconut sugar, Greek yogurt, eggs, almond milk and vanilla. Whisk to combine.
  • Add the dry ingredients to the wet ingredients. Using a spatula, fold dry ingredients into wet ingredients. Fold until the flour mixture is incorporated and there are no lumps in the batter.
  • Add zucchini and raisins. Use a spatula to fold in the zucchini and raisins.
  • Using a cookie scoop, divide batter evenly into prepared muffin pan.
  • Bake for 20-22 minutes or until a toothpick inserted into the center of a muffin comes out clean. Let muffins cool in the pan for 10 minutes before removing and transferring to a wire rack to cool completely. Makes 12 muffins.

Notes

Do not overmix the batter. Overmixing the batter will cause the muffins to be dense.
Healthy Zucchini Raisin Muffins can be stored in an airtight container or bag for up three days at room temperature.
Healthy Zucchini Raisin Muffins freeze well. Place muffins in a freezer safe container or bag and freeze up to three months. Thaw in the fridge or at room temperature when ready to eat.
Do not use muffin liners in the pan! This recipe has very little fat in it so the muffins will easily stick to the liners. I have tried greasing the liners but I find it easier to just grease the pan with some olive oil cooking spray.

Nutrition

Serving: 1muffin | Calories: 130kcal | Carbohydrates: 26g | Protein: 4g | Fat: 1g | Saturated Fat: 0.3g | Polyunsaturated Fat: 0.4g | Monounsaturated Fat: 0.4g | Trans Fat: 0.003g | Cholesterol: 31mg | Sodium: 320mg | Potassium: 164mg | Fiber: 1g | Sugar: 4g | Vitamin A: 67IU | Vitamin C: 3mg | Calcium: 65mg | Iron: 1mg

Filed Under: Healthy Snacks, Muffins, Recipes

No Bake Peanut Butter Protein Bites

June 19, 2023 by Christine 2 Comments

No Bake Peanut Butter Protein Bites are soft, chewy and full of peanut butter flavor. They are super easy to prepare and they make a great snack at any time of day.

A tower of No Bake Peanut Butter Protein Bites on a small white plate in the foreground with a bowl of chocolate chips and a dishtowel in the background.

We are in the middle of a heat wave here in Northwest Ontario, Canada. My house is hot and the last thing I want to do is turn on my oven. These No Bake Peanut Butter Protein Bites are the perfect recipe for those hot days. No Bake Peanut Butter Protein Bites come together easily. Simply add the ingredients to a bowl, mix well, form into balls and place in the fridge to set. No Bake Peanut Butter Protein Bites are a healthy snack and a great protein booster that you can enjoy at any time of day. They taste sweet and decadent but they are surprisingly healthy. I like to pop one or two in my mouth on the way out the door. If you are looking for another no bake recipe, try my No Bake Cookies for a rich and delicious treat.

Ingredients

Ingredients for No Bake Peanut Butter Protein Bites laid out on a wood surface.
  • Rolled Oats – I used rolled oats for this recipe.
  • Vanilla Protein Powder – use your favorite brand!
  • Ground Flax Seeds – to add some healthy fats to the recipe.
  • Mini Chocolate Chips – Because chocolate and peanut butter taste sooo good together!
  • Peanut Butter – I used smooth peanut butter.
  • Maple Syrup – Adds some sweetness.

See recipe card for quantities.

Instructions

Dry ingredients in a white medium size bowl with a big spoon leaning on the side of the bowl.

In a medium size bowl, add oats, vanilla protein powder, ground flax seed and mini chocolate chips. Stir to combine.

Peanut butter and maple syrup on top of the dry ingredients in a white medium size bowl.

Add peanut butter and maple syrup.

The mixture is in a medium size bowl with a large spoon leaning on the side of the bowl.

Use a large spoon to mix in the peanut butter and maple syrup.

Mixture has been shaped into balls that are resting on a medium size plate.

Using your hands, take one tablespoon of the mixture and gently roll it into a ball. Place ball on plate and repeat with remaining mixture. Refrigerate for one hour. Remove bites from the fridge and enjoy! Makes 20 protein bites.

Hint: Make sure to mix the dry ingredients together before adding the peanut butter and maple syrup to ensure each ingredient is evenly distributed in the mixture.

Substitutions

  • Rolled Oats – I used rolled oats in this recipe but you can easily swap quick oats for the rolled oats.
  • Protein Powder – I used vanilla protein powder. Chocolate protein powder can be substituted for the vanilla protein powder.
  • Maple Syrup – I used maple syrup to sweeten the protein bites but you could substitute honey if you prefer.
  • Mini Chocolate Chips – Mini chocolate chips work best in this recipe because they distribute more evenly into the mixture. In a pinch, regular chocolate chips can be used.
  • Peanut Butter – Any type of nut butter can be substituted for the peanut butter.

Equipment

No Bake Peanut Butter Protein Bites are super easy to make with minimal equipment required. All you need is a bowl, measuring cups, a plate and a spoon!

Storage

No Bake Peanut Butter Protein Bites can be stored in the fridge in an airtight container or bag for up to 5 days.

No Bake Peanut Butter Protein Bites freeze well. Place bites in a freezer safe container or bag and freeze up to three months. Thaw in the fridge or at room temperature when ready to eat.

Top tip

Make sure to chill the protein bites before serving because this allows the mixture to set. Chill for one hour and then eat as many as you like!

FAQ

How many calories does a No Bake Peanut Butter Protein Bite have?

One bite has just 70 calories so make sure you eat more than one!

Can I substitute honey for the maple syrup?

Yes! Honey works as a great substitute for the maple syrup.

How many No Bake Peanut Butter Protein Bites should I eat?

Eat 2-3 protein bites for a satisfying snack.

Related

Looking for other recipes like this? Try these:

A tower of No Bake Peanut Butter Protein Bites on a small white plate in the foreground with a bowl of chocolate chips and a dishtowel in the background.
Print Recipe
5 from 1 vote

No Bake Peanut Butter Protein Bites

No Bake Peanut Butter Protein Bites are soft, chewy and full of peanut butter flavor. They are super simple to make and they make a great snack at any time of day.
Prep Time5 minutes mins
Chill Time1 hour hr
Total Time1 hour hr 5 minutes mins
Servings: 20
Calories: 70kcal
Author: Christine

Ingredients

  • â…” cup rolled oats
  • â…“ cup vanilla protein powder
  • 1 tablespoon ground flax seed
  • 2 tablespoons mini chocolate chips
  • ½ cup peanut butter
  • 2 tablespoons maple syrup

Instructions

  • In a medium size bowl, add oats, vanilla protein powder, ground flax seed and mini chocolate chips. Stir to combine.
  • Add peanut butter and maple syrup.
  • Use a large spoon to mix in the peanut butter and maple syrup.
  • Using your hands, take one tablespoon of the mixture and gently roll it into a ball. Place ball on plate and repeat with remaining mixture. Refrigerate for one hour. Remove bites from the fridge and enjoy! Makes 20 protein bites.

Notes

Make sure to mix the dry ingredients together before adding the peanut butter and maple syrup to ensure each ingredient is evenly distributed in the mixture.
No Bake Peanut Butter Protein Bites can be stored in the fridge in an airtight container or bag for up to 5 days.
No Bake Peanut Butter Protein Bites freeze well. Place bites in a freezer safe container or bag and freeze up to three months. Thaw in the fridge or at room temperature when ready to eat.
Make sure to chill the protein bites before serving because this allows the mixture to set. Chill for one hour and then eat as many as you like!

Nutrition

Serving: 1protein bite | Calories: 70kcal | Carbohydrates: 6g | Protein: 3g | Fat: 4g | Saturated Fat: 1g | Polyunsaturated Fat: 1g | Monounsaturated Fat: 2g | Trans Fat: 0.003g | Cholesterol: 4mg | Sodium: 34mg | Potassium: 61mg | Fiber: 1g | Sugar: 3g | Vitamin A: 3IU | Vitamin C: 0.01mg | Calcium: 19mg | Iron: 0.3mg

Filed Under: Breakfast, Healthy Snacks, Recipes

  • 1
  • 2
  • Next Page »

Copyright © 2026 · Foodie Pro 5 on Genesis Framework · WordPress · Log in

Rate This Recipe

Your vote:


A rating is required
A name is required
An email is required