Seeking A Balance

Recipes from decadent to healthy and everything in between.

  • Recipe Index
  • About Me
  • Home
  • Subscribe

Strawberry Rhubarb Muffins

June 13, 2023 by Christine Leave a Comment

Strawberry Rhubarb Muffins are soft, fluffy and moist. They are golden on the outside and packed full of delicious strawberry flavor on the inside.

A muffin with sliced strawberries on a small white plate in the foreground, a bowl of strawberries, a piece of rhubarb and muffins on a cooling rack in the background.

I am counting down the days until I can go strawberry picking. Unfortunately there aren’t any strawberry farms in my area so I drive to Manitoba, Canada every year to pick. Fresh picked strawberries are sweet, juicy and way better than any strawberries I can buy at the local stores. I have to admit I often pick way too many strawberries and then I am left scrambling to find recipes to use up some of those extra berries. Strawberry Rhubarb Muffins is the perfect recipe to use up some of those extra berries. The fresh strawberries add a touch of sweetness to the muffins and the tartness of the rhubarb create the perfect balance. With no added butter or oil, Strawberry Rhubarb Muffins are a healthy snack at any time of day. If you are looking for other healthy muffin recipes try my Healthy Banana Muffins.

Ingredients

Ingredients for Strawberry Rhubarb Muffins laid out on a wood surface.
  • Strawberries and Rhubarb – Adds both a sweet and tart flavor to the muffins.
  • Milk – I used 0% skim milk for this recipe.
  • Lemon Juice – Mixed with the milk to create a buttermilk.
  • All-purpose Flour – I used all-purpose flour for this recipe. I have not tried this recipe using any other type of flour.
  • Baking Soda – Helps the muffins to rise.
  • Baking Powder – Gives the muffins a cake like texture.
  • Salt – Brings out the flavor of the other ingredients.
  • Coconut Sugar – Adds some sweetness to the muffins.
  • Greek Yogurt – I used 0% no sugar added.
  • Eggs – Helps to bind the ingredients together.
  • Vanilla – Adds some flavor.

See recipe card for quantities.

Instructions

Preheat oven to 350F. Grease a muffin pan with non-stick cooking spray.

Diced strawberries and rhubarb on a white cutting board with a small knife resting on the side of the cutting board.

Dice strawberries and rhubarb into small pieces. Set aside.

A white liquid in a small measuring cup.

Mix together milk and lemon juice. Set aside.

Dry ingredients in a medium size bowl with a metal whisk leaning on the side of the bowl.

In a medium size bowl, add flour, baking soda, baking powder and salt. Whisk to combine.

Wet ingredients in a large bowl with a metal whisk leaning on the side of the bowl.

In a large bowl, add coconut sugar, Greek yogurt, eggs, vanilla and the milk mixture. Whisk to combine.
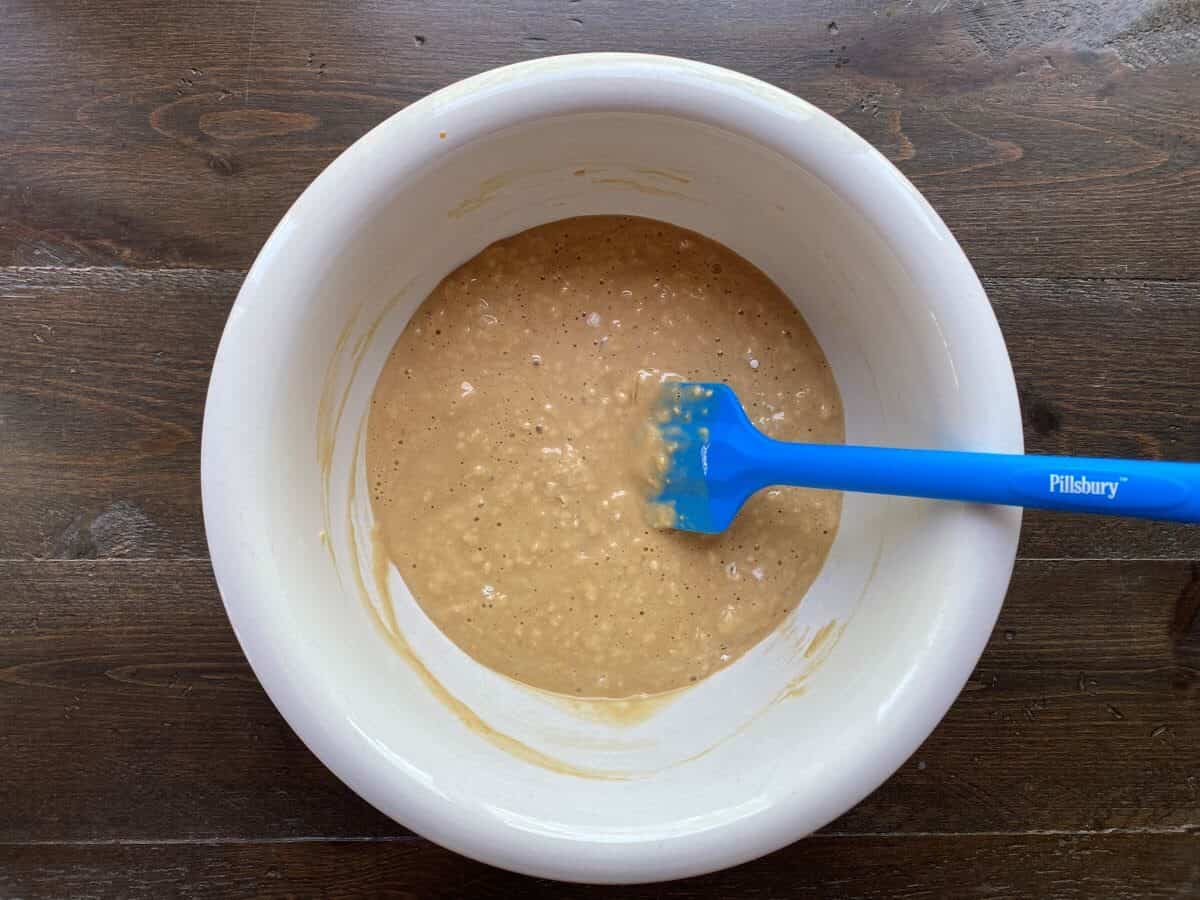
Muffin batter in a large bowl with a blue spatula leaning on the side of the bowl.

Add the dry ingredients to the wet ingredients. Using a spatula, fold dry ingredients into wet ingredients. Fold until the flour mixture is incorporated and there are no lumps in the batter.

Muffin batter in a large bowl with a blue spatula leaning on the side of the bowl.

Add diced strawberries and rhubarb. Use a spatula to fold in the strawberries and rhubarb.

Muffin batter divided evenly in grey and blue silicone muffin pan.

Using a cookie scoop, divide batter evenly into prepared muffin pan. Optional: place thinly sliced strawberries on top of the batter.

Baked strawberry rhubarb muffins in a grey and blue silicone muffin pan.

Bake for 16-18 minutes or until a toothpick inserted into the center of a muffin comes out clean. Let muffins cool in the pan for 10 minutes before removing and transferring to a wire rack to cool completely. Makes 12 muffins.

Hint: Do not overmix the batter. Overmixing the batter will cause the muffins to be dense.

Substitutions

  • Skim Milk – I used skim milk in this recipe. You can substitute the skim milk for any other type of milk.
  • Strawberries – I used fresh strawberries for this recipe. You can substitute frozen strawberries but be sure to completely thaw the berries before adding them to the batter because the berries will create a lot of liquid as they thaw. Drain the liquid before adding them to the batter.
  • Coconut Sugar – Any other type of granulated sugar can be substituted for the coconut sugar.
  • Greek Yogurt – I used 0%, no sugar added Greek yogurt. You can substitute with 2% or higher or varieties with added sugar. Keep in mind the muffins will be sweeter if you choose a Greek yogurt with added sugars.

Equipment

Silicone Muffin Pan – I used a silicone muffin pan for this recipe because it makes it super easy to pop the muffins out of the pan. You can use a metal non-stick muffin pan but be sure to grease it liberally as the muffins tend to stick.

Cookie Scoop – I used a cookie scoop to divide the batter into the muffin pan. If you do not have a cookie scoop, feel free to use a large spoon.

Storage

Strawberry Rhubarb Muffins can be stored at room temperature in an airtight container or bag for up three days.

Strawberry Rhubarb Muffins freeze well. Place muffins in a freezer safe container or bag and freeze up to three months. Thaw muffins at room temperature when ready to eat.

Top tip

Do not use muffin liners in the pan! This recipe has very little fat in it so the muffins will easily stick to the liners. I have tried greasing the liners but I find it easier to just grease the pan with some olive oil cooking spray.

FAQ

Why are my muffins dry?

You have overbaked the muffins. Do not overbake the muffins or they will be dry. Strawberry Rhubarb Muffins only need to be baked until a toothpick inserted into the center of a muffin comes out clean. As oven temperatures vary, I recommend checking the muffins at 16 minutes.

Can I use frozen strawberries for this recipe?

Yes! You can substitute frozen strawberries in this recipe. Be sure to read the substitution section above for some helpful tips.

Related

Looking for other recipes like this? Try these:

A muffin with sliced strawberries on a small white plate in the foreground, a bowl of strawberries, a piece of rhubarb and muffins on a cooling rack in the background.
Print Recipe
5 from 1 vote

Strawberry Rhubarb Muffins

Strawberry Rhubarb Muffins are soft, fluffy and moist. They are golden on the outside and packed full of delicious strawberry flavor on the inside.
Prep Time15 minutes mins
Cook Time18 minutes mins
Total Time33 minutes mins
Servings: 12
Calories: 98kcal
Author: Christine

Ingredients

  • 1 cup strawberries about 6-8 medium size strawberries
  • ½ cup rhubarb about 1 medium stalk of rhubarb
  • ¾ cup skim milk
  • 2 teaspoons lemon juice
  • 1 ½ cups all-purpose flour
  • 2 teaspoons baking soda
  • 1 teaspoon baking powder
  • ¼ teaspoon salt
  • â…“ cup coconut sugar
  • â…“ cup Greek Yogurt 0%, no sugar added
  • 2 large eggs
  • 1 teaspoon vanilla

Instructions

  • Dice strawberries and rhubarb into small pieces. Set aside.
  • Mix together milk and lemon juice. Set aside.
  • In a medium size bowl, add flour, baking soda, baking powder and salt. Whisk to combine.
  • In a large bowl, add coconut sugar, Greek yogurt, eggs, vanilla and the milk mixture. Whisk to combine.
  • Add the dry ingredients to the wet ingredients. Using a spatula, fold dry ingredients into wet ingredients. Fold until the flour mixture is incorporated and there are no lumps in the batter.
  • Add diced strawberries and rhubarb. Use a spatula to fold in the strawberries and rhubarb.
  • Using a cookie scoop, divide batter evenly into prepared muffin pan. Optional: place thinly sliced strawberries on top of the batter.
  • Bake for 16-18 minutes or until a toothpick inserted into the center of a muffin comes out clean. Let muffins cool in the pan for 10 minutes before removing and transferring to a wire rack to cool completely. Makes 12 muffins.

Notes

Do not overmix the batter. Overmixing the batter will cause the muffins to be dense.
Strawberry Rhubarb Muffins can be stored at room temperature in an airtight container or bag for up three days.
Strawberry Rhubarb Muffins freeze well. Place muffins in a freezer safe container or bag and freeze up to three months. Thaw muffins at room temperature when ready to eat.
Do not use muffin liners in the pan! This recipe has very little fat in it so the muffins will easily stick to the liners. I have tried greasing the liners but I find it easier to just grease the pan with some olive oil cooking spray.

Nutrition

Serving: 1muffin | Calories: 98kcal | Carbohydrates: 18g | Protein: 4g | Fat: 1g | Saturated Fat: 0.3g | Polyunsaturated Fat: 0.2g | Monounsaturated Fat: 0.3g | Trans Fat: 0.003g | Cholesterol: 32mg | Sodium: 296mg | Potassium: 96mg | Fiber: 1g | Sugar: 5g | Vitamin A: 83IU | Vitamin C: 8mg | Calcium: 59mg | Iron: 1mg

Filed Under: Healthy Snacks, Muffins, Recipes

Soft and Chewy Oatmeal Raisin Cookies

May 31, 2023 by Christine Leave a Comment

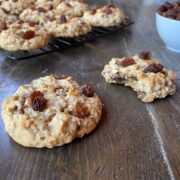
Soft and Chewy Oatmeal Raisin Cookies are slightly crispy on the outside and soft and chewy on the inside. They are packed full of raisins with a hint of cinnamon for that classic oatmeal raisin cookie taste.

Two baked oatmeal raisin cookies in the foreground, one with a bite taken out of it. A bowl of raisins on the right side of the picture and a cooling rack with the cookies on it in the back left.

Oatmeal raisin cookies are often the last cookie left in a variety pack, they are often overlooked when they are beside their chocolate chip cookie counterparts and they are frequently the last dessert left at a potluck. These Soft and Chewy Oatmeal Raisin Cookies are here to change that. Soft and Chewy Oatmeal Raisin Cookies are sweet and decadent and the cinnamon adds a nice warm flavor. Simply mix the dough, bake in the oven and you have a perfect dessert to satisfy those sweet tooth cravings. The best part is there is no chilling required!

Ingredients

Ingredients for Soft and Chewy Oatmeal Raisin Cookies laid out on a table.
  • All-purpose flour – I haven’t used any other type of flour in this recipe.
  • Cornstarch – Helps to make the cookies thick.
  • Baking Soda – Helps the cookies to rise.
  • Cinnamon – Adds that nice warm flavor to the cookies.
  • Salt – Brings out the flavor of the other ingredients.
  • Butter, Melted – Provides that nice rich flavor in the cookies.
  • Brown Sugar – Helps to keep the cookies moist and chewy.
  • Granulated Sugar – Adds a touch more sweetness.
  • Eggs – Helps to bind the ingredients together.
  • Vanilla – Adds some flavor.
  • Quick Oats – the best type of oatmeal for these cookies.
  • Raisins – because you can’t have oatmeal raisin cookies without the raisins!

See recipe card for quantities.

Instructions

Preheat oven to 350F. Line two large baking sheets with parchment paper.

Dry ingredients in a white medium size bowl with a metal whisk leaning on the side of the bowl.

In a medium size bowl add flour, cornstarch, baking soda, cinnamon and salt. Whisk to combine.

Cookie dough in a large white bowl with an electric mixer leaning on the side of the bowl.

In a large bowl, add butter, brown sugar and granulated sugar. Using an electric mixer, beat on medium speed for one minute. Scrape down the sides of the bowl with a spatula.

Cookie dough in a large white bowl with an electric mixer leaning on the side of the bowl.

Add eggs and vanilla. Beat with an electric mixture on medium until dough is smooth. Use a spatula to scrape down the sides of the bowl.

Dough in a large white bowl with flour added to the top of the dough and an electric mixer leaning on the side of the bowl.

Add half of the dry mixture to the dough. Beat with an electric mixer on low speed until the flour starts to incorporate. As the flour mixture starts to incorporate, you can increase the speed of the electric mixer to medium. Use a spatula to scrape down the sides of the bowl as necessary. Repeat with remaining dry mixture.

Oatmeal and raisins on top of the cookie dough in a large white bowl.

Add oatmeal and raisins.

The dough in a large white bowl after the raisins and oatmeal have been folded in with a blue spatula leaning on the side of the bowl.

Use a spatula to fold in the oatmeal and raisins.

Twelve cookie dough balls spaced evenly apart on a large baking sheet lined with parchment paper.

Using a large spoon or your hands, shape approximately 2 tablespoons of dough into a ball. Place dough ball onto baking pan. Repeat until the baking sheet is full. Leave 1.5 – 2 inches between cookies so they have room to spread when baking.

Baked oatmeal raisin cookies on a baking pan lined with parchment paper.

Bake cookies for 10-12 minutes or until the tops start to turn golden brown. Remove from the oven. Let cookies cool slightly before transferring to a wire rack to cool completely. Makes 24 cookies.

Hint: Make sure to line the baking sheets with parchment paper as this prevents the bottoms of the cookies from burning.

Substitutions

  • Butter – I used unsalted butter for this recipe. You can use salted butter for these cookies but be sure to omit the salt from the recipe.
  • Quick Oats – I used quick oats for this recipe. You can substitute instant oats or rolled oats. Do not use steel cut oats as they have a different texture and cooking time.

Equipment

Large Non-Stick Baking Pans – I used two large non-stick metal baking pans for this recipe. You can use smaller baking pans but you won’t be able to fit as many cookies on a pan.

Electric Mixer – I used an electric mixer for this recipe. I highly recommend using an electric mixer for this recipe because the cookie dough is quite thick. You can try mixing by hand but it will require some good elbow grease!

Spatula – Used to scrape down the sides of the bowl when mixing the dough.

Storage

Soft and Chewy Oatmeal Raisin Cookies can be stored in an airtight container or bag for up to three days at room temperature.

Soft and Chewy Oatmeal Cookies freeze well. Place cookies in an airtight container or bag and freeze up to three months. Thaw at room temperature when ready to eat.

Top tip

Do not overbake the cookies. If you overbake the cookies, they will be hard and dry. Bake cookies until the tops start to turn golden brown.

FAQ

What makes cookies soft?

Brown sugar helps to keep the cookies moist and soft. Do not replace the brown sugar with any other type of sugar in this recipe.

Why are my oatmeal raisin cookies hard?

You have overbaked the cookies. Bake cookies for 10-12 minutes or until the tops start to turn golden. The cookies may look slightly undercooked when you remove them from the oven but they will continue baking on the pan.

What keeps cookies soft and chewy?

Once cookies have cooled completely, store them in an airtight container or bag at room temperature to keep them soft and chewy. If cookies are left out and exposed to the air they will become hard.

Related

Looking for other recipes like this? Try these:

Two baked oatmeal raisin cookies in the foreground, one with a bite taken out of it. A bowl of raisins on the right side of the picture and a cooling rack with the cookies on it in the back left.
Print Recipe
5 from 1 vote

Soft and Chewy Oatmeal Raisin Cookies

Soft and Chewy Oatmeal Raisin Cookies are slightly crispy on the outside and soft and chewy on the inside. They are packed full of raisins with a hint of cinnamon for that classic oatmeal raisin cookie taste.
Prep Time15 minutes mins
Cook Time12 minutes mins
Total Time27 minutes mins
Servings: 24
Calories: 171kcal
Author: Christine

Ingredients

  • 1 ¾ cup all-purpose flour
  • 2 tablespoons cornstarch
  • 2 teaspoons baking soda
  • 1 teaspoon cinnamon
  • ¼ teaspoon salt
  • ½ cup butter, melted
  • 1 cup brown sugar
  • ¼ cup granulated sugar
  • 2 large eggs
  • 2 teaspoons vanilla
  • 2 cups quick oats
  • 1 ½ cups raisins

Instructions

  • Preheat oven to 350F. Line two large baking sheets with parchment paper.
  • In a medium size bowl add flour, cornstarch, baking soda, cinnamon and salt. Whisk to combine.
  • In a large bowl, add butter, brown sugar and granulated sugar. Using an electric mixer, beat on medium speed for one minute. Scrape down the sides of the bowl with a spatula.
  • Add eggs and vanilla. Beat with an electric mixture on medium until dough is smooth. Use a spatula to scrape down the sides of the bowl.
  • Add half of the dry mixture to the dough. Beat with an electric mixer on low speed until the flour starts to incorporate. As the flour mixture starts to incorporate, you can increase the speed of the electric mixer to medium. Use a spatula to scrape down the sides of the bowl as necessary. Repeat with remaining dry mixture.
  • Add oatmeal and raisins. Use a spatula to fold in the oatmeal and raisins.
  • Using a large spoon or your hands, shape approximately 2 tablespoons of dough into a ball. Place dough ball onto baking pan. Repeat until the baking sheet is full. Leave 1.5 – 2 inches between cookies so they have room to spread when baking.
  • Bake cookies for 10-12 minutes or until the tops start to turn golden brown. Remove from the oven. Let cookies cool slightly before transferring to a wire rack to cool completely. Makes 24 cookies.

Notes

Make sure to line the baking sheets with parchment paper as this prevents the bottoms of the cookies from burning.
Soft and Chewy Oatmeal Raisin Cookies can be stored in an airtight container or bag for up to three days at room temperature.
Soft and Chewy Oatmeal Cookies freeze well. Place cookies in an airtight container or bag and freeze up to three months. Thaw at room temperature when ready to eat.
Do not overbake the cookies. If you overbake the cookies, they will be hard and dry. Bake cookies until the tops start to turn golden brown.

Nutrition

Serving: 1cookie | Calories: 171kcal | Carbohydrates: 30g | Protein: 3g | Fat: 5g | Saturated Fat: 3g | Polyunsaturated Fat: 0.4g | Monounsaturated Fat: 1g | Trans Fat: 0.2g | Cholesterol: 26mg | Sodium: 157mg | Potassium: 128mg | Fiber: 1g | Sugar: 11g | Vitamin A: 141IU | Vitamin C: 0.5mg | Calcium: 18mg | Iron: 1mg

Filed Under: Cookies, Recipes

Healthy Chocolate Chip Zucchini Bread

May 30, 2023 by Christine Leave a Comment

Healthy Chocolate Chip Zucchini Bread is soft, fluffy and delicious. The zucchini keeps the bread extra moist and the cinnamon and chocolate chips add a nice warm, rich flavor.

Slices of Healthy Chocolate Chip Zucchini Bread on a white cutting board with a knife on the right side. A slice of healthy chocolate chip zucchini bread of the left side on a white plate and a zucchini and a bowl of chocolate chips at the top of the photo.

The weather has been beautiful here in Northwestern Ontario, Canada and I have been watching the plants in my garden start to grow. I often get lost in my thoughts as I think about all of the wonderful recipes I would like to create with my harvest. I started thinking about zucchinis because everyone knows when you plant a zucchini plant, there are often so many zucchinis that you don’t know what to do with them all. I immediately knew I had to create some recipes for the blog for the upcoming zucchini season. Healthy Chocolate Chip Zucchini Bread is one of those recipes and it’s a great way to use up one of those extra zucchinis. The zucchini keeps the bread moist, it adds some great nutrients and you barely notice it’s there. With no added butter, oil or processed sugar, Healthy Chocolate Chip Zucchini Bread is a healthy snack at any time of day.

Ingredients

Ingredients for health chocolate chip zucchini bread laid out on a table.
  • Zucchini – a medium size zucchini works great. No need to peel the zucchini!
  • All-purpose flour – I haven’t made this recipe using any other type of flour.
  • Baking Soda – Helps the bread to rise.
  • Baking Powder – Helps give the bread that cake like texture.
  • Cinnamon, Nutmeg – Spices to add flavor.
  • Salt – Brings out the flavor of the other ingredients.
  • Honey – Adds some sweetness.
  • Greek Yogurt – I used plain 0%, no sugar added.
  • Eggs – Helps to bind the ingredients together.
  • Vanilla – Adds some flavor.
  • Almond Milk – I used unsweetened vanilla almond milk.
  • Mini Chocolate Chips – You can’t have Healthy Chocolate Chip Zucchini Bread without the chocolate chips!

See recipe card for quantities.

Instructions

Preheat oven to 350F. Lightly grease a loaf pan with cooking spray.

Shredded zucchini on a white cutting board.

Use a grater to shred the zucchini. Set aside.

Dry ingredients and a whisk in a medium size bowl.

In a medium size bowl, add flour, baking soda, baking powder, cinnamon, nutmeg and salt. Whisk to combine.

Wet ingredients in a large bowl with a whisk leaning on the side of the bowl.

In a large bowl, add honey, Greek yogurt, eggs, vanilla and almond milk. Whisk to combine.

Batter in a large bowl with a blue spatula leaning on the side of the bowl.

Add dry ingredients to the wet ingredients. Use a spatula to mix the batter until the flour is incorporated. Do not overmix.

Shredded zucchini and chocolate chips on top of the batter in a large bowl.

Add shredded zucchini and chocolate chips to the batter.

Batter with chocolate chips and zucchini in a large bowl with a spatula leaning on the side of the bowl.

Use a spatula to fold in shredded zucchini and the chocolate chips.

Batter in a loaf pan.

Pour batter into prepared loaf pan.

Baked healthy chocolate chip zucchini bread in a loaf pan on a table.

Bake for 50-60 minutes or until a toothpick inserted into the center come out clean. Let cool for 10 minutes before moving to a wire rack to cool completely. Cut bread into 12 equal slices. Enjoy!

Hint: Make sure to grease the loaf pan so the bread doesn’t stick to the pan!

Substitutions

  • Almond Milk – I used unsweetened vanilla almond milk. You can use any type of milk in this recipe.
  • Mini Chocolate Chips – Feel free to use any chocolate chips you have on hand. I prefer to use mini chocolate chips because they distribute more evenly in the batter to ensure you have chocolate in every bite!

Equipment

Silicone Loaf Pan – I used a silicone loaf pan for this recipe because it’s easier to pop the bread out of the pan. You can also use a metal or glass loaf pan for this recipe.

Box Grater – I used a box grater to shred the zucchini but feel free to use any type of grater you have on hand.

Storage

Healthy Chocolate Chip Zucchini Bread can be stored in an airtight container or bag at room temperature for up to three days.

Healthy Chocolate Chip Zucchini Bread freezes well. Place slices in an airtight container or bag and freeze up to three months. Thaw in the refrigerator or at room temperature when ready to eat.

Top tip

Make sure the honey is runny before adding it to the wet ingredients. Older honey has the tendency to crystalize and become thick. It will be difficult to whisk in the honey if it is crystalized and thick. Thick or crystalized honey can be put in the microwave for 20 seconds and it will quickly become runny!

FAQ

Should I leave the skin on the zucchini?

Yes! There is no need to peel the zucchini. You won’t even notice the skin is there and it adds extra nutrients to the bread.

Why is my bread dry?

You have overbaked the zucchini bread. Bake 50-60 minutes or until a toothpick inserted into the center comes out clean. I recommend checking the bread at 50 minutes to ensure you don’t overbake it.

Why is my Healthy Chocolate Chip Zucchini Bread dense?

Do not overmix the batter because overmixing will cause the bread to be dense. Mix the batter just until the flour mixture is incorporated to create the soft and fluffy bread.

Related

Looking for other recipes like this? Try these:

Slices of Healthy Chocolate Chip Zucchini Bread on a white cutting board with a knife on the right side. A slice of healthy chocolate chip zucchini bread of the left side on a white plate and a zucchini and a bowl of chocolate chips at the top of the photo.
Print Recipe
5 from 1 vote

Healthy Chocolate Chip Zucchini Bread

Healthy Chocolate Chip Zucchini Bread is soft, fluffy and delicious. The zucchini keeps the bread extra moist and the cinnamon and chocolate chips add a nice warm, rich flavor.
Prep Time15 minutes mins
Cook Time1 hour hr
Total Time1 hour hr 15 minutes mins
Servings: 12
Calories: 145kcal
Author: Christine

Ingredients

  • 1 cup zucchini shredded
  • 1 ½ cups all-purpose flour
  • 2 teaspoons baking powder
  • 1 teaspoons baking soda
  • 1 teaspoon cinnamon
  • ¼ teaspoon nutmeg
  • ¼ teaspoon salt
  • â…“ cup honey
  • â…“ cup Greek Yogurt plain 0%, no sugar added
  • 2 large eggs
  • 2 teaspoons vanilla
  • ½ cup almond milk
  • ½ cup mini chocolate chips divided

Instructions

  • Use a grater to shred the zucchini. Set aside.
  • In a medium size bowl, add flour, baking soda, baking powder, cinnamon, nutmeg and salt. Whisk to combine.
  • In a large bowl, add honey, Greek yogurt, eggs, vanilla and almond milk. Whisk to combine.
  • Add dry ingredients to the wet ingredients. Use a spatula to mix the batter until the flour is incorporated. Do not overmix.
  • Add shredded zucchini and chocolate chips to the batter.
  • Use a spatula to fold in shredded zucchini and the chocolate chips.
  • Pour batter into prepared loaf pan.
  • Bake for 50-60 minutes or until a toothpick inserted into the center come out clean. Let cool for 10 minutes before moving to a wire rack to cool completely. Cut bread into 12 equal slices. Enjoy!

Notes

Make sure to grease the loaf pan so the bread doesn’t stick to the pan!
Make sure the honey is runny before adding it to the wet ingredients. Older honey has the tendency to crystalize and become thick. It will be difficult to whisk in the honey if it is crystalized and thick. Thick or crystalized honey can be put in the microwave for 20 seconds and it will quickly become runny!
Healthy Chocolate Chip Zucchini Bread can be stored in an airtight container or bag at room temperature for up to three days.
Healthy Chocolate Chip Zucchini Bread freezes well. Place slices in an airtight container or bag and freeze up to three months. Thaw in the refrigerator or at room temperature when ready to eat.

Nutrition

Serving: 1slice | Calories: 145kcal | Carbohydrates: 26g | Protein: 4g | Fat: 3g | Saturated Fat: 1g | Polyunsaturated Fat: 0.3g | Monounsaturated Fat: 0.4g | Trans Fat: 0.02g | Cholesterol: 32mg | Sodium: 244mg | Potassium: 70mg | Fiber: 1g | Sugar: 13g | Vitamin A: 84IU | Vitamin C: 2mg | Calcium: 78mg | Iron: 1mg

Filed Under: Breads, Healthy Snacks, Recipes

Chocolate Chip Cookie Pie

May 29, 2023 by Christine Leave a Comment

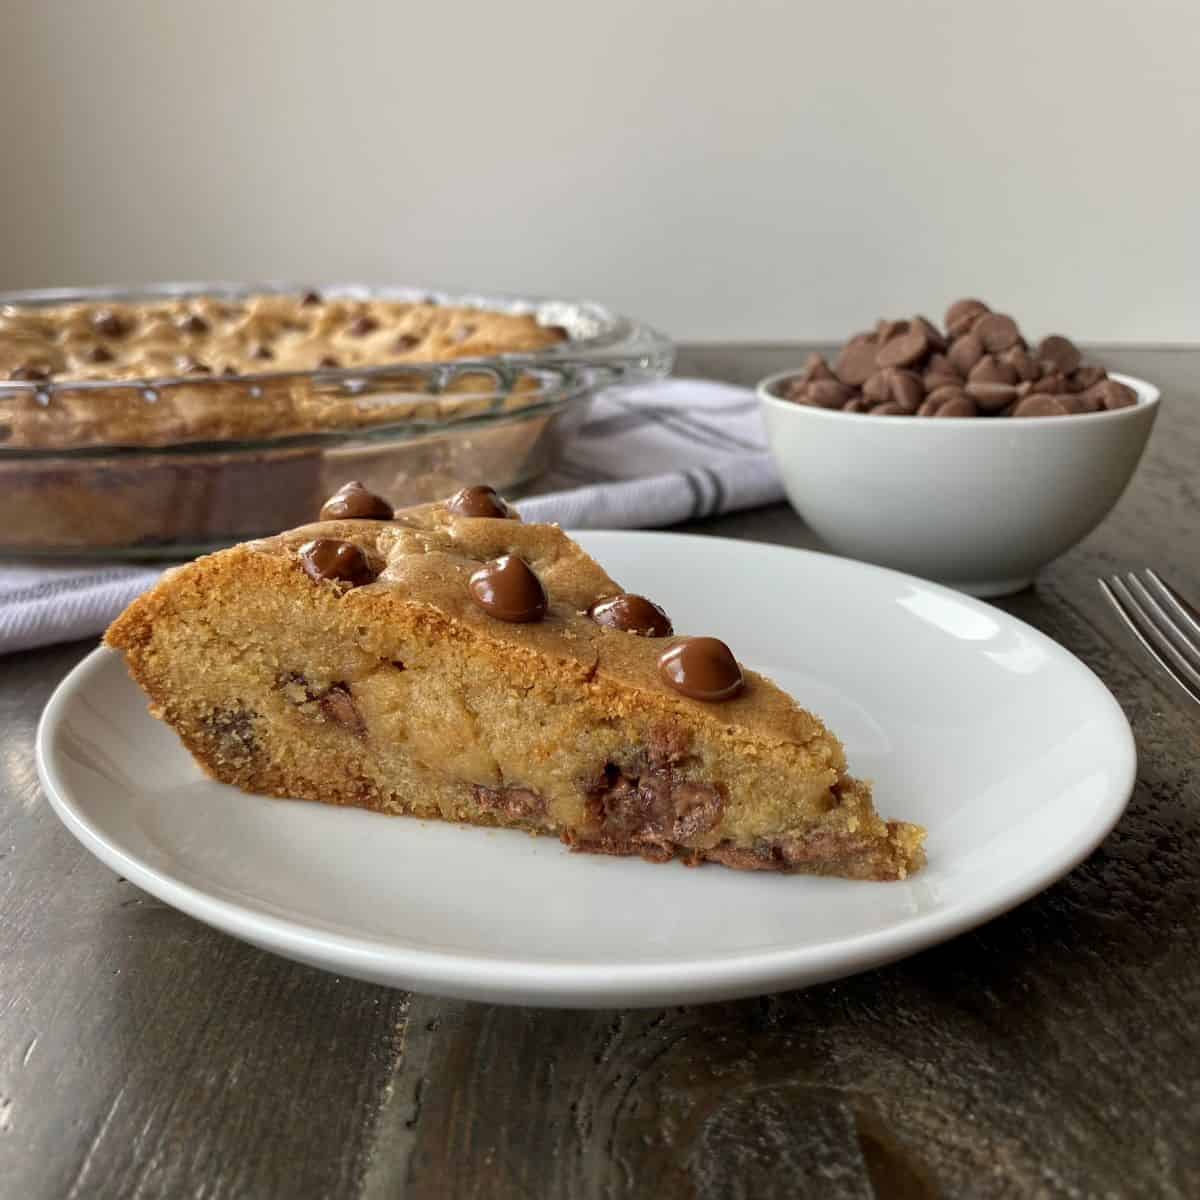
Chocolate Chip Cookie Pie is soft, chewy and chocolatey. It’s a rich and delectable dessert that’s perfect for any occasion.

A piece of Chocolate Chip Cookie Pie on a white plate in the foreground, with the remaining cookie pie and a dish of chocolate chips in the background.

Craving chocolate chip cookies but you don’t want put in all of the work to make them? Looking for a quick and easy crowd pleasing dessert for a special occasion? Chocolate Chip Cookie Pie is just the recipe for you. It’s like one big giant chocolate chip cookie but in pie form. You simply mix up the batter, press it into a pie plate and bake it in the oven. There is no fussing over scooping the dough onto cookie sheets. Slice the pie when it’s done baking, add some ice cream and you have a rich and decadent dessert that is sure to please others.

Ingredients

Ingredients for Chocolate Chip Cookie Pie measured and laid out on a table.
  • All-purpose flour – I used all-purpose flour for this recipe. I haven’t tried this recipe using any other type of flour.
  • Baking Soda – Helps the pie to rise.
  • Salt – Brings out the flavor of the other ingredients.
  • Unsalted Butter, Melted – Helps give the pie that nice rich flavor.
  • Brown Sugar – Gives the pie a moist and chewy texture.
  • Granulated Sugar – Adds a touch more sweetness.
  • Eggs – Helps to bind the ingredients together.
  • Vanilla – Adds some flavor.
  • Chocolate Chips – You can’t have Chocolate Chip Cookie Pie without the chocolate chips!

See recipe card for quantities.

Instructions

Preheat oven to 350F.

Dry ingredients with a whisk in a medium size bowl.

In a medium size bowl, add flour, baking soda and salt. Whisk to combine.

Wet ingredients for Chocolate Chip Cookie Pie in a large bowl with an electric mixer leaning on the side of the bowl.

In a large bowl, add melted butter, brown sugar and granulated sugar. Beat with an electric mixer on medium speed until combined. Use a spatula to scrape down the sides of the bowl as necessary.

Wet ingredients for Chocolate Chip Cookie Pie in a large bowl with an electric mixer leaning on the side of the bowl.

Add eggs and vanilla. Beat with electric mixture on medium speed until the batter is smooth. Use a spatula to scrape down the sides of the bowl.

Flour has been added to the dough in a large bowl, with a electric mixer leaning on the side of the bowl.

Add half the flour mixture to the batter. Beat on low until the flour starts to incorporate, then increase speed to medium. Scrape down the sides of the bowl with a spatula. Repeat with remaining flour mixture and beat until all of the flour has been incorporated.

Chocolate Chips mixed into the dough in a large bowl with a spatula in the dough.

Add 1 cup chocolate chips to the batter. Use a spatula to fold in the chocolate chips.

Dough has been spread evenly into a pie plate.

Add dough to pie plate. Use spatula to spread dough evenly in the pie plate.

Chocolate Chips sprinkled on top of cookie dough in a pie dish on a table.

Sprinkle with remaining chocolate chips.

Baked Chocolate Chip Cookie Pie in a pie plate on a table.

Bake for 27-30 minutes or until the edges of the pie start to brown and the middle no longer looks glossy. The middle of the pie will look slightly undercooked but it will continue to bake after it has been removed from the oven. Let pie cool completely or overnight before cutting into slices. Makes 16 slices.

Hint: Make sure to cool the pie completely or overnight before cutting into slices as this allows the gooey texture of the cookie pie to set.

Substitutions

  • Unsalted Butter – I used unsalted butter for this recipe. You can use salted butter but be sure to omit the salt from the recipe.
  • Chocolate Chips – I used milk chocolate chips for this recipe but feel free to use whatever type of chocolate chips you prefer.

Equipment

Electric Mixer – I used an electric mixer for this recipe. I highly recommend using an electric mixer for this recipe because the dough is quite thick. You can try mixing by hand but you will likely end up with very sore arms.

Glass Pie Plate – I used a glass pie plate for this recipe. You can use a metal or disposable pie plate, just make sure it’s 8 inches because using a different sized pie plate will change the baking time.

Storage

Chocolate Chip Cookie Pie can be stored in an airtight container or bag at room temperature for up to three days.

Chocolate Chip Cookie Pie freezes well. Wrap individual pieces of pie in plastic wrap before placing in a freezer safe container or bag. Freeze up to three months. Thaw in the fridge or at room temperature when you are ready to enjoy another piece of this Chocolate Chip Cookie Pie!

Top tip

Do not overbake the pie! If Chocolate Chip Cookie Pie is overbaked it will be hard and dry. If the pie is baked right, the center will still be a little gooey.

FAQ

What is cookie pie made of?

Chocolate Chip Cookie Pie is made of the same ingredients that are used to bake chocolate chip cookies. The pie tastes just like a delicious chocolate chip cookie but in pie form.

Can I serve Chocolate Chip Cookie Pie with ice-cream?

Yes! Chocolate Chip Cookie Pie tastes even better when it’s served with ice-cream. I also like to serve the cookie pie with vanilla frozen yogurt.

Why is my cookie pie hard and dry?

You have baked the pie for too long. Bake the pie until the edges start to brown and the middle no longer looks glossy. The middle will still look slightly undercooked but it will continue to bake after you remove it from the oven.

Related

Looking for other recipes like this? Try these:

A piece of Chocolate Chip Cookie Pie on a white plate in the foreground, with the remaining cookie pie and a dish of chocolate chips in the background.
Print Recipe
5 from 1 vote

Chocolate Chip Cookie Pie

Chocolate Chip Cookie Pie is soft, chewy and chocolatey. It's a rich and delectable dessert that's perfect for any occasion.
Prep Time15 minutes mins
Cook Time30 minutes mins
Total Time45 minutes mins
Servings: 16
Calories: 254kcal
Author: Christine

Ingredients

  • 2 cups all-purpose flour
  • 1 teaspoon baking soda
  • ¼ teaspoon salt
  • ½ cup unsalted butter melted
  • 1 cup brown sugar
  • ¼ cup granulated sugar
  • 2 large eggs
  • 1 tablespoon vanilla
  • 1 ¼ cup chocolate chips divided

Instructions

  • Preheat oven to 350F.
  • In a medium size bowl, add flour, baking soda and salt. Whisk to combine.
  • In a large bowl, add melted butter, brown sugar and granulated sugar. Beat with an electric mixer on medium speed until combined. Use a spatula to scrape down the sides of the bowl as necessary.
  • Add eggs and vanilla. Beat with electric mixture on medium speed until the batter is smooth. Use a spatula to scrape down the sides of the bowl.
  • Add half the flour mixture to the batter. Beat on low until the flour starts to incorporate, then increase speed to medium. Scrape down the sides of the bowl with a spatula. Repeat with remaining flour mixture and beat until all of the flour has been incorporated.
  • Add 1 cup chocolate chips to the batter. Use a spatula to fold in the chocolate chips.
  • Add dough to pie plate. Use spatula to spread dough evenly in the pie plate.
  • Sprinkle with remaining chocolate chips.
  • Bake for 27-30 minutes or until the edges of the pie start to brown and the middle no longer looks glossy. The middle of the pie will look slightly undercooked but it will continue to bake after it has been removed from the oven. Let pie cool completely or overnight before cutting into slices. Makes 16 slices.

Notes

Make sure to cool the pie completely or overnight before cutting into slices as this allows the gooey texture of the cookie pie to set.
Do not overbake the pie! If Chocolate Chip Cookie Pie is overbaked it will be hard and dry. If the pie is baked right, the center will still be a little gooey.
Chocolate Chip Cookie Pie can be stored in an airtight container or bag at room temperature for up to three days.
Chocolate Chip Cookie Pie freezes well. Wrap individual pieces of pie in plastic wrap before placing in a freezer safe container or bag. Freeze up to three months. Thaw in the fridge or at room temperature when you are ready to enjoy another piece of this Chocolate Chip Cookie Pie!

Nutrition

Serving: 1slice | Calories: 254kcal | Carbohydrates: 38g | Protein: 2g | Fat: 11g | Saturated Fat: 6g | Polyunsaturated Fat: 0.4g | Monounsaturated Fat: 2g | Trans Fat: 0.2g | Cholesterol: 39mg | Sodium: 119mg | Potassium: 87mg | Fiber: 0.4g | Sugar: 25g | Vitamin A: 211IU | Calcium: 29mg | Iron: 1mg

Filed Under: Desserts, Recipes

Air Fryer Chicken Strips

May 25, 2023 by Christine Leave a Comment

Air Fryer Chicken Strips are crispy on the outside and moist and flavorful on the inside. They are a great alternative to store bought chicken strips.

Air Fryer Chicken Strips on a square plate with a bowl of ketchup on the top right hand side.

Looking for a kid friendly meal idea or snack? Air Fryer Chicken Strips are just the recipe for you! Air Fryer Chicken Strips are super easy to make. Simply dip the chicken strips in egg, coat with the breading mix and pop into the air fryer for 10 minutes. Kids will love these Air Fryer Chicken Strips and you can feel safe feeding them to your kids knowing there are no unnecessary additives or preservatives that many of the store bought varieties have. Air Fryer Chicken Strips will quickly become part of your regular meal rotation and I am sure the kids won’t object! Try my Air Fryer Sweet Potato Fries if you are looking for a delicious side to pair with your Air Fryer Chicken Strips.

Ingredients

The ingredients for Air Fryer Chicken Strips are laid out on a table.
  • Boneless Skinless Chicken Breasts – Will be cut into smaller pieces to create the chicken strips.
  • Panko Breadcrumbs – Used to coat the chicken strips.
  • Seasoned Breadcrumbs – Also used to coat the chicken strips.
  • Garlic Powder, Seasoned Salt, Ground Black Pepper – Seasonings for the coating mix.
  • Egg – Helps the coating to stick to the chicken strips.

See recipe card for quantities.

Instructions

Chicken breast cut into one inch strips on a plate.

Cut chicken breasts into strips. The strips should be approximately one inch wide.

Breadcrumb and spice mixture in a container with the container lid on the side.

Place panko breadcrumbs, seasoned breadcrumbs and spices in a resealable container or bag. Shake until the spices are mixed into the breadcrumbs.

Breadcrumb mixture spread out on a plate.

Pour breadcrumb mixture onto a plate or shallow dish. Gently pat down the breadcrumb mixture.

A beaten egg with a fork in a small bowl.

Beat egg in a small bowl.

A cut piece of chicken breast is in the egg wash in a small bowl.

Take one chicken strip and coat it with the egg mixture.

A cut piece of chicken breast is being coated in the breadcrumb mixture on a large plate.

Gently place the chicken strip onto the coating mixture and rotate until all sides have coating on it. Place chicken strip on a plate.

Cut chicken breast pieces that have been coated in the breadcrumb mixture on a plate.

Repeat with remaining chicken strips.

Cooked chicken strips in an air fryer basket.

Preheat air fryer to 400F. Place chicken strips in a single layer in the air fryer basket. Cook for 5 minutes. Flip chicken strips and cook an additional 2-3 minutes or until the internal temperature reaches 165F. Repeat with remaining chicken strips. Remove chicken strips from air fryer and serve immediately. Makes approximately 24 chicken strips.

Hint: Don’t overcook the chicken strips or they will be dry. Chicken strips only need to be cooked until they reach an internal temperature of 165F.

Substitutions

  • Seasoned Breadcrumbs – You can use plain breadcrumbs if you don’t have seasoned breadcrumbs.
  • Seasoned Salt – Any type of salt can be substituted for the seasoned salt in this recipe.

Variations

  • Spicy – add 1/2 teaspoon of cayenne pepper if you like some heat!

Equipment

Air Fryer – I used a basket style air fryer for this recipe. Other styles of air fryers can be used, just make sure you flip the chicken strips after 5 minutes of cooking time.

Storage

Air Fryer Chicken Strips are best served immediately after cooking. Leftovers can be stored in the fridge for up to two days. Chicken strips can be reheated in the microwave, oven or in the air fryer.

Air Fryer Chicken Strips freeze well. Place chicken strips in an airtight container or bag and freeze up to three months. Thaw in the fridge or at room temperature. Reheat in the microwave, oven or air fryer.

Top tip

Do not crowd the chicken strips in the air fryer basket because they won’t cook properly. Ensure chicken strips are placed in a single layer with a little space between chicken strips.

FAQ

I don’t have an air fryer. Can I cook the chicken strips in the oven?

Yes! Preheat oven to 400F. Cook chicken strips for 10 minutes. Flip the chicken strips and cook for an additional 3-4 minutes or until the internal temperature reaches 165F.

Can I use precut chicken tenders?

Absolutely! Precut chicken tenders can be used in place of the chicken breast. I prefer to use chicken breasts because they cost less than the chicken tenders.

Related

Looking for other recipes like this? Try these:

Air Fryer Chicken Strips on a square plate with a bowl of ketchup on the top right hand side.
Print Recipe
5 from 1 vote

Air Fryer Chicken Strips

Air Fryer Chicken Strips are crispy on the outside and moist and flavorful on the inside. They are a great alternative to store bought chicken strips.
Prep Time10 minutes mins
Cook Time8 minutes mins
Total Time18 minutes mins
Servings: 6
Calories: 242kcal
Author: Christine

Ingredients

  • 2 lbs chicken breast boneless, skinless
  • ½ cup Panko breadcrumbs
  • ½ cup breadcrumbs seasoned
  • 1 teaspoon garlic powder
  • ½ teaspoon seasoned salt
  • ½ teaspoon black pepper ground
  • 1 large egg

Instructions

  • Cut chicken breasts into strips. The strips should be approximately one inch wide.
  • Place panko breadcrumbs, seasoned breadcrumbs and spices in a resealable container or bag. Shake until the spices are mixed into the breadcrumbs.
  • Pour breadcrumb mixture onto a plate or shallow dish. Gently pat down the breadcrumb mixture.
  • Beat egg in a small bowl.
  • Take one chicken strip and coat it with the egg mixture.
  • Gently place the chicken strip onto the coating mixture and rotate until all sides have coating on it. Place chicken strip on a plate.
  • Repeat with remaining chicken strips.
  • Preheat air fryer to 400F. Place chicken strips in a single layer in the air fryer basket. Cook for 5 minutes. Flip chicken strips and cook an additional 2-3 minutes or until the internal temperature reaches 165F. Repeat with remaining chicken strips. Remove chicken strips from air fryer and serve immediately. Makes approximately 24 chicken strips.

Notes

Don’t overcook the chicken strips or they will be dry. Chicken strips only need to be cooked until they reach an internal temperature of 165F.
Air Fryer Chicken Strips are best served immediately after cooking. Leftovers can be stored in the fridge for up to two days. Chicken strips can be reheated in the microwave, oven or in the air fryer.
Air Fryer Chicken Strips freeze well. Place chicken strips in an airtight container or bag and freeze up to three months. Thaw in the fridge or at room temperature. Reheat in the microwave, oven or air fryer.
Do not crowd the chicken strips in the air fryer basket because they won’t cook properly. Ensure chicken strips are placed in a single layer with a little space between chicken strips.

Nutrition

Serving: 4strips | Calories: 242kcal | Carbohydrates: 11g | Protein: 35g | Fat: 5g | Saturated Fat: 1g | Polyunsaturated Fat: 1g | Monounsaturated Fat: 2g | Trans Fat: 0.02g | Cholesterol: 128mg | Sodium: 484mg | Potassium: 607mg | Fiber: 1g | Sugar: 1g | Vitamin A: 91IU | Vitamin C: 2mg | Calcium: 39mg | Iron: 1mg

Food safety

  • Cook to a minimum temperature of 165F.
  • Do not use the same utensils on cooked food, that previously touched raw meat.
  • Wash hands after touching raw meat.
  • Don’t leave food sitting out at room temperature for extended periods.
  • Never leave cooking food unattended.

Filed Under: Air Fryer, Recipes

Egg White Breakfast Bites

May 9, 2023 by Christine Leave a Comment

Egg White Breakfast Bites are a delicious, healthy and flavorful on the go breakfast snack. They are high in protein to keep you feeling satisfied on those busy mornings.

An Egg White Breakfast Bite on a small white plate, with a green onion placed above the plate, a muffin pan is placed to the left of the plate, a fork is placed to the right of the plate and a dishtowel is placed below the plate.

Looking for a quick grab and go breakfast snack on those busy weekday mornings? Egg White Breakfast Bites are just the answer you are looking for. This recipe can be made in advance and it’s great for meal prepping. Egg White Breakfast Bites are super easy to make. Simply whisk the ingredients in a large measuring cup and pour into a muffin pan to bake. Store them in the fridge and grab a couple as you are walking out the door. Try adding a piece of my Gluten Free Blueberry Oatmeal Breakfast Bars for a more well rounded breakfast to keep you satisfied all morning long.

Ingredients

Ingredients for Egg White Breakfast Bites measured and displayed on a table.
  • Liquid Egg Whites – Can be found near the eggs in the grocery store.
  • Cottage Cheese – Do not use 0% cottage cheese as it is too runny for this recipe. Be sure to use 2% or higher.
  • Red Pepper, Finely Diced – Adds some color to the egg white bites.
  • Green Onion, Finely Chopped – Adds some color and flavor to the recipe.
  • Garlic Powder, Salt, Ground Black Pepper – Spices to add more flavor.
  • Shredded Cheddar Cheese – or any type of shredded cheese you have on hand.

See recipe card for quantities.

Instructions

Preheat oven to 350F. Grease a muffin pan generously with cooking spray.

Egg White mixture in a large measuring cup with a whisk in the mixture.

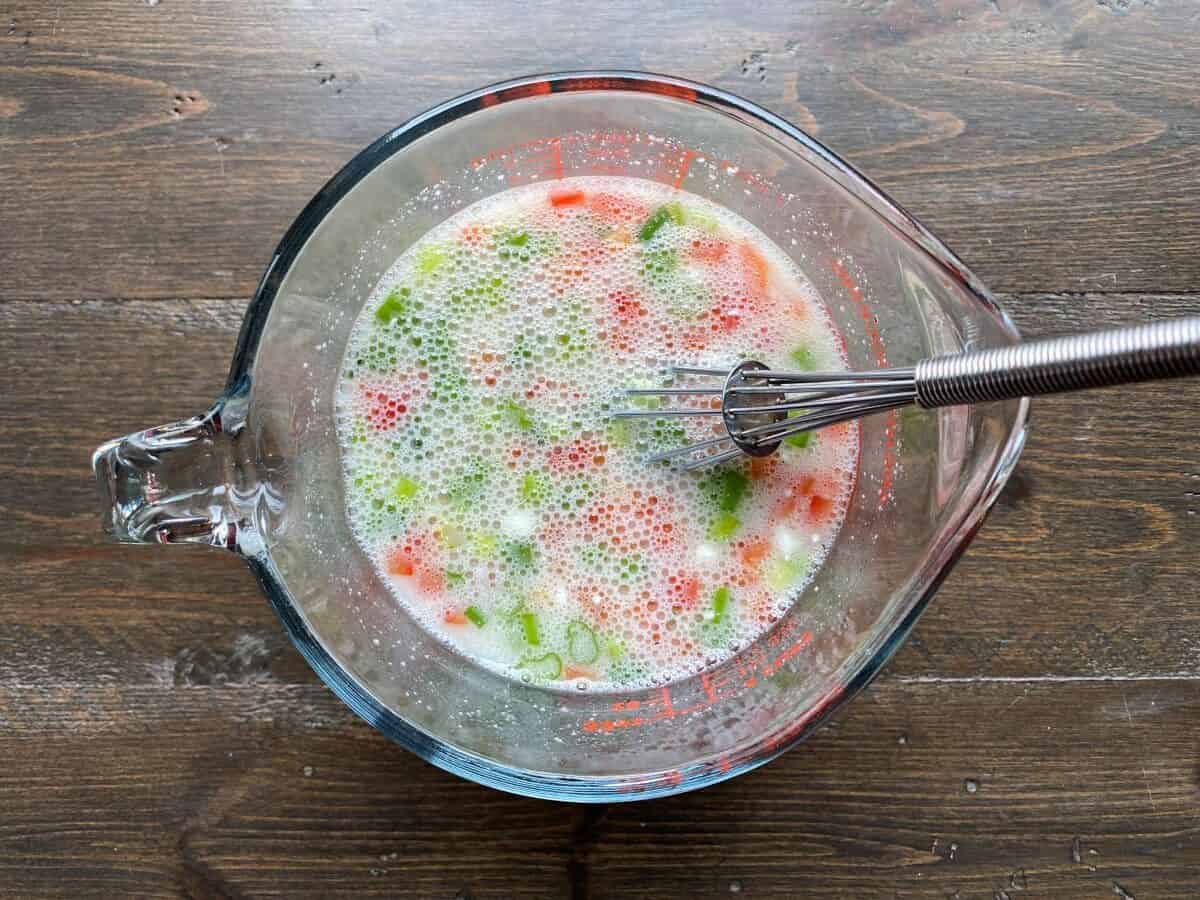
In a large measuring cup add egg whites, cottage cheese, diced red pepper, green onions and spices. Whisk to combine.

Cheese is added to the egg white mixture in the large measuring cup.

Add cheese to the egg mixture. Stir to combine.

Egg White mixture is divided evenly into a silicone muffin pan.

Divide mixture evenly into muffin pan, filling each cup about 3/4 full.

Baked Egg White Breakfast Bites in a silicone muffin pan.

Bake for 26-28 minutes or until the eggs look set. The eggs bites will puff up but they will deflate as they start to cool. Cool completely before removing from pan. Makes 12 egg white bites.

Hint: Make sure to liberally grease the muffin pan because Egg White Breakfast Bites have a tendency to stick to the pan. I prefer to use a silicone muffin pan because you can easily pop the egg white bites out of the pan after they have cooled.

Substitutions

  • Liquid Egg Whites – I used liquid egg whites that come in a carton for this recipe. You also use egg whites for this recipe. Substitute 16 egg whites for 2 cups of liquid egg whites. Be sure to save the yolks for use in another recipe. I prefer to use liquid egg whites because it’s easier and a big time saver!
  • Red Pepper – You can substitute any kind of pepper for the red pepper in this recipe. Green pepper also works well. I prefer to use red pepper because it adds some color to the egg white bites.
  • Cheddar Cheese – Feel free to swap the cheddar cheese for any other type of cheese you have on hand.

Variations

  • Spicy – add 1/4 teaspoon of cayenne pepper to add some heat to the egg white bites.

Equipment

Large Measuring Cup with a Spout – I use this type of measuring cup to mix the recipe in because it makes it easy to pour the liquid into the muffin pan. If you do not have this type of measuring cup, you can mix the egg white bites in a large bowl and use a ladle to spoon the liquid evenly into the muffin pan.

Silicone Muffin Pan – I used a silicone muffin pan for this recipe because it’s easy to pop the egg white bites out of the pan once they have cooled. You can also use a non-stick metal muffin pan for this recipe. Be sure to grease the pan liberally.

Storage

Egg White Breakfast Bites can be stored in the refrigerator in an airtight container or bag for 3-4 days.

Egg White Breakfast Bites freeze well. Wrap each bite in plastic wrap before transferring to an airtight freezer bag or container. Freeze up to three months. Thaw in the refrigerator or at room temperature.

Top tip

Don’t overcook the Egg White Breakfast Bites or they will be rubbery. Cook the egg white bites until the eggs look set.

FAQ

Are Egg White Breakfast Bites healthy?

Yes! One egg white bite has only 49 calories, 2 grams of fat and 7 grams of protein!

How do I keep my egg white bites from collapsing?

Let the egg white bites cool in the pan before removing them.

Why are my egg white bites rubbery?

You have cooked the egg white bites too long. Cook egg white bites until the egg looks set.

Related

Looking for other recipes like this? Try these:

An Egg White Breakfast Bite on a small white plate, with a green onion placed above the plate, a muffin pan is placed to the left of the plate, a fork is placed to the right of the plate and a dishtowel is placed below the plate.
Print Recipe
No ratings yet

Egg White Breakfast Bites

Egg White Breakfast Bites are a delicious, healthy and flavorful on the go breakfast snack. They are high in protein to keep you feeling satisfied on those busy mornings.
Prep Time10 minutes mins
Cook Time26 minutes mins
Total Time36 minutes mins
Servings: 12
Calories: 49kcal
Author: Christine

Ingredients

  • 2 cups liquid egg whites
  • 1 cup cottage cheese 2% or higher
  • ¼ cup red pepper finely diced
  • 2 tablespoons green onion finely chopped
  • ½ teaspoon garlic powder
  • ¼ teaspoon ground black pepper
  • ¼ teaspoon salt
  • ¼ cup cheddar cheese, shredded

Instructions

  • Preheat oven to 350F. Grease a muffin pan generously with cooking spray.
  • In a large measuring cup add egg whites, cottage cheese, diced red pepper, green onions and spices. Whisk to combine.
  • Add cheese to the egg mixture. Stir to combine.
  • Divide mixture evenly into muffin pan, filling each cup about 3/4 full.
  • Bake for 26-28 minutes or until the eggs look set. The eggs bites will puff up but they will deflate as they start to cool. Cool completely before removing from pan. Makes 12 egg white bites.

Notes

Make sure to liberally grease the muffin pan because Egg White Breakfast Bites have a tendency to stick to the pan. I prefer to use a silicone muffin pan because you can easily pop the egg white bites out of the pan after they have cooled.
Don’t overcook the Egg White Breakfast Bites or they will be rubbery. Cook the egg white bites until the eggs look set.
Egg White Breakfast Bites can be stored in the refrigerator in an airtight container or bag for 3-4 days.
Egg White Breakfast Bites freeze well. Wrap each bite in plastic wrap before transferring to an airtight freezer bag or container. Freeze up to three months. Thaw in the refrigerator or at room temperature.

Nutrition

Serving: 1egg white bite | Calories: 49kcal | Carbohydrates: 2g | Protein: 7g | Fat: 2g | Saturated Fat: 1g | Polyunsaturated Fat: 0.1g | Monounsaturated Fat: 0.3g | Cholesterol: 5mg | Sodium: 193mg | Potassium: 31mg | Fiber: 0.1g | Sugar: 1g | Vitamin A: 483IU | Vitamin C: 4mg | Calcium: 32mg | Iron: 1mg

Filed Under: Recipes

Air Fryer Chicken Burgers

May 8, 2023 by Christine Leave a Comment

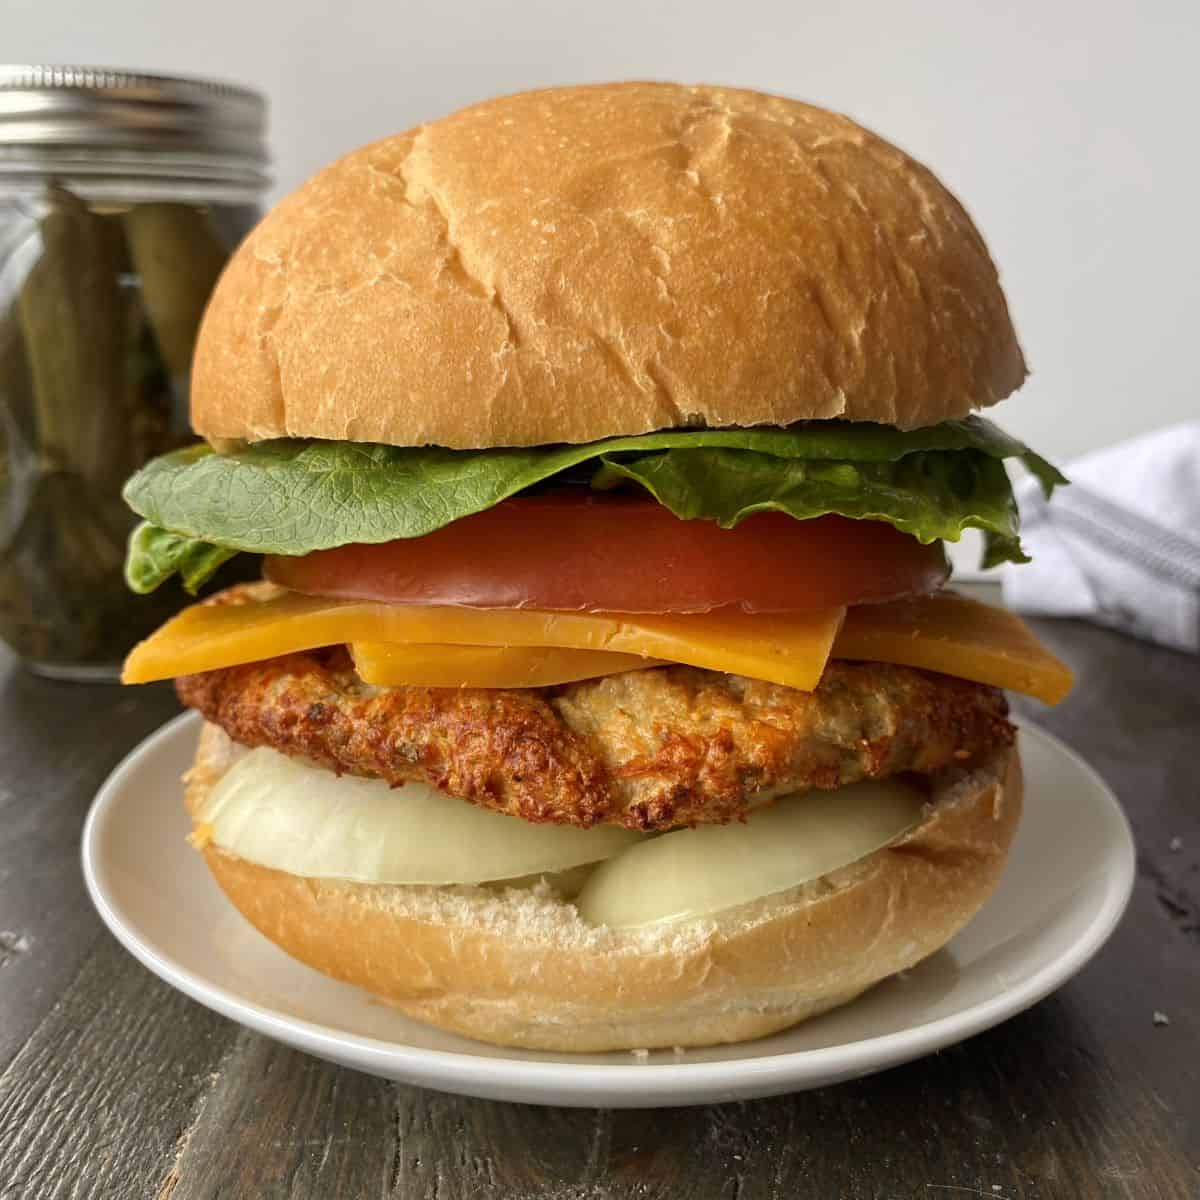
Air Fryer Chicken Burgers are slightly crispy on the outside and juicy and moist on the inside. They are loaded with flavor and a great alternative to traditional beef burgers.

Chicken Burger with all of the fixings on a plate in the foreground, with a jar of pickles and dishtowel in the background.

Looking for a quick and easy weeknight dinner? Air Fryer Chicken Burgers are just the recipe for you. Air Fryer Chicken Burgers come together easily. Add all of the ingredients to a large bowl, mix together and form into patties. Place in the air fryer for a quick 10 minutes and the burgers are ready to eat! Looking for a great side to go with the burgers? Try my Air Fryer Sweet Potato Fries for a quick and easy side dish.

Ingredients

Ingredients for Air Fryer Chicken Burgers on a table.
  • Ground Chicken – I prefer to use ground chicken breast but any type of ground chicken can be used.
  • Egg – Helps to bind the chicken burgers together.
  • Parmesan Cheese – Adds some great flavor.
  • Onion Powder, Garlic Powder, Oregano, Basil and Ground Black Pepper – spices to add some flavor to the burgers.
  • Breadcrumbs – I used seasoned breadcrumbs to add some extra flavor.

See recipe card for quantities.

Instructions

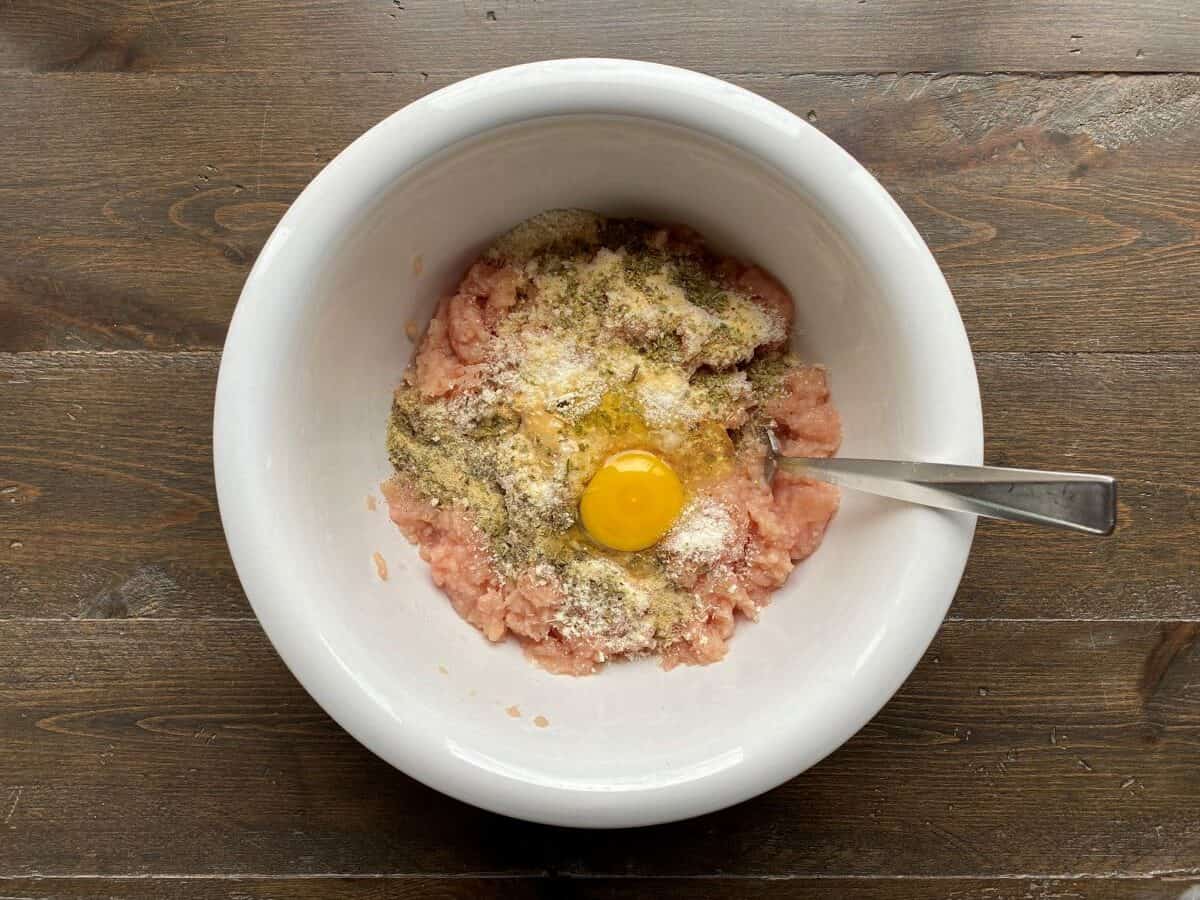
Ground chicken, parmesan cheese, egg and spices are in a large bowl.

Add ground chicken, egg, parmesan cheese and spices to a large bowl. Use a fork to mix thoroughly.

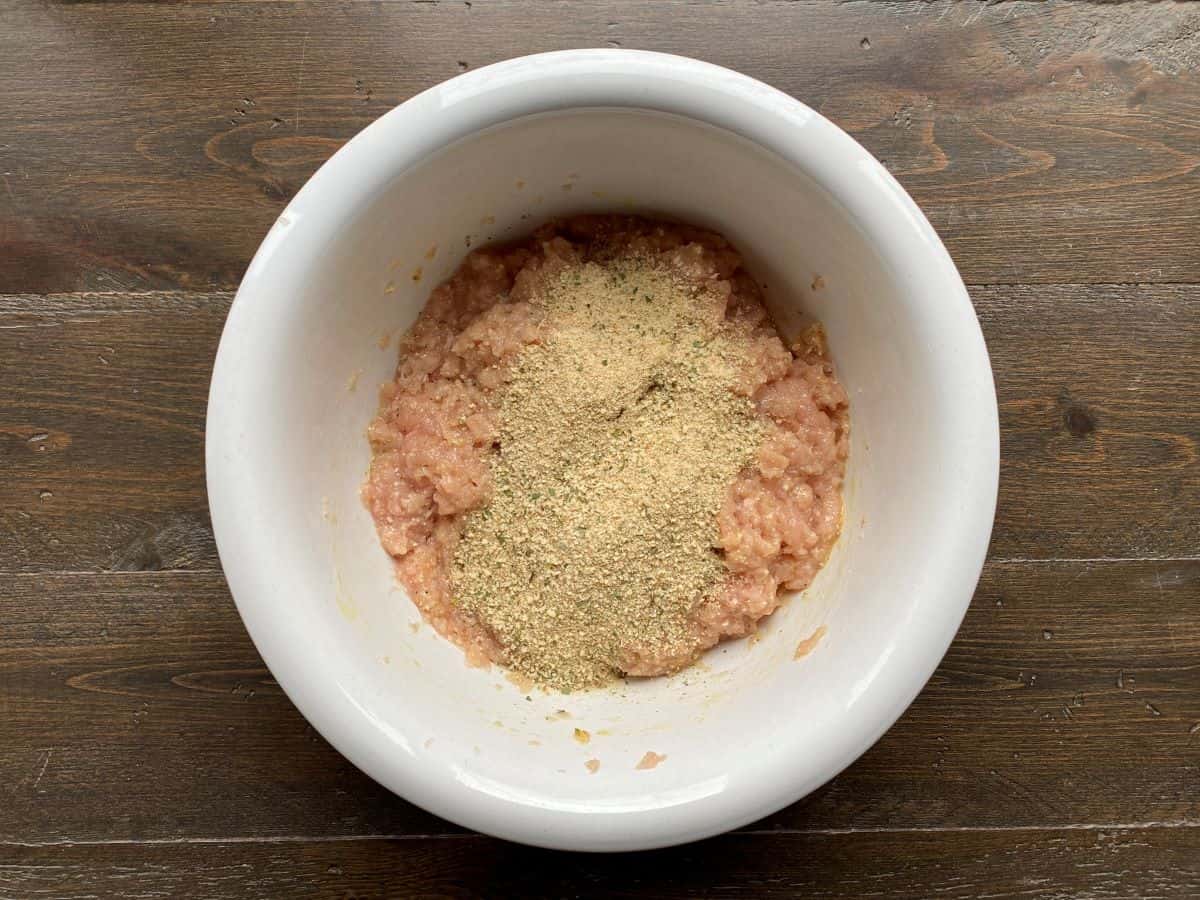
Breadcrumbs on top of the chicken mixture in a large bowl.

Add breadcrumbs. Use hands to mix in the breadcrumbs

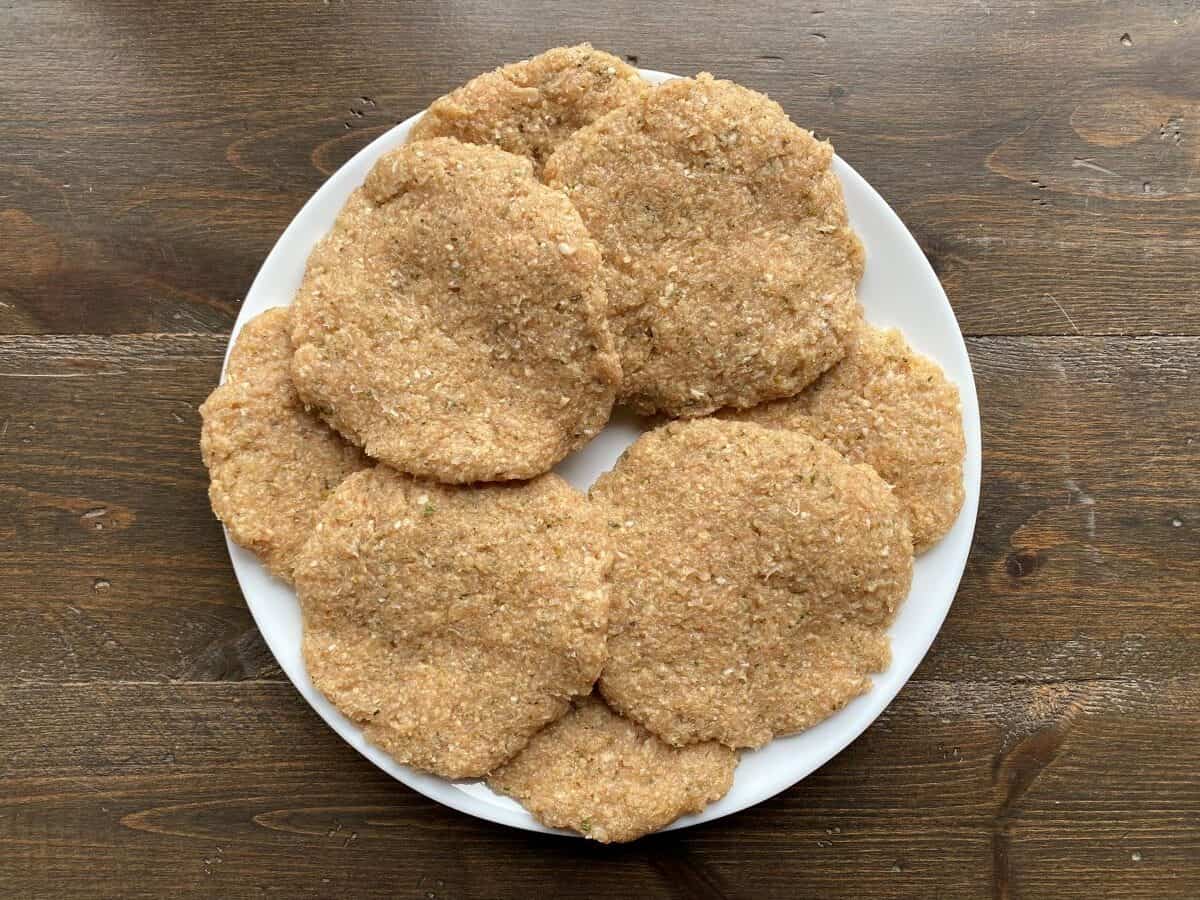
Ground chicken patties on a plate.

Shape approximately 1/2 cup of ground chicken mixture into a patty. Repeat with remaining mixture.

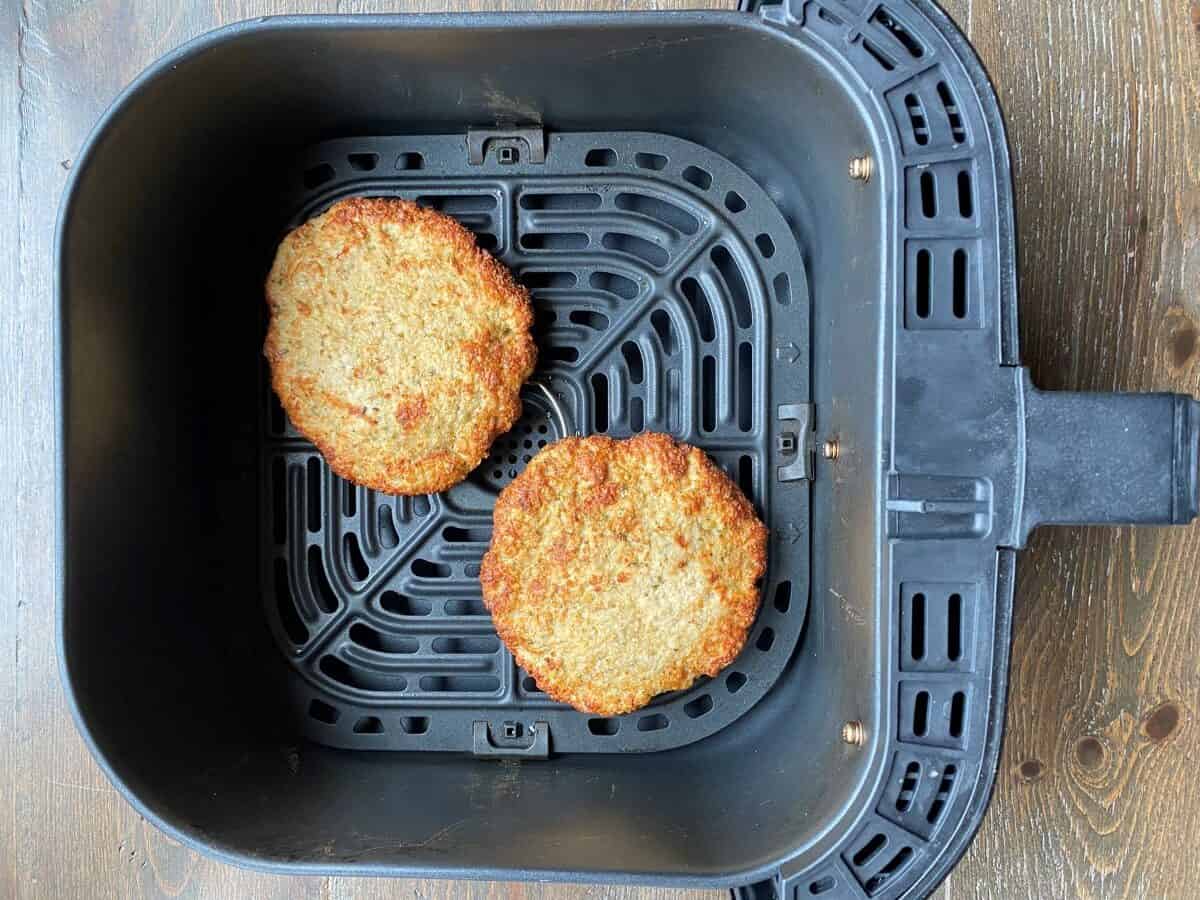
Two cooked chicken burgers in an air fryer basket.

Lightly grease air fryer basket. Preheat air fryer to 400F. Add patties to air fryer and cook for 8-10 minutes or until the internal temperature reaches 165F. Flip patties halfway through the cooking time. Remove from air fryer and serve immediately. Makes 8 burgers.

Hint: Make sure to grease the air fryer basket before adding the chicken burgers because this will ensure the burgers don’t stick. I like to use olive oil cooking spray.

Substitutions

  • Breadcrumbs – I used seasoned bread crumbs for this recipe. Plain breadcrumbs or gluten free breadcrumbs can be substituted for the seasoned breadcrumbs.

Variations

  • Spicy – add 1/4 – 1/2 teaspoon of dried crushed red chilies for some extra heat.

Equipment

Air Fryer – I used a basket style air fryer for this recipe. The same cooking instructions apply to other types of air fryers. Make sure to flip the patties halfway through the cooking time.

Storage

Air Fryer Chicken Burgers keep well in the fridge for up to three days. They can be reheated in the air fryer, microwave or on the stovetop.

Air Fryer Chicken Burgers freeze well. Place patties in a freezer safe container or bag. If using a bag, individually wrap the patties in plastic or parchment paper before placing them into a bag so they do not stick together. If using a container, use parchment paper to separate the patties. Freeze up to three months. Thaw in the refrigerator or at room temperature. Reheat patties in the air fryer, microwave or on the stovetop.

Top tip

Do not overcook the patties because the chicken burgers will be dry if they are overcooked. Cook until the internal temperature reaches 165F.

FAQ

Can you make Air Fryer Chicken Burgers without an air fryer?

Yes! Add 1 teaspoon of olive oil to a medium sized frypan. Preheat pan to medium high heat. Cook chicken burgers for 6-7 minutes per side or until the internal temperature reaches 165F.

Related

Looking for other recipes like this? Try these:

Chicken Burger with all of the fixings on a plate in the foreground, with a jar of pickles and dishtowel in the background.
Print Recipe
5 from 1 vote

Air Fryer Chicken Burgers

Air Fryer Chicken Burgers are slightly crispy on the outside and juicy and moist on the inside. They are loaded with flavor and a great alternative to traditional beef burgers.
Prep Time10 minutes mins
Cook Time10 minutes mins
Total Time20 minutes mins
Servings: 8
Calories: 240kcal
Author: Christine

Ingredients

  • 2 lb ground chicken
  • 1 large egg
  • ¼ cup parmesan cheese grated
  • 1 teaspoon onion powder
  • 1 teaspoon garlic powder
  • 1 teaspoon oregano
  • ½ teaspoon basil
  • ¼ teaspoon ground black pepper
  • 1 cup breadcrumbs

Instructions

  • Add ground chicken, egg, parmesan cheese and spices to a large bowl. Use a fork to mix thoroughly.
  • Add breadcrumbs. Use hands to mix in the breadcrumbs.
  • Shape approximately ½ cup of ground chicken mixture into a patty. Repeat with remaining mixture.
  • Lightly grease air fryer basket. Preheat air fryer to 400F. Add patties to air fryer and cook for 8-10 minutes or until the internal temperature reaches 165F. Rotate patties halfway through the cooking time. Remove from air fryer and serve immediately. Makes 8 burgers.

Notes

Make sure to grease the air fryer basket before adding the chicken burgers because this will ensure the burgers don’t stick. I like to use olive oil cooking spray.
Do not overcook the patties because the chicken burgers will be dry if they are overcooked. Cook until the internal temperature reaches 165F.
Air Fryer Chicken Burgers keep well in the fridge for up to three days. They can be reheated in the air fryer, microwave or on the stovetop.
Air Fryer Chicken Burgers freeze well. Place patties in a freezer safe container or bag. If using a bag, individually wrap the patties in plastic or parchment paper before placing them into a bag so they do not stick together. If using a container, use parchment paper to separate the patties. Freeze up to three months. Thaw in the refrigerator or at room temperature. Reheat patties in the air fryer, microwave or on the stovetop.

Nutrition

Serving: 1burger | Calories: 240kcal | Carbohydrates: 11g | Protein: 24g | Fat: 11g | Saturated Fat: 3g | Polyunsaturated Fat: 2g | Monounsaturated Fat: 5g | Trans Fat: 0.1g | Cholesterol: 123mg | Sodium: 226mg | Potassium: 641mg | Fiber: 1g | Sugar: 1g | Vitamin A: 63IU | Vitamin C: 0.1mg | Calcium: 78mg | Iron: 2mg

Food safety

  • Cook to a minimum temperature of 165F.
  • Do not use the same utensils on cooked food, that previously touched raw meat.
  • Wash hands after touching raw meat.
  • Don’t leave food sitting out at room temperature for extended periods.
  • Never leave cooking food unattended.

Filed Under: Air Fryer, Recipes

Double Chocolate Chip Cookies

May 8, 2023 by Christine Leave a Comment

Double Chocolate Chip Cookies have a slight crisp on the outside with a chocolatey soft, chewy center. They are rich, decadent and a great way to satisfy that sweet tooth craving.

Double Chocolate Chip Cookies on a black cooling rack.

Looking for a rich, chocolatey and decadent cookie??? Double Chocolate Chip Cookies are just the recipe for you. They are thick and chewy just like my Soft and Chewy Chocolate Chip Cookies but with even more chocolate because you can never have too much chocolate right?? I added cocoa powder to the batter to create the chocolatey flavor in the dough and then I added chocolate chips to make them even more chocolatey. The best part of this recipe is there is no chilling required! Simply mix the dough together, add the chocolate chips, bake and enjoy!

Ingredients

Ingredients for Double Chocolate Chip Cookies arranged on a table.
  • All-purpose flour – I used all purpose flour for this recipe. I have not tried this recipe using any other type of flour.
  • Cocoa Powder – Used to make the cookie dough extra chocolatey.
  • Cornstarch – Helps to make the cookies thick.
  • Baking Soda – Helps the cookies to rise.
  • Salt – Brings out the flavor of the other ingredients.
  • Melted Butter – Helps to give the cookies that nice rich flavor.
  • Brown Sugar – Helps to keep the cookies chewy and moist.
  • Granulated Sugar – Adds some more sweetness.
  • Eggs – Helps to bind the ingredients together.
  • Vanilla – Adds some flavor.
  • Chocolate Chips – Adds even more chocolate to the batter.

See recipe card for quantities.

Instructions

Preheat oven to 350F. Line two large baking sheets with parchment paper.

Dry ingredients being whisked in a medium size bowl.

Add flour, cocoa, cornstarch, baking soda and salt to a medium size bowl. Whisk to combine.

Dough in a large bowl with an electric mixer leaning on the side of the bowl.

In a large bowl, add melted butter, brown sugar and granulated sugar. Beat with electric mixture on medium speed for one minute.

Dough in a large bowl with an electric mixer leaning on the side of the bowl.

Add eggs and vanilla. Beat with electric mixture on medium speed for one minute or until the batter is smooth. Use a spatula to scrape down the sides of the bowl.

Dough in a large bowl with an electric mixer leaning on the side of the bowl.

Add half of the flour mixture to the batter. Turn electric mixer to low and mix until the flour mixture starts to incorporate into the batter. As the flour mixture starts to incorporate, you can increase the speed of the electric mixer to medium. Use a spatula to scrape down the sides of the bowl as necessary. Repeat with remaining flour mixture.

Dough balls on a cookie sheet lined with parchment paper.

Add chocolate chips. Use a spatula to fold in chocolate chips. Using a spoon or your hands, shape approximately 2 tablespoons of dough into a ball. Place dough ball onto baking pan. Repeat until the baking sheets are full. Leave 1.5 to 2 inches between cookies so they have room to spread as they bake.

Baked Double Chocolate Chips Cookies on a baking pan lined with parchment paper.

Place baking pan into preheated oven and bake for 10-12 minutes. The cookies are ready when small cracks start to form on the tops. Remove pan from oven. Let cookies cool slightly before transferring to a wire rack to cool completely. Repeat with other baking sheet. Makes 24 cookies. Enjoy!

Hint: Make sure the baking sheets are lined with parchment paper. This will help prevent the bottoms of the cookies from burning.

Substitutions

  • Unsalted Butter – Salted butter can be substituted for the unsalted butter. If you use salted butter then omit the salt from the recipe.
  • Chocolate Chips – I used dark chocolate chips for this recipe. You can substitute the dark chocolate chips with your favorite type of chocolate chip. Milk chocolate chips and semi-sweet chocolate chips work great.

Equipment

Large Non-Stick Baking Pans – I used two large non-stick metal baking pans for this recipe. You can use smaller baking pans but you won’t be able to fit as many cookies on a pan.

Electric Mixer – I used an electric mixer for this recipe. I highly recommend using an electric mixer for this recipe because the cookie dough is quite thick. You can try mixing by hand but you will likely end up with very sore arms!

Storage

Double Chocolate Chip Cookies can be stored in an airtight container or bag for up to three days at room temperature.

Double Chocolate Chip Cookies freeze well. Place cookies in a freezer safe container or bag and freeze up to three months. Thaw at room temperature when ready to eat.

Top tip

Do not overbake the cookies! Otherwise they won’t be soft and chewy.  The cookies are ready when small cracks start to form on the tops of the cookies.

FAQ

Do I have to chill the cookie dough before baking?

No! Double Chocolate Chip Cookie dough does not require chilling before baking. This means you can get them into your tummy sooner!

How do I keep my cookies soft after baking?

Store Double Chocolate Chip Cookies in an airtight container or sealed bag and they will stay soft.

Related

Looking for other recipes like this? Try these:

Double Chocolate Chip Cookies on a black cooling rack.
Print Recipe
No ratings yet

Double Chocolate Chip Cookies

Double Chocolate Chip Cookies have a slight crisp on the outside with a chocolatey soft, chewy center. They are rich, decadent and a great way to satisfy that sweet tooth craving.
Prep Time15 minutes mins
Cook Time12 minutes mins
Total Time27 minutes mins
Servings: 24
Calories: 177kcal
Author: Christine

Ingredients

  • 1 â…” cup all-purpose flour
  • â…“ cup cocoa powder
  • 2 tablespoons cornstarch
  • 2 teaspoons baking soda
  • ¼ teaspoon salt
  • ½ cup butter, melted
  • 1 cup brown sugar
  • ¼ cup granulated sugar
  • 2 large eggs
  • 2 teaspoons vanilla
  • 1 ½ cups chocolate chips

Instructions

  • Preheat oven to 350F. Line two large baking sheets with parchment paper.
  • Add flour, cocoa, cornstarch, baking soda and salt to a medium size bowl. Whisk to combine.
  • In a large bowl, add melted butter, brown sugar and granulated sugar. Beat with electric mixture on medium speed for one minute.
  • Add eggs and vanilla. Beat with electric mixture on medium speed for one minute or until the batter is smooth. Use a spatula to scrape down the sides of the bowl.
  • Add half of the flour mixture to the batter. Turn electric mixer to low and mix until the flour mixture starts to incorporate into the batter. As the flour mixture starts to incorporate, you can increase the speed of the electric mixer to medium. Use a spatula to scrape down the sides of the bowl as necessary. Repeat with remaining flour mixture.
  • Add chocolate chips. Use a spatula to fold in chocolate chips. Using a spoon or your hands, shape approximately 2 tablespoons of dough into a ball. Place dough ball onto baking pan. Repeat until the baking sheets are full. Leave 1.5 to 2 inches between cookies so they have room to spread as they bake.
  • Place baking pan into preheated oven and bake for 10-12 minutes. The cookies are ready when small cracks start to form on the tops. Remove pan from oven. Let cookies cool slightly before transferring to a wire rack to cool completely. Repeat with other baking sheet. Makes 24 cookies. Enjoy!

Notes

Make sure the baking sheets are lined with parchment paper. This will help prevent the bottoms of the cookies from burning.
Double Chocolate Chip Cookies can be stored in an airtight container or bag for up to three days at room temperature.
Double Chocolate Chip Cookies freeze well. Place cookies in a freezer safe container or bag and freeze up to three months. Thaw at room temperature when ready to eat.
Do not overbake the cookies! Otherwise they won’t be soft and chewy.  The cookies are ready when small cracks start to form on the tops of the cookies.

Nutrition

Serving: 1cookie | Calories: 177kcal | Carbohydrates: 26g | Protein: 2g | Fat: 8g | Saturated Fat: 5g | Polyunsaturated Fat: 0.3g | Monounsaturated Fat: 1g | Trans Fat: 0.2g | Cholesterol: 26mg | Sodium: 155mg | Potassium: 79mg | Fiber: 1g | Sugar: 18g | Vitamin A: 141IU | Calcium: 22mg | Iron: 1mg

Filed Under: Cookies, Recipes

Healthy Apple Cinnamon Cake

April 25, 2023 by Christine Leave a Comment

Healthy Apple Cinnamon Cake is light, fluffy and moist. With no butter, oil or refined sugar Healthy Apple Cinnamon Cake makes a great healthy dessert or snack.

A piece of Healthy Apple Cinnamon Cake with sliced apples on a white plate, with an apple, fork and tea towel in the background.

I was shopping at Costco a few weeks ago and I bought two large bags of apples. I put them in the fridge when I got home and I immediately thought wow…..that’s a lot of apples! I do love eating apples but even I have to admit I went a little overboard when I bought two bags. I quickly started thinking of recipes I could make with all of those extra apples. I sat down at the table and created this Healthy Apple Cinnamon Cake recipe. It turned out delicious on the first run! I have made this recipe several times since the first experiment to make sure it turned out just as delicious. Healthy Apple Cinnamon Cake can be eaten on it’s own for a healthy dessert or snack or it can be paired with ice-cream. I like to eat mine with vanilla frozen yogurt.

Ingredients

Ingredients for Healthy Apple Cinnamon Cake are displayed on a table.
  • All-purpose flour – I used all purpose flour for this recipe. I haven’t tried making this recipe with any other type of flour.
  • Baking Powder – Helps to create that fluffy cake like texture.
  • Baking Soda – Helps the cake to rise.
  • Cinnamon and Nutmeg – Adds that nice warm flavor.
  • Salt – Brings out the flavor of the other ingredients.
  • Almond Milk – I used unsweetened vanilla almond milk for this recipe.
  • Honey – Adds some sweetness.
  • Applesauce – I used unsweetened applesauce for this recipe.
  • Greek Yogurt – I used 0%, no sugar added.
  • Eggs – Helps to bind the ingredients together.
  • Apples, cored and diced – I used Gala apples.

See recipe card for quantities.

Instructions

Preheat oven to 350F. Line a 9×13 baking pan with parchment paper.

Dry ingredients for Healthy Apple Cinnamon Cake are whisked in a medium sized bowl.

In a medium size bowl, add flour, baking powder, baking soda, cinnamon, nutmeg and salt. Whisk to combine.

The wet ingredients for Healthy Apple Cinnamon Cake are whisked in a large bowl.

In a large bowl, add almond milk, honey, applesauce, Greek yogurt and eggs. Whisk to combine.

Dry Ingredients are folded into the wet ingredients in a large bowl using a spatula.

Add the dry ingredients to the wet ingredients. Using a spatula, gently fold the dry ingredients into the wet ingredients until the flour mixture is incorporated. Do not overmix.

Diced apples have been folded into the batter in a large bowl using a spatula.

Add diced apples to the batter. Use a spatula to gently fold in the apples.

Batter has been poured into a 9x13 baking pan lined with parchment paper.

Pour batter into prepared baking pan. Use a spatula to spread batter to the edges of the pan.

Healthy Apple Cinnamon Cake in a 9x13 baking pan after it has been removed from the oven.

Bake for 25-30 minutes or until a toothpick inserted into the center of the cake comes out clean.

Let cake cool in the pan for 10 minutes. Use the sides of the parchment paper to remove the cake from the pan. Let cake cool for 20 more minutes and then cut cake into 24 square pieces. Enjoy!

Hint: Make sure the honey is runny before adding it to the wet ingredients. Older honey has the tendency to crystalize and become thick. It will be difficult to whisk in the honey if it is crystalized and thick. Thick or crystalized honey can be put in the microwave for 20 seconds and it will quickly become runny!

Substitutions

  • Almond Milk – Any type of milk can be substituted for the almond milk.
  • Applesauce – Regular applesauce can be substituted for the unsweetened applesauce.

Equipment

9×13 baking pan – I used a non-stick metal baking pan for this recipe. If using a glass baking pan, lower the oven temperature by 25 degrees and bake for 5 minutes longer.

Storage

Healthy Apple Cinnamon Cake can be stored in an airtight container or bag at room temperature for up to three days.

Healthy Apple Cinnamon Cake freezes well. Store cake in an airtight container or bag and freeze up to three months. Remove from freezer and thaw in the fridge or at room temperature.

Top tip

Do not overbake Health Apple Cinnamon Cake. The cake will be dry if it is baked too long.

FAQ

How many calories are in this Healthy Apple Cinnamon Cake?

One piece comes in at only 98 calories! That’s a good reason to eat more than one piece.

Why isn’t my cake fluffy?

You may have overmixed the batter. Mix the batter just until the flour is incorporated.

Do I need to peel the apples for Healthy Apple Cinnamon Cake?

No! The apples do not need to be peeled. In fact the skin on the apples provide extra nutrients.

Related

Looking for other recipes like this? Try these:

A piece of Healthy Apple Cinnamon Cake with sliced apples on a white plate, with an apple, fork and tea towel in the background.
Print Recipe
5 from 1 vote

Healthy Apple Cinnamon Cake

Healthy Apple Cinnamon Cake is light, fluffy and moist. With no butter, oil or refined sugar Healthy Apple Cinnamon Cake makes a great healthy dessert or snack.
Prep Time15 minutes mins
Cook Time30 minutes mins
Total Time45 minutes mins
Servings: 24
Calories: 98kcal
Author: Christine

Ingredients

  • 3 cups all-purpose flour
  • 2 teaspoons baking powder
  • 2 teaspoons baking soda
  • 2 teaspoons cinnamon
  • ¼ teaspoon nutmeg
  • ¼ teaspoon salt
  • 1 ½ cup almond milk
  • ½ cup honey
  • ½ cup applesauce unsweetened
  • â…“ cup Greek yogurt 0%, no sugar added
  • 2 large eggs
  • 3 cups apples cored and diced

Instructions

  • Preheat oven to 350F. Line a 9×13 baking pan with parchment paper.
  • In a medium size bowl, add flour, baking powder, baking soda, cinnamon, nutmeg and salt. Whisk to combine.
  • In a large bowl, add almond milk, honey, applesauce, Greek yogurt and eggs. Whisk to combine.
  • Add the dry ingredients to the wet ingredients. Using a spatula, gently fold the dry ingredients into the wet ingredients until the flour mixture is incorporated. Do not overmix.
  • Add diced apples to the batter. Use a spatula to gently fold in the apples.
  • Pour batter into prepared baking pan. Use a spatula to spread batter to the edges of the pan.
  • Bake for 25-30 minutes or until a toothpick inserted into the center of the cake comes out clean.
  • Let cake cool in the pan for 10 minutes. Use the sides of the parchment paper to remove the cake from the pan. Let cake cool for 20 more minutes and then cut cake into 24 square pieces. Enjoy!

Notes

Make sure the honey is runny before adding it to the wet ingredients. Older honey has the tendency to crystalize and become thick. It will be difficult to whisk in the honey if it is crystalized and thick. Thick or crystalized honey can be put in the microwave for 20 seconds and it will quickly become runny!
Healthy Apple Cinnamon Cake can be stored in an airtight container or bag at room temperature for up to three days.
Healthy Apple Cinnamon Cake freezes well. Store cake in an airtight container or bag and freeze up to three months. Remove from freezer and thaw in the fridge or at room temperature.
Do not overbake Health Apple Cinnamon Cake. The cake will be dry if it is baked too long.

Nutrition

Serving: 1piece | Calories: 98kcal | Carbohydrates: 21g | Protein: 3g | Fat: 1g | Saturated Fat: 0.2g | Polyunsaturated Fat: 0.2g | Monounsaturated Fat: 0.2g | Trans Fat: 0.002g | Cholesterol: 16mg | Sodium: 172mg | Potassium: 51mg | Fiber: 1g | Sugar: 8g | Vitamin A: 33IU | Vitamin C: 1mg | Calcium: 43mg | Iron: 1mg

Filed Under: Healthy Snacks, Recipes

Homemade Dinner Rolls

April 24, 2023 by Christine Leave a Comment

Homemade Dinner Rolls are soft, fluffy and moist. Brushing melted butter on the tops makes these the best Homemade Dinner Rolls.

Baked Homemade Dinner Rolls in a pan with a dishtowel beside the pan.

I have fond memories of eating dinner rolls at holiday gatherings when I was growing up. You couldn’t have the big meal without a dinner roll on your plate. A couple of weeks ago I was cooking an Easter dinner and I decided I would experiment with making my own dinner roll recipe. The recipe required a couple of tweaks but the end result is far from disappointing. Homemade Dinner Rolls are soft, fluffy and buttery. They are a great side for a variety of meals such as pastas, soups and stews. They pair nicely with my Slow Cooker Beef and Barley Soup recipe. Homemade Dinner Rolls also taste amazing on their own. Slice and butter a roll right after it comes out of the oven for a completely mouth watering and satisfying snack. Once you try this recipe, you won’t go back to buying store bought dinner rolls.

Ingredients

Ingredients for Homemade Dinner Rolls on a table.
  • Warm Water – Warm water is crucial for this recipe. Cold water won’t allow the yeast to activate and if the water is too hot, it will kill the yeast. The water should be between 90F – 110F.
  • Instant Yeast – I prefer to use instant yeast because I can tell really quickly if the yeast is fermenting.
  • Granulated Sugar – The sugar is mixed with the warm water to activate the yeast.
  • Salt – Helps to boost the flavor and it strengthens the dough.
  • All-purpose flour – I have not tried this recipe using any other type of flour but I think bread flour would work.
  • Egg – Make sure the egg is at room temperature.
  • Butter, softened – I used unsalted butter for this recipe. If you use salted butter, then omit the salt from the recipe.
  • Butter, melted – Brushed on top of the rolls after they are finished baking.

See recipe card for quantities.

Instructions

Foamy yeast mixture in a small bowl.

Mix together warm water, yeast and sugar in a small bowl. Let this mixture sit for 5 – 10 minutes. It will look foamy once the yeast has activated. This step is crucial for this recipe. If your mixture is not foamy, the yeast has not been activated.

Salt, flour, egg and butter are added to the yeast mixture in the bowl of a stand mixer.

Pour yeast mixture into the large bowl of a stand mixer. Add salt, flour, egg and butter. It’s important to measure the flour by spooning it into the measuring cup because flour gets compacted when it sits in the bag or container. If you scoop the flour with the measuring cup it will stay compacted and you will add too much flour. Use a knife to level the flour.

Dough is being mixed in the bowl of a stand mixer using the dough hook attachment.

Using a dough hook on a stand mixer, mix together for 3-5 minutes. The dough should be tacky and slightly sticky to touch. It should not be so sticky that it stays on your hands when you touch it. If the dough is too sticky add a pinch of flour. Only add one pinch at a time because adding too much flour will dry out the dough. Be sure to mix thoroughly between additions if you add more flour. If the dough is too dry, add a teaspoon of water and mix thoroughly. The end result should be a slightly sticky dough.

Ball of dough in a large bowl.

Once the dough has formed, roughly shape it into a ball and place in a large greased bowl. Cover with plastic wrap or a clean dishtowel. Let the dough rise for 1.5 hours or until doubled in size. This step is really important and is also known as “bulk fermentation” because it allows the yeast to continue to ferment. Fermentation helps with the structure and flavor of the dough.

Twelve equal size dough balls are placed in a 9x13 baking pan.

Remove dough from the bowl and punch down to remove any air pockets. Divide dough into 12 equal pieces. Gently roll dough pieces into balls. Place dough balls in a lightly greased 9×13 baking pan. There should be 4 rows of 3 dough balls. Cover with a clean dishtowel and let rise for another hour. The dough balls should double in size.

Homemade Dinner Rolls in a pan after they have been removed from the oven.

Preheat oven to 350F. Bake rolls for 18-20 minutes. Melt the butter while the rolls are baking. Place butter in a small bowl and microwave for 20 seconds on high. Repeat in 10 second intervals until the butter is melted. I like to cover the bowl with a paper towel in case the butter splatters. Remove dinner rolls from oven. Use a pastry brush to evenly coat the rolls with the melted butter. Serve immediately.

Hint:

Make sure to use warm water (90 – 110F) when activating the yeast. If the water is too cold the yeast won’t activate. If the water is too hot, you will kill the yeast.

Check the expiration date on the yeast. Expired yeast won’t activate.

Substitutions

  • All-purpose flour– You can substitute bread flour in place of the all-purpose flour. I haven’t tried this recipe with any other types of flour.

Equipment

Stand Mixer – These Homemade Dinner Rolls are made with a stand mixer using the dough hook attachment. I have not tried to make this recipe without a stand mixer.

9×13 Baking Pan – I used a non-stick metal baking pan for this recipe. If you are using glass, lower the temperature by 25 degrees and bake 3-5 minutes longer.

Storage

Homemade Dinner Rolls are best enjoyed immediately after removing them from the oven or the same day they were baked.

Homemade Dinner Rolls freeze well. Place in a freezer safe container or bag and freeze up to three months. Thaw at room temperature. When ready to eat, pop into the microwave for 20 seconds and the rolls will taste like they just came out of the oven.

Top tip

Do not add too much flour to the dough! If you add too much flour, the Homemade Dinner rolls will be dense and they won’t have that nice fluffy consistency. If this is your first time baking with yeast, I highly recommend reading the detailed instructions above!

FAQ

Why aren’t my dinner rolls light and fluffy?

Too much flour has been added to the dough. It’s important to measure the flour by spooning it into the measuring cup because flour gets compacted when it sits in the bag or container. If you scoop the flour with the measuring cup it will stay compacted and you will add too much flour. Use a knife to level the flour.

Why are the dinner rolls brushed with butter after baking?

Brushing the rolls with butter after baking gives them a delicious buttery flavor.

Related

Looking for other recipes like this? Try these:

Baked Homemade Dinner Rolls in a pan with a dishtowel beside the pan.
Print Recipe
5 from 1 vote

Homemade Dinner Rolls

Homemade Dinner Rolls are soft, fluffy and moist. Brushing melted butter on the tops makes these the best Homemade Dinner Rolls.
Prep Time2 hours hrs 45 minutes mins
Cook Time20 minutes mins
Total Time3 hours hrs 5 minutes mins
Servings: 12
Calories: 156kcal
Author: Christine

Ingredients

  • 1 cup warm water (between 90 and 110F)
  • 2 ¼ teaspoons instant yeast
  • 1 tablespoon granulated sugar
  • ½ teaspoon salt
  • 3 cups all-purpose flour
  • 1 large egg
  • 2 tablespoons butter softened
  • 1 tablespoon butter melted

Instructions

  • Mix together warm water, yeast and sugar in a small bowl. Let this mixture sit for 5 – 10 minutes. It will look foamy once the yeast has activated. This step is crucial for this recipe. If your mixture is not foamy, the yeast has not been activated.
  • Pour yeast mixture into the large bowl of a stand mixer. Add salt, flour, egg and butter. It's important to measure the flour by spooning it into the measuring cup because flour gets compacted when it sits in the bag or container. If you scoop the flour with the measuring cup it will stay compacted and you will add too much flour. Use a knife to level the flour.
  • Using a dough hook on a stand mixer, mix together for 3-5 minutes. The dough should be tacky and slightly sticky to touch. It should not be so sticky that it stays on your hands when you touch it. If the dough is too sticky add a pinch of flour. Only add one pinch at a time because adding too much flour will dry out the dough. Be sure to mix thoroughly between additions if you add more flour. If the dough is too dry, add a teaspoon of water and mix thoroughly. The end result should be a slightly sticky dough.
  • Once the dough has formed, roughly shape it into a ball and place in a large greased bowl. Cover with plastic wrap or a clean dishtowel. Let the dough rise for 1.5 hours or until doubled in size. This step is really important and is also known as "bulk fermentation" because it allows the yeast to continue to ferment. Fermentation helps with the structure and flavor of the dough.
  • Remove dough from the bowl and punch down to remove any air pockets. Divide dough into 12 equal pieces. Gently roll dough pieces into balls. Place dough balls in a lightly greased 9×13 baking pan. There should be 4 rows of 3 dough balls. Cover with a clean dishtowel and let rise for another hour. The dough balls should double in size.
  • Preheat oven to 350F. Bake rolls for 18-20 minutes. Melt the butter while the rolls are baking. Place butter in a small bowl and microwave for 20 seconds on high. Repeat in 10 second intervals until the butter is melted. I like to cover the bowl with a paper towel in case the butter splatters. Remove dinner rolls from oven. Use a pastry brush to evenly coat the rolls with the melted butter. Serve immediately.

Notes

Make sure to use warm water (90 – 110F) when activating the yeast. If the water is too cold the yeast won’t activate. If the water is too hot, you will kill the yeast.
Check the expiration date on the yeast. Expired yeast won’t activate.
Do not add too much flour to the dough! If you add too much flour, the Homemade Dinner Rolls will be dense and they won’t have that nice fluffy consistency. If this is your first time baking with yeast, I highly recommend reading the detailed instructions above!
Homemade Dinner Rolls are best enjoyed immediately after removing them from the oven or the same day they were baked.
Homemade Dinner Rolls freeze well. Place in a freezer safe container or bag and freeze up to three months. Thaw at room temperature. When ready to eat, pop into the microwave for 20 seconds and the rolls will taste like they just came out of the oven.

Nutrition

Serving: 1roll | Calories: 156kcal | Carbohydrates: 26g | Protein: 5g | Fat: 4g | Saturated Fat: 2g | Polyunsaturated Fat: 0.3g | Monounsaturated Fat: 1g | Trans Fat: 0.1g | Cholesterol: 23mg | Sodium: 127mg | Potassium: 62mg | Fiber: 1g | Sugar: 1g | Vitamin A: 111IU | Vitamin C: 0.01mg | Calcium: 9mg | Iron: 2mg

Filed Under: Breads, Recipes

Gluten Free Blueberry Oatmeal Breakfast Bars

April 18, 2023 by Christine Leave a Comment

Gluten Free Blueberry Oatmeal Breakfast Bars are soft, chewy and loaded with blueberry flavor. Grab one for breakfast when you are on the go!

Gluten Free Blueberry Oatmeal Breakfast Bar on a small plate with a small bowl of blueberries in the background.

Hit the snooze button one too many times? Running behind? Late for work or school again? These Gluten Free Blueberry Oatmeal Breakfast Bars are just the recipe for you! Bake them ahead of time and store them in the fridge or freezer and you have the perfect breakfast or snack on those busy days. Gluten Free Blueberry Oatmeal Breakfast Bars are easy to make. Mix the dry ingredients, add the wet ingredients and pour the mixture in the pan to bake. Gluten Free Blueberry Oatmeal Breakfast Bars are made with gluten free rolled oats and they have no refined sugar. They are a great alternative to store bought granola bars. They are healthy but you wouldn’t even know because they taste amazing!

Ingredients

Ingredients for Gluten Free Blueberry Oatmeal Breakfast Bars in bowls/cups on a table.
  • Rolled oats – Make sure to use gluten free oats if you want to keep the recipe gluten free.
  • Baking powder – Helps to add a cake like texture.
  • Cinnamon – adds some flavor.
  • Almond Milk – I used unsweetened vanilla almond milk.
  • Eggs – Helps to bind the ingredients together.
  • Honey – Adds some sweetness.
  • Vanilla – Adds a little more flavor.
  • Frozen Blueberries – I used frozen blueberries in this recipe.

See recipe card for quantities.

Instructions

Preheat oven to 350F. Line an 8×8 square baking pan with parchment paper.

Dry ingredients are mixed in a large bowl.

Combine oats, baking powder and cinnamon in a large bowl.

Wet ingredients in a large bowl with a whisk.

Add almond milk, eggs, honey and vanilla to a medium size bowl. Whisk to combine.

Dry and wet ingredients are combined in a large bowl.

Add wet mixture to dry mixture and mix to combine. Let mixture sit for 10 minutes before adding the blueberries.

Mixture has been poured into a pan lined with parchment paper.

Use a spatula to fold in blueberries. Pour mixture into baking pan. Bake for 35-40 minutes or until the top starts to turn golden.

Remove pan from oven and let cool for 10 minutes. Use edges of parchment paper to remove bars from the pan. Let cool completely before slicing into 9 bars.

Hint: Make sure to let the mixture sit for 10 mins before adding the blueberries so the oats can absorb some of the moisture. This will allow the Gluten Free Oatmeal Breakfast Bars to set (or bind together) after they have been removed from the oven.

Substitutions

  • Almond Milk – Any type of milk can be substituted for the almond milk.
  • Gluten Free Rolled Oats – You can substitute regular rolled oats but the recipe will not be gluten free. Do not use steel cut oats as they have a different texture and cooking time.
  • Frozen Blueberries – Fresh blueberries can be substituted for the frozen blueberries. Be careful when mixing in fresh blueberries as they crush easily.

Equipment

8×8 Non-stick metal baking pan – Do not use a different size of pan as this will change the baking time. If using a glass pan, lower the oven temperature by 25 degrees and bake the bars for 5-10 minutes longer.

Parchment Paper – used to line the baking pan. If you don’t have parchment paper, make sure to grease the pan. I highly recommend using parchment paper as it is used to easily remove the bars from the pan.

Storage

Gluten Free Blueberry Oatmeal Breakfast Bars can be stored in the fridge for up to three days in an airtight container or bag.

Gluten Free Blueberry Oatmeal Breakfast Bars freeze well. Place bars in a freezer safe container or bag and freeze up to three months. Thaw in the fridge or at room temperature.

Top tip

Do not cut the bars until they have completely cooled! Cooling the bars allows them to completely set.

FAQ

Are Gluten Free Blueberry Oatmeal Breakfast Bars healthy?

Yes! They have no refined sugars or preservatives like a standard store bought granola bar. Plus the oats are packed with fiber for optimum gut health.

What Can I Eat with Gluten Free Blueberry Oatmeal Breakfast Bars?

They can be mixed with yogurt for a more balanced breakfast. I prefer to use 0%, no sugar added Greek Yogurt for an extra protein boost.

Related

Looking for other recipes like this? Try these:

Gluten Free Blueberry Oatmeal Breakfast Bar on a small plate with a small bowl of blueberries in the background.
Print Recipe
5 from 1 vote

Gluten Free Blueberry Oatmeal Breakfast Bars

Gluten Free Blueberry Oatmeal Breakfast Bars are soft, chewy and loaded with blueberry flavor. Grab one for breakfast when you are on the go!
Prep Time15 minutes mins
Cook Time35 minutes mins
Total Time50 minutes mins
Servings: 9
Calories: 127kcal
Author: Christine

Ingredients

  • 2 cups rolled oats gluten free
  • 2 teaspoons baking powder
  • ½ teaspoon cinnamon
  • ½ cup almond milk
  • 2 large eggs
  • ¼ cup honey
  • 2 teaspoons vanilla
  • 1 cup blueberries frozen

Instructions

  • Preheat oven to 350F. Line an 8×8 square baking pan with parchment paper.
  • Combine oats, baking powder and cinnamon in a large bowl.
  • Add almond milk, eggs, honey and vanilla to a medium size bowl. Whisk to combine.
  • Add wet mixture to dry mixture and mix to combine. Let mixture sit for 10 minutes before adding the blueberries.
  • Use a spatula to fold in blueberries. Pour mixture into baking pan. Bake for 35-40 minutes or until the top starts to turn golden.
  • Remove pan from oven and let cool for 10 minutes. Use edges of parchment paper to remove bars from the pan. Let cool completely before slicing into 9 bars.

Notes

Make sure to let the mixture sit for 10 mins before adding the blueberries so the oats can absorb some of the moisture. This will allow the Gluten Free Oatmeal Breakfast Bars to set (or bind together) after they have been removed from the oven.
Do not cut the bars until they have completely cooled! Cooling the bars allows them to completely set.
Gluten Free Blueberry Oatmeal Breakfast Bars can be stored in the fridge for up to three days in an airtight container or bag.
Gluten Free Blueberry Oatmeal Breakfast Bars freeze well. Place bars in a freezer safe container or bag and freeze up to three months. Thaw in the fridge or at room temperature.

Nutrition

Serving: 1bar | Calories: 127kcal | Carbohydrates: 23g | Protein: 4g | Fat: 2g | Saturated Fat: 1g | Polyunsaturated Fat: 1g | Monounsaturated Fat: 1g | Trans Fat: 0.004g | Cholesterol: 41mg | Sodium: 130mg | Potassium: 100mg | Fiber: 2g | Sugar: 10g | Vitamin A: 69IU | Vitamin C: 2mg | Calcium: 87mg | Iron: 1mg

Filed Under: Breakfast, Recipes

Air Fryer Sweet Potato Fries

April 18, 2023 by Christine Leave a Comment

Air Fryer Sweet Potato Fries are super easy to make. They are tossed in olive oil, sprinkled with salt and cooked until crispy.

Sweet potato fries on a square plate with a small bowl of ketchup on the side.

I absolutely LOVE sweet potato fries. I will often substitute them for regular fries when I eat out at a restaurant. I have also purchased frozen sweet potato fries from the freezer section of the grocery store. Both are delicious options! However, it’s no secret that sweet potato fries are often deep fried and loaded with unhealthy oils. These Air Fryer Sweet Potato Fries use extra virgin olive oil and just a fraction of the oil that is typically in restaurant style sweet potato fries. Sweet potatoes are a great source of fiber, potassium and other nutrients. Air Fryer Sweet Potato Fries are super simple to make. Just wash and prepare the sweet potatoes, toss them with olive oil, sprinkle with salt and place in air fryer. Wait 20 minutes and viola you have a heathier version of sweet potato fries. They pair nice with a burger or they taste great on their own!

Ingredients

Ingredients for air fryer sweet potato fries on a table.
  • Sweet potatoes – You can’t have sweet potato fries without the sweet potatoes. I prefer the sweet potatoes with the orange flesh.
  • Olive Oil – Helps the sweet potatoes crisp.
  • Salt – Adds some flavor.

See recipe card for quantities.

Instructions

Two sweet potatoes on a cutting board after blemishes have been removed.

Wash and dry sweet potatoes. I usually just wash the potatoes with my hands but you can also use a scrubber to make sure you remove all of the dirt from the skin. Remove any blemishes from the sweet potatoes. I use the top of a potato peeler for this step but you can also use a knife.

Sweet potatoes are cut with a knife on a wood cutting board.

Cut off the ends of the sweet potatoes. Place one sweet potato on it’s side and cut it into 1/2 inch rounds. Cut each round into 1/2 inch pieces. Repeat with remaining sweet potato. The sweet potato pieces will look quite large but they will shrink as they cook.

Sweet potatoes in a large bowl after they have been tossed with olive oil and salt.

Preheat air fryer to 400F. Place cut sweet potatoes in a large bowl. Add olive oil and toss to coat the potatoes. Sprinkle with salt and toss again.

Cooked sweet potato fries in air fryer basket.

Once the air fryer has heated, add sweet potatoes. Cook for 20 – 22 minutes. Open the air fryer every 5 minutes and toss the sweet potatoes. This will ensure the sweet potatoes are cooked evenly on all sides.

Remove sweet potato fries from air fryer after the timer ends. Serve immediately!

Hint: Different models of air fryers can vary slightly in temperature. Check the sweet potato fries regularly throughout the last 5 minutes of cooking time to make sure they don’t burn. If the sweet potato fries are browning too much, turn off the air fryer and serve them immediately.

Substitutions

  • Salt – Any type of salt can be used for this recipe. I like to use seasoned salt.
  • Olive Oil – You can substitute vegetable oil or canola oil. I prefer to use olive oil because it’s rich in monounsaturated fats which lowers bad cholesterol and increases good cholesterol.

Variations

  • Spicy – To add a little kick, sprinkle 1/4 teaspoon of cayenne pepper on sweet potato fries before cooking.

Equipment

Air Fryer – I used a basket style air fryer for this recipe. If you are using another type of air fryer, flip the sweet potatoes halfway through cooking to ensure they crisp and brown evenly.

Storage

Air Fryer Sweet Potato Fries are best served immediately after cooking. Leftovers can be stored for a day or two in the refrigerator. They can be reheated in the microwave but they won’t be as crispy as they were when they first came out of the air fryer.

Top tip

Adjust the oil according to your preferences. If you prefer sweet potato fries that are crispier then add the full amount of olive oil. The more oil, the more crispier the fries will be. If you prefer a healthier version, then use less oil but they won’t be as crispy.

FAQ

Why are my sweet potatoes fries soggy?

Too many sweet potatoes in the air fryer. Make sure the sweet potatoes are in a single layer while cooking. Cook two batches if necessary.

Should I preheat the air fryer?

Yes! Preheating the air fryer will help to make crispy fries.

Related

Looking for other recipes like this? Try these:

Sweet potato fries on a square plate with a small bowl of ketchup on the side.
Print Recipe
No ratings yet

Air Fryer Sweet Potato Fries

Air Fryer Sweet Potato Fries are super easy to make. They are tossed in olive oil, sprinkled with salt and cooked until crispy.
Prep Time5 minutes mins
Cook Time22 minutes mins
Total Time27 minutes mins
Servings: 4
Calories: 115kcal
Author: Christine

Ingredients

  • 2 medium sweet potatoes
  • 2 – 4 teaspoons olive oil See recipe notes
  • ½ teaspoon salt

Instructions

  • Wash and dry sweet potatoes. I usually just wash the potatoes with my hands but you can also use a scrubber to make sure you remove all of the dirt from the skin. Remove any blemishes from the sweet potatoes. I use the top of a potato peeler for this step but you can also use a knife.
  • Place one sweet potato on it's side and cut it into ½ inch rounds. Cut each round into ½ inch pieces. Repeat with remaining sweet potato. The sweet potato pieces will look quite large but they will shrink as they cook.
  • Preheat air fryer to 400F. Place cut sweet potatoes in a large bowl. Add olive oil and toss to coat the potatoes. Sprinkle with salt and toss again.
  • Once the air fryer has heated, add sweet potatoes. Cook for 20 – 22 minutes. Open the air fryer every 5 minutes and toss the sweet potatoes. This will ensure the sweet potatoes are cooked evenly on all sides.
  • Remove sweet potato fries from air fryer after the timer ends. Serve immediately!

Notes

Nutrition information is calculated using 2 teaspoons of olive oil.
Different models of air fryers can vary slightly in temperature. Check the sweet potato fries regularly throughout the last 5 minutes of cooking time to make sure they don’t burn. If the sweet potato fries are browning too much, turn off the air fryer and serve them immediately.
Air Fryer Sweet Potato Fries are best served immediately after cooking. Leftovers can be stored for a day or two in the refrigerator. They can be reheated in the microwave but they won’t be as crispy as they were when they first came out of the air fryer.
Adjust the oil according to your preferences. If you prefer sweet potato fries that are crispier then add the full amount of olive oil. The more oil, the more crispier the fries will be. If you prefer a healthier version, then use less oil but they won’t be as crispy.

Nutrition

Serving: 8fries | Calories: 115kcal | Carbohydrates: 23g | Protein: 2g | Fat: 2g | Saturated Fat: 0.3g | Polyunsaturated Fat: 0.2g | Monounsaturated Fat: 1g | Sodium: 353mg | Potassium: 381mg | Fiber: 3g | Sugar: 5g | Vitamin A: 16031IU | Vitamin C: 3mg | Calcium: 34mg | Iron: 1mg

Filed Under: Air Fryer, Recipes

Homemade Garlic Butter Breadsticks

April 11, 2023 by Christine 1 Comment

Homemade Garlic Butter Breadsticks are golden on the outside and light and fluffy on the inside. The garlic butter topping makes these breadsticks better than any store bought variety.

Baked Homemade Garlic Butter Breadsticks wrapped in a dish towel and placed on a cutting board.

Homemade Garlic Butter Breadsticks remind me of going out for dinner at the Olive Garden restaurant. I would look forward to eating breadsticks all day long and I could not wait for the server to place that warm basket of breadsticks on the table. Friends of mine would wrap breadsticks in napkins and stuff them in their purse to take home. My morals would kick in and I could not make myself do the same. Instead I would eat far too many breadsticks before my meal even arrived. I often wouldn’t have enough room to eat the main course. Unfortunately, I no longer live close to an Olive Garden restaurant. About 10 years ago we started buying premade breadsticks from the store and put garlic butter on top. We popped them in the oven for a few minutes and at the time we thought these breadsticks were amazing. Once I started baking with yeast I had the idea of trying to make my own breadsticks. My breadstick recipe quickly turned into a huge success and a recipe sought out by friends and family. These Homemade Garlic Butter Breadsticks are light and fluffy and so flavorful that you’ll never want to buy store bought breadsticks again.

Ingredients

Ingredients for Homemade Garlic Butter Breadsticks in bowls on a table.
  • Warm Water – Warm water is crucial for this recipe. Cold water won’t allow the yeast to activate and if the water is too hot, it will kill the yeast. The water should be between 90F – 110F.
  • Instant Yeast – I prefer to use instant yeast because I can tell really quickly if the yeast is fermenting.
  • Granulated Sugar – The sugar is mixed with the warm water to activate the yeast.
  • Salt – Helps to boost the flavor and it strengthens the dough.
  • Olive Oil – Keeps the dough from drying out.
  • Bread Flour – Bread flour has a higher protein content than other flours and the higher protein helps to dough to create gluten and the chewiness that’s characteristic of bread.
  • Butter – Butter is melted and then brushed onto the breadsticks right after they come out of the oven.
  • Garlic Powder and Salt – Sprinkled on top of the melted butter.

See recipe card for quantities.

Instructions

Yeast mixture is foaming in a small bowl.

Mix together warm water, yeast and sugar in a small bowl. Let this mixture sit for 5 – 10 minutes. It will look foamy once the yeast has activated. This step is crucial for this recipe. If your mixture is not foamy, the yeast has not been activated.

Adding olive oil, salt and flour to the yeast mixture in a large bowl of a stand mixer.

Pour yeast mixture into a large bowl. Add salt, olive oil and flour. It’s important to measure the flour by spooning it into the measuring cup because flour gets compacted when it sits in the bag or container. If you scoop the flour with the measuring cup it will stay compacted and you will add too much flour. Use a knife to level the flour.

Dough ball in a large bowl of a stand mixer.

Using a dough hook on a stand mixer, mix together for 3-5 minutes. The dough should be tacky and slightly sticky to touch. It should not be so sticky that it stays on your hands when you touch it. If the dough is too sticky add a pinch of flour. Only add one pinch at a time because adding too much flour will dry out the dough. Be sure to mix thoroughly between additions if you add more flour. If the dough is too dry, add a teaspoon of water and mix thoroughly. The end result should be a slightly sticky dough.

Dough is placed in a large bowl to rise.

Once the dough has formed, roughly shape it into a ball and place in a large greased bowl. Cover with plastic wrap or a clean dishtowel. Let the dough rise for 1.5 hours or until doubled in size. This step is really important and is also known as “bulk fermentation” because it allows the yeast to continue to ferment. Fermentation helps with the structure and flavor of the dough.

Dough is rolled into thin logs and is placed on two non-stick baking sheets.

Remove dough from the bowl and punch down to remove any air pockets. Divide dough into 12 equal pieces. On a lightly floured surface roll dough pieces into thin logs. Place breadsticks on two lightly greased non-stick baking pans. Cover with a clean dishtowel and let rise for another hour. The breadsticks should double in size.

Homemade Garlic Butter Breadsticks on two non-stick baking pans after they have been removed from the oven.

Preheat oven to 350F. Bake breadsticks for 18-20 minutes. Melt the butter while the breadsticks are baking. Place butter in a small bowl and microwave for 20 seconds on high. Repeat in 10 second intervals until the butter is melted. I like to cover the bowl with a paper towel in case the butter splatters. Remove breadsticks from oven. Use a pastry brush to evenly coat the breadsticks with the melted butter. Sprinkle with garlic powder and salt. Serve immediately.

Hint: Make sure to use warm water (90 – 110F) when activating the yeast. If the water is too cold the yeast won’t activate. If the water is too hot, you will kill the yeast.

Check the expiration date on the yeast. Expired yeast won’t activate.

Substitutions

  • Bread Flour – You can substitute all-purpose flour in place of the bread flour. I haven’t tried this recipe with any other types of flour.

Equipment

Stand Mixer – These Homemade Garlic Butter Breadsticks are made with a stand mixer using the dough hook attachment. I have not tried to make this recipe without a stand mixer.

Large Non-Stick Baking Pans – Make sure to use two pans for this recipe.

Storage

Homemade Garlic Butter Breadsticks are best enjoyed immediately after removing them from the oven or the same day they were baked.

Homemade Garlic Butter Breadsticks freeze well. Place in a freezer safe container or bag and freeze up to three months. Thaw at room temperature. When ready to eat, pop into the microwave for 20 seconds and the breadsticks will taste like they just came out of the oven.

Top tip

Do not add too much flour to the dough! If you add too much flour, the breadsticks will be dense and they won’t have that nice fluffy consistency. If this is your first time baking with yeast, I highly recommend reading the detailed instructions above!

FAQ

What can you serve with breadsticks?

Homemade Garlic Butter Breadsticks pair well with pasta dishes, stews, etc. These breadsticks are so tasty, you can also eat them on their own.

Why are Olive Garden Breadsticks so good?

They are served while they are still warm. Try these Homemade Garlic Butter Breadsticks shortly after removing them from the oven and you won’t be disappointed!

Related

Looking for other recipes like this? Try these:

Baked Homemade Garlic Butter Breadsticks wrapped in a dish towel and placed on a cutting board.
Print Recipe
5 from 1 vote

Homemade Garlic Butter Breadsticks

Homemade Garlic Butter Breadsticks are golden on the outside and light and fluffy on the inside. The garlic butter topping makes these breadsticks better than any store bought variety.
Prep Time2 hours hrs 45 minutes mins
Cook Time20 minutes mins
Total Time3 hours hrs 5 minutes mins
Servings: 12
Calories: 172kcal
Author: Christine

Ingredients

  • 1 cup warm water (between 90F-110F).
  • 2¼ teaspoons instant yeast
  • 1 tablespoon granulated sugar
  • ½ teaspoon salt
  • 3 tablespoons olive oil
  • 2 ¾ cups bread flour
  • 2 tablespoons butter
  • ½ teaspoon garlic powder
  • ¼ teaspoon salt

Instructions

  • Mix together warm water, yeast and sugar in a small bowl. Let this mixture sit for 5 – 10 minutes. It will look foamy once the yeast has activated. This step is crucial for this recipe. If your mixture is not foamy, the yeast has not been activated.
  • Pour yeast mixture into a large bowl. Add salt, olive oil and flour. It's important to measure the flour by spooning it into the measuring cup because flour gets compacted when it sits in the bag or container. If you scoop the flour with the measuring cup it will stay compacted and you will add too much flour. Use a knife to level the flour.
  • Using a dough hook on a stand mixer, mix together for 3-5 minutes. The dough should be tacky and slightly sticky to touch. It should not be so sticky that it stays on your hands when you touch it. If the dough is too sticky add a pinch of flour. Only add one pinch at a time because adding too much flour will dry out the dough. Be sure to mix thoroughly between additions if you add more flour. If the dough is too dry, add a teaspoon of water and mix thoroughly. The end result should be a slightly sticky dough.
  • Remove dough from the bowl and punch down to remove any air pockets. Divide dough into 12 equal pieces. On a lightly floured surface roll dough pieces into thin logs. Place breadsticks on two lightly greased non-stick baking sheets. Cover with a clean dishtowel and let rise for another hour. The breadsticks should double in size.
  • Preheat oven to 350F. Bake breadsticks for 18-20 minutes.
  • Melt the butter while the breadsticks are baking. Place butter in a small bowl and microwave for 20 seconds on high. Repeat in 10 second intervals until the butter is melted. I like to cover the bowl with a paper towel in case the butter splatters.
  • Remove breadsticks from oven. Use a pastry brush to evenly coat the breadsticks with the melted butter. Sprinkle with garlic powder and salt. Serve immediately.

Notes

Make sure to use warm water (90 – 110F) when activating the yeast. If the water is too cold the yeast won’t activate. If the water is too hot, you will kill the yeast.
Check the expiration date on the yeast. Expired yeast won’t activate.
Do not add too much flour to the dough! If you add too much flour, the breadsticks will be dense and they won’t have that nice fluffy consistency. If this is your first time baking with yeast, I highly recommend reading the detailed instructions above!
Homemade Garlic Butter Breadsticks are best enjoyed immediately after removing them from the oven or the same day they were baked.
Homemade Garlic Butter Breadsticks freeze well. Place in a freezer safe container or bag and freeze up to three months. Thaw at room temperature. When ready to eat, pop into the microwave for 20 seconds and the breadsticks will taste like they just came out of the oven.

Nutrition

Serving: 1breadstick | Calories: 172kcal | Carbohydrates: 25g | Protein: 5g | Fat: 6g | Saturated Fat: 2g | Polyunsaturated Fat: 1g | Monounsaturated Fat: 3g | Trans Fat: 0.1g | Cholesterol: 5mg | Sodium: 162mg | Potassium: 55mg | Fiber: 1g | Sugar: 1g | Vitamin A: 59IU | Vitamin C: 0.01mg | Calcium: 6mg | Iron: 0.4mg

Filed Under: Breads, Recipes

Vegan Black Bean Meatballs

April 10, 2023 by Christine Leave a Comment

Vegan Black Bean Meatballs are slightly crispy on the outside and filled with loads of flavor on the inside. The combination of spices make these the best Vegan Black Bean Meatballs.

Vegan Black Bean Meatballs covered in tomato sauce on a white plate.

I recently tried prepackaged vegan meatballs from a local grocery store and I must say they tasted delicious. I don’t eat a lot of processed foods because of the unhealthy ingredients that are typically added to these products. I decided I had to create my own vegan meatball recipe and the results are far from disappointing. Vegan Black Bean Meatballs come together easily and they are super simple to make. They are versatile and can be added to many dishes such as rice or pasta. Vegan Black Bean Meatballs are a delicious plant based protein and they will quickly become part of your regular meal rotation.

Ingredients

Ingredients for Vegan Black Bean Meatballs in bowls on a table.
  • Ground Flax Seeds – Used to make flax eggs in this recipe.
  • Water – Mixed with the ground flax seeds to make flax eggs.
  • Black Beans – used as the base of these Vegan Black Bean Meatballs.
  • Garlic Powder, Onion Powder, Pepper and Salt – spices to add flavor.
  • BBQ Sauce – Make sure to use a vegan variety.
  • Bread Crumbs – Helps to bind the Vegan Black Bean Meatballs together.
  • Olive Oil – To cook the Vegan Black Bean Meatballs.

See recipe card for quantities.

Instructions

Preheat oven to 350F. Line a 2 baking sheets with parchment paper.

Water and ground flax seeds mixed in a small bowl.

Add ground flax seed and water to a small bowl. Whisk to combine. Place bowl in fridge.

Black beans are spread out on two baking sheets lined with parchment paper.

Spread drained and rinsed black beans onto the baking sheets. Bake at 350F for 8-10 minutes. Remove beans from oven and let cool for 10 minutes.

Black beans are mashed in a large bowl with a potato masher.

Transfer black beans to a large bowl. Use a potato masher to mash beans. Continue until most of the beans have been mashed.

Vegan Black Bean Meatballs formed into balls on a plate.

Add flax eggs, spices, BBQ sauce and bread crumbs to the bean mixture. Use your hands to combine the ingredients. Form mixture into 1 inch balls.

Add olive oil to a medium sized frypan. Preheat frypan to medium high heat. Once the pan has heated, add Vegan Black Bean Meatballs. Cook for 3 minutes per side or until they start to brown. Rotate to brown all sides. Continue with remaining Vegan Black Bean Meatballs. Makes 24 meatballs. Serve immediately.

Hint: Make sure most of the beans have been mashed. If they are not mashed it will be difficult to to form the mixture into balls

Substitutions

  • Breadcrumbs – Gluten free breadcrumbs can be substituted for the breadcrumbs.

Variations

  • Spicy – add dried red chilies flakes to add some heat to this recipe.

Equipment

I used two large metal baking pans to precook the black beans. Any type of baking sheet can be used as long as it’s lined with parchment paper.

A potato masher works the best for mashing the beans but a fork can be used if needed.

Storage

Vegan Black Bean Meatballs are best served immediately. They tend to lose some of their crispiness if they sit too long.

Vegan Black Bean Meatballs can be stored in the fridge for up to three days. Reheat in a pan with a little bit of olive oil. They can also be reheated in the microwave.

Vegan Black Bean Meatballs freeze well. Place in a freezer safe container or bag and freeze up to three months. Thaw in the fridge or at room temperature. Reheat on the stovetop or in the microwave.

Top tip

Do not overcook the black beans when precooking them. If the beans start to split open, remove them from the oven immediately. Vegan Black Bean Meatballs will be dry if the beans have been overcooked.

FAQ

Can I use another type of bean in this recipe?

Don’t substitute the black beans for another type of bean in this recipe because it will change the taste.

What can I serve Vegan Black Bean Meatballs with?

Vegan Black Bean Meatballs can be substituted in place of meatballs in your favorite recipes. They pair nice with pasta and rice.

Related

Looking for other recipes like this? Try these:

Vegan Black Bean Meatballs covered in tomato sauce on a white plate.
Print Recipe
No ratings yet

Vegan Black Bean Meatballs

Vegan Black Bean Meatballs are slightly crispy on the outside and filled with loads of flavor on the inside. The combination of spices make these the best Vegan Black Bean Meatballs.
Prep Time20 minutes mins
Cook Time10 minutes mins
Total Time30 minutes mins
Servings: 6
Calories: 176kcal

Ingredients

  • 2 tablespoons ground flax seed
  • 6 tablespoons water
  • 2 cans (540ml each) black beans rinsed and drained
  • 1 teaspoon garlic powder
  • 1 teaspoon onion powder
  • ½ teaspoon ground black pepper
  • ½ teaspoon salt
  • ¼ cup BBQ sauce
  • ¼ cup bread crumbs
  • 2 teaspoons olive oil extra virgin

Instructions

  • Preheat oven to 350F. Line two baking sheets with parchment paper.
  • Add ground flax seeds and water to a small bowl. Whisk to combine. Place in fridge.
  • Spread drained and rinsed black beans onto the baking sheets. Bake at 350F for 10 minutes.
  • Remove beans from oven and let cool for 10 minutes.
  • Transfer black beans to a large bowl. Use a potato masher to mash beans. Continue until most of the beans have been mashed.
  • Add olive oil to a medium sized frypan. Preheat frypan to medium high heat.
  • Add flax eggs, spices, BBQ sauce and bread crumbs to the bean mixture. Use your hands to combine the ingredients. Form mixture into 1 inch balls.
  • Once the pan has heated, add Vegan Black Bean Meatballs. Cook for 3 minutes per side or until they start to brown. Rotate to brown all sides.
  • Continue with remaining Vegan Black Bean Meatballs. Makes 24 meatballs. Serve immediately.

Notes

Do not overcook the black beans when precooking them. If the beans start to split open, remove them from the oven immediately. Vegan Black Bean Meatballs will be dry if the beans have been overcooked.
Vegan Black Bean Meatballs are best served immediately. They tend to lose some of their crispiness if they sit too long.
Vegan Black Bean Meatballs can be stored in the fridge for up to three days. Reheat in a pan with a little bit of olive oil. They can also be reheated in the microwave.
Vegan Black Bean Meatballs freeze well. Place in a freezer safe container or bag and freeze up to three months. Thaw in the fridge or at room temperature. Reheat on the stovetop or in the microwave.

Nutrition

Serving: 4meatballs | Calories: 176kcal | Carbohydrates: 29g | Protein: 9g | Fat: 3g | Saturated Fat: 0.4g | Polyunsaturated Fat: 1g | Monounsaturated Fat: 1g | Sodium: 352mg | Potassium: 363mg | Fiber: 8g | Sugar: 4g | Vitamin A: 33IU | Vitamin C: 0.2mg | Calcium: 43mg | Iron: 2mg

Filed Under: Recipes

Slow Cooker Beef and Barley Soup

April 5, 2023 by Christine 1 Comment

Slow Cooker Beef and Barley Soup is hearty, warm and filled with flavor. The combination of beef, vegetables and tender pieces of barley make this soup the ultimate winter comfort food.

Slow Cooker Beef and Barley Soup in a white bowl in the foreground. Slices of bread in the background.

We are in the middle of another big dump of snow here in Northwestern Ontario. I was hopeful that spring was just around the corner but Mother Nature had a different idea. The snow has me thinking of comfort food. Slow Cooker Beef and Barley Soup is the perfect meal for those cold and snowy days. It’s really easy to make and the slow cooker does all of the work for you. It pairs well with my Homemade Garlic Butter Breadsticks. Slow Cooker Beef and Barley Soup comes together easily. Just brown the beef and onions and add them to the slow cooker with the rest of the ingredients except the barley which will be added later. Walk away and enjoy the mouth watering smells as the soup starts cooking. Add the barley towards the end of the cooking time. The result is a warm, hearty and delicious soup. Slow Cooker Beef and Barley Soup is the ultimate winter comfort food.

Ingredients

Ingredients for Slow Cooker Beef and Barley Soup in individual bowls on a table.
  • Olive Oil – Used to brown the beef before adding it to the slow cooker
  • Stewing Beef – I prefer to use stewing beef because the meat ends up being nice and tender when cooked. It’s perfect for those busy days because most of the waste is already trimmed off.
  • Carrot and Celery – the perfect vegetables to add to this soup.
  • Onion and Garlic – Both add great flavor.
  • Beef Broth – I used a reduced salt beef broth to keep the sodium lower in this recipe. You could also use a “no salt added” beef broth.
  • Dry Red Wine – Be sure to use a dry red wine such as a merlot.
  • Worcestershire Sauce and Soy Sauce – Both sauces add flavor to nicely compliment the beef broth.
  • Parsley, Ground Black Pepper and a Bay Leaf – Spices to add flavor to the soup.
  • Red Chilies – I highly recommend adding the red chilies because they add a lot of flavor to the soup.
  • Pearl Barley – You can’t have Slow cooker Beef and Barley Soup without the barley!

See recipe card for quantities.

Instructions

Beef and onions are browning in a fry pan.

In a medium fry pan, brown beef and onions over high heat. Pour into slow cooker.

All ingredients except for the broth and barley have been added to the slow cooker.

Add all of the ingredients to the slow cooker except for the barley. Cook on high for 3 hours or low for 6 hours.

Barley is added to the rest of the ingredients in the slow cooker.

Add barley to the slow cooker and stir to combine. Cook for an additional 1 hour on high or 2 hours on low.

Slow Cooker Beef and Barley Soup in a white bowl on a table. Pieces of fresh bread are on one side of the bowl and a tea towel is on the other side of the bowl.

Spoon into bowls and enjoy! Makes 6 servings (1 1/2 cups of soup per serving).

Hint: Be sure to brown the beef over high heat because you just want to brown the outsides of the beef to lock in the flavor. The beef will continue to cook in the slow cooker.

Substitutions

  • Beef Broth – I used a reduced sodium beef broth in this recipe. You can substitute with a regular beef broth or a “no salt added” beef broth.
  • Stewing Beef – You can substitute a chuck roast cut into small pieces.

Variations

  • Spicy – add an extra 1/2 teaspoon of dried red chilies.

Equipment

I used a 6 quart slow cooker for this recipe. I wouldn’t use a smaller size as it will not fit all of the ingredients.

Storage

Slow Cooker Beef and Barley Soup can be stored in the fridge for up to three days. Simply remove soup from fridge, place in a pot or bowl and reheat on the stovetop or in the microwave.

Slow Cooker Beef and Barley Soup freezes well. Place soup in a freezer safe container and freeze up to three months. I prefer to freeze the soup in individual sized freezer safe containers. Soup can be removed from freezer for a quick lunch or dinner. Thaw on the counter and reheat according to your preferences.

Top tip

Do not add barley to the soup until the last hour or two of cooking! If the barley is added to early it will get soggy.

FAQ

Should I soak barley before adding it to the soup?

Pearl barley does not need to be soaked before adding it to the soup as it cooks quickly.

Does barley get soggy in soups?

The barley will not get soggy if it’s added within the last hour or two of cooking.

Should I cook barley before adding it to the soup.

Barley does not need to be cooked before adding it to the soup.

Related

Looking for other recipes like this? Try these:

Slow Cooker Beef and Barley Soup in a white bowl in the foreground. Slices of bread in the background.
Print Recipe
5 from 2 votes

Slow Cooker Beef and Barley Soup

Slow Cooker Beef and Barley Soup is warm, hearty and filled with flavor. The combination of beef, vegetables and tender pieces of barley make this soup the ultimate winter comfort food.
Prep Time20 minutes mins
Cook Time4 hours hrs
Total Time4 hours hrs 20 minutes mins
Servings: 6
Calories: 284kcal

Ingredients

  • 1 tablespoon olive oil extra virgin
  • 2 lbs stewing beef
  • 1 cup onion chopped
  • 2 cups carrots peeled and chopped
  • 1 ½ cups celery chopped
  • 3 cloves garlic minced
  • 6 cups beef broth
  • ½ cup dry red wine
  • 1 teaspoon parsley flakes
  • 1 teaspoon ground black pepper
  • 1 bay leaf
  • ½ teaspoon dry red chilies optional
  • â…” cup pearl barley

Instructions

  • In a medium fry pan, brown beef and onions over high heat. Pour beef and onions into slow cooker.
  • Add all of the ingredients to the slow cooker except for the barley.
  • Cook on high for 3 hours or low for 6 hours.
  • Add barley to the slow cooker and stir to combine.
  • Cook for an additional 1 hour on low or 2 hours on high.
  • Spoon into bowls and enjoy! Makes 6 servings (1 ½ cups of soup per serving).

Notes

Be sure to brown the beef over high heat because you just want to brown the outsides of the beef to lock in the flavor.  The beef will continue to cook in the slow cooker.
Do not add the barley to the soup until the last hour or two of cooking! If the barley is added too early it will get soggy.
Slow Cooker Beef and Barley Soup can be stored in the fridge for up to three days. Simply remove soup from fridge, place in a pot or bowl and reheat on the stovetop or in the microwave.
Slow Cooker Beef and Barley Soup freezes well. Place soup in a freezer safe container and freeze up to three months. I prefer to freeze the soup in individual sized freezer safe containers. Soup can be removed from freezer for a quick lunch or dinner. Thaw on the counter and reheat according to your preferences.

Nutrition

Serving: 1bowl (1 1/2 cups soup). | Calories: 284kcal | Carbohydrates: 19g | Protein: 30g | Fat: 8g | Saturated Fat: 2g | Polyunsaturated Fat: 1g | Monounsaturated Fat: 4g | Cholesterol: 70mg | Sodium: 773mg | Potassium: 721mg | Fiber: 4g | Sugar: 3g | Vitamin A: 5440IU | Vitamin C: 5mg | Calcium: 63mg | Iron: 3mg

Filed Under: Recipes

Soft and Chewy Chocolate Chip Cookies

March 30, 2023 by Christine 1 Comment

Soft and Chewy Chocolate Chips Cookies are slightly crispy on the outside and soft and chewy on the inside. They are decadent and oozing with chocolatey flavor. No chilling required!

Close up of a baked soft and chewy chocolate chip cookie in the foreground. Baked cookies on a wire rack in the background.

I loved baking chocolate chip cookies when I was a kid. I have fond memories of baking them with my best friend. We would frequently have “bake-a-thons” and bake more than one treat. As much as we tried different recipes we always went back to chocolate chip cookies. Looking back, the cookies we baked were always thin and flat but they were guaranteed to be delicious. I have learned a lot about baking since those days. I have since created a chocolate chip cookie recipe that still has the same great flavor but the cookies are thick, soft and chewy. The best part is the dough doesn’t have to be chilled! Soft and Chewy Chocolate Chips Cookies are better than any store bought variety. They are a delicious treat and they pair well with a glass of milk.

Ingredients

Ingredients for Soft and Chewy Chocolate Chips Cookies on a table.
  • All-purpose flour – I used all-purpose flour for this recipe. I haven’t tried this recipe using any other type of flour.
  • Cornstarch – Helps make the cookies thick and chewy.
  • Baking soda – Helps the cookies to rise.
  • Salt – Brings out the flavor of the other ingredients.
  • Butter – I used unsalted butter for this recipe. If you use salted butter, then omit the salt from the recipe.
  • Brown sugar – Gives the cookies that chewy texture.
  • Granulated sugar – Adds a touch more sweetness.
  • Large eggs – Helps to bind the ingredients together.
  • Vanilla – Adds some flavor.
  • Chocolate Chips – I used a mixture of dark and milk chocolate chips for this recipe.

See recipe card for quantities.

Instructions

Preheat oven to 350F. Line two large baking sheets with parchment paper. In a medium bowl, whisk together flour, cornstarch, baking soda and salt. Place butter in a microwave safe bowl. Cook on high for 40-60 seconds or until melted.

Melted butter, brown sugar and granulated sugar have been added to a large bowl.

Pour butter into a large bowl. Add brown sugar and granulated sugar. Using an electric mixture on medium speed, cream butter and sugars until batter is smooth. Use a spatula to scrape down the sides of the bowl. Add eggs and vanilla. Continue mixing on medium until the batter is smooth.

Dry ingredients have been added to the batter in a large bowl.

Add half of the flour mixture to the batter. Turn electric mixer to low and mix until the flour mixture starts to incorporate into the batter. As the flour mixture starts to incorporate, you can increase the speed of the electric mixer to medium. Use a spatula to scrape down the sides of the bowl as necessary. Repeat with remaining flour mixture.

A spatula is used to fold the chocolate chips into the batter in a large bowl.

Add chocolate chips. Use a spatula to fold in chocolate chips. Using a spoon or your hands, shape approximately 2 tablespoons of dough into a ball. Place dough ball onto baking pan. Repeat until the baking sheets are full. Leave 1.5 to 2 inches between cookies so they have room to spread as they bake.

Baked soft and chewy chocolate chip cookies on a baking sheet lined with parchment paper.

Place baking pan into preheated oven and bake for 10-12 minutes. The cookies will be done when the tops start turning golden brown. Remove pan from oven. Let cookies cool slightly before transferring to a wire rack to cool completely. Repeat with other baking sheet. Makes 24 cookies. Enjoy!

Hint: Make sure the baking sheets are lined with parchment paper. This will help prevent the bottoms of the cookies from burning.

Substitutions

  • Chocolate Chips – I used a mixture of dark and milk chocolate chips in this recipe. You can use semisweet, milk, dark or your favorite type of chocolate chip.

Equipment

I used two large non-stick metal baking pans for this recipe. You can use smaller baking pans but you won’t be able to fit as many cookies on a pan.

I used an electric mixer for this recipe. I highly recommend using an electric mixer for this recipe because the cookie dough is quite thick. You can try mixing by hand but you will likely end up with very sore arms!

Storage

Soft and Chewy Chocolate Chip Cookies can be stored in an airtight container for up to three days at room temperature.

Soft and Chewy Chocolate Chip Cookies freeze well. Place cookies in a freezer safe container or bag and freeze up to three months. Thaw at room temperature when ready to eat.

Top tip

Do not overbake the cookies! Otherwise they won’t be soft and chewy.  The cookies are ready when the tops start to turn golden.

FAQ

What is the secret to making soft chewy cookies?

Using a higher ratio of brown sugar to granulated sugar in the recipe. Brown sugar helps to keep the cookies chewy because it retains more moisture.

What is the best way to keep homemade cookies soft?

Store cookies in an airtight container or bag at room temperature.

Related

Looking for other recipes like this? Try these:

Close up of a baked soft and chewy chocolate chip cookie in the foreground. Baked cookies on a wire rack in the background.
Print Recipe
5 from 1 vote

Soft and Chewy Chocolate Chip Cookies

Soft and Chewy Chocolate Chips Cookies are slightly crispy on the outside and soft and chewy on the inside. They are decadent and oozing with chocolatey flavor. No chilling required!
Prep Time10 minutes mins
Cook Time10 minutes mins
Total Time20 minutes mins
Servings: 24 cookies
Calories: 190kcal
Author: Christine

Ingredients

  • 2 ½ cups all-purpose flour
  • 2 tablespoons cornstarch
  • 2 teaspoons baking soda
  • ½ teaspoon salt
  • ½ cup butter unsalted
  • 1 cup brown sugar
  • ¼ cup granulated sugar
  • 2 large eggs
  • 1 tablespoon vanilla
  • 1 ½ cups chocolate chips

Instructions

  • Preheat oven to 350F. Line two large baking sheets with parchment paper.
  • In a medium bowl, whisk together flour, cornstarch, baking soda and salt.
  • Place butter in a microwave safe bowl. Cook on high for 40-60 seconds or until melted.
  • Pour butter into a large bowl. Add granulated sugar and brown sugar.
  • Using an electric mixer on medium speed, cream butter and sugars until batter is smooth. Use a spatula to scrape down the sides of the bowl.
  • Add eggs and vanilla. Continue mixing on medium until the batter is smooth.
  • Add half of the flour mixture to the batter. Turn electric mixer to low and mix until the flour mixture starts to incorporate into the batter. As the flour mixture starts to incorporate, you can increase the speed of the electric mixer to medium. Use a spatula to scrape down the sides of the bowl as necessary.
  • Repeat with remaining flour mixture.
  • Add chocolate chips. Use a spatula to fold in chocolate chips.
  • Using a large spoon or your hands, shape approximately 2 tablespoons of dough into a ball. Place dough ball onto baking pan.
  • Repeat until the baking sheet is full. Leave 1.5 – 2 inches between cookies so they have room to spread when baking.
  • Place baking pan in preheated oven and bake for 10-12 minutes. The cookies will be done when they start to turn golden on the tops.
  • Remove pan from oven. Let cookies cool slightly and then transfer cookies to a wire rack to cool completely.
  • Repeat with the other baking sheet. Makes 24 cookies.
  • Enjoy!

Notes

Do not overbake the cookies! Otherwise they won’t be soft and chewy.  The cookies are ready when the tops start to turn golden.
Soft and Chewy Chocolate Chips cookies can be stored in an airtight container or bag for up to three days at room temperature.  Soft and Chewy Chocolate Chip Cookies freeze well.  Place cookies in a freezer safe container or bag and freeze up to three months.  Thaw cookies at room temperature when ready to serve.

Nutrition

Serving: 1cookie | Calories: 190kcal | Carbohydrates: 29g | Protein: 2g | Fat: 8g | Saturated Fat: 5g | Polyunsaturated Fat: 0.3g | Monounsaturated Fat: 1g | Trans Fat: 0.2g | Cholesterol: 26mg | Sodium: 179mg | Potassium: 66mg | Fiber: 0.4g | Sugar: 18g | Vitamin A: 141IU | Calcium: 21mg | Iron: 1mg

Filed Under: Cookies, Recipes

Healthy Banana Muffins

March 27, 2023 by Christine 1 Comment

Healthy banana muffins are fluffy and moist. They are golden on the outside and full of sweet banana flavor on the inside.

Healthy Banana Muffin on a plate. Bananas in the background.

Brown spotted bananas on your counter? This is a sight that happens all too often in my kitchen. I buy bananas thinking I will eat them all and inevitably they end up with brown spots all over them. These overripe bananas are just the type of bananas you want to use in this Healthy Banana Muffin recipe. Healthy Banana Muffins come together easily. With no added butter, oil or processed sugar, these Healthy Banana Muffins are a great on the go snack or breakfast when you are short on time.

Ingredients

Ingredients for Healthy Banana Muffins measured and placed on a table.
  • All-purpose flour – I used all purpose flour in this recipe. I have not tried this recipe using any other type of flour.
  • Baking Powder – Helps to create the fluffy cake like texture.
  • Baking Soda – Helps the muffins to rise.
  • Salt – Brings out the flavor of the other ingredients.
  • Mashed Bananas – Gives the muffins that delicious banana flavor. Make sure to use overripe bananas….the ones with the brown spots.
  • Large Eggs – Helps to bind the ingredients together.
  • Greek Yogurt – I used plain, 0%, no sugar added.
  • Milk – I used skim milk in this recipe.
  • Honey – adds a touch of sweetness.
  • Vanilla – adds some flavor.

See recipe card for quantities.

Instructions

Preheat oven to 350F. Grease a muffin pan with nonstick cooking spray.

Dry ingredients are whisked in a medium size bowl.

In a medium size bowl, add flour, baking powder, baking soda and salt. Whisk until combined.

Wet ingredients are mixed in a large bowl using a whisk.

In a large bowl, add mashed bananas, eggs, Greek yogurt, milk, honey and vanilla. Whisk until combined.

A spatula is used to fold the dry ingredients into the wet ingredients in a large bowl.

Add dry ingredients to wet ingredients. Using a spatula, fold dry ingredients into wet ingredients. Fold until the flour mixture is incorporated and there are no lumps in the batter.

Muffin batter has been distributed evenly in prepared muffin pan.

Using a cookie scoop, divide batter evenly into prepared muffin pan. Bake muffins for 16-18 minutes or until a toothpick inserted into the center comes out clean.

Let muffins cool slightly. Gently remove muffins from the pan and transfer to a wire rack to cool completely. Makes 12 muffins.

Hint: Do not overmix the batter. Overmixing the batter will cause the muffins to be dense.

Substitutions

  • Milk – I used skim milk in this recipe. You can substitute any type of milk.

Equipment

I used a non-stick muffin pan for this recipe and it worked well. I have also used a silicone muffin pan and it also works well. I actually prefer to use a silicone pan because the muffins are easier to remove from the pan.

Storage

Healthy Banana Muffins can be stored in a airtight container or bag at room temperature for up to three days. Healthy Banana Muffins freeze well. Place muffins in a freezer safe container or bag and freeze up to three months. Thaw in the refrigerator or at room temperature.

Top tip

Do not use paper muffin liners in the pan! This recipe has very little fat in it so the muffins will easily stick to the liners. I have tried greasing the liners but I find it easier to just grease the pan with some olive oil cooking spray.

FAQ

What is the secret to making moist muffins?

Do not overbake the muffins. Overbaking the muffins will cause them to dry out.

Is butter or oil better for muffins?

Neither! This recipe uses Greek yogurt in place of oil or butter. The muffins are still fluffy and moist.

Related

Looking for other recipes like this? Try these:

Print Recipe
5 from 2 votes

Healthy Banana Muffins

Prep Time10 minutes mins
Cook Time18 minutes mins
Total Time28 minutes mins
Servings: 12
Calories: 136kcal
Author: Christine

Ingredients

  • 2 cups all-purpose flour
  • 2 teaspoons baking powder
  • 1 teaspoon baking soda
  • ¼ teaspoon salt
  • 1 cup bananas overripe, mashed
  • 2 large eggs
  • â…“ cup Greek yogurt plain, 0%, no sugar added
  • ¼ cup milk
  • â…“ cup honey
  • 2 teaspoons vanilla

Instructions

  • Preheat oven to 350F.
  • Grease a muffin pan with non-stick cooking spray.
  • In a medium size bowl, add flour, baking powder, baking soda and salt. Whisk until combined.
  • In a large bowl, add mashed bananas, eggs, Greek Yogurt, milk, honey and vanilla. Whisk until combined.
  • Add dry ingredients to wet ingredients.
  • Using a spatula, fold dry ingredients into wet ingredients. Fold until the flour mixture is incorporated and there are no lumps in the batter.
  • Using a cookie scoop, divide batter evenly into prepared muffin pan.
  • Bake for 16-18 minutes or until a toothpick inserted into the center of a muffin comes out clean.
  • Let muffins cool slightly. Gently remove them from the pan and transfer to a wire rack to cool completely. Makes 12 muffins
  • Enjoy!

Notes

Do not overmix the batter.  Overmixing the batter will make the muffins dense.
Healthy Banana Muffins can be stored in an airtight container or bag for up to three days at room temperature.  Healthy Banana Muffins freeze well.  Place muffins in a freezer safe container or bag and store up to three months.  Thaw at room temperature.

Nutrition

Serving: 1muffin | Calories: 136kcal | Carbohydrates: 27g | Protein: 4g | Fat: 1g | Saturated Fat: 0.4g | Polyunsaturated Fat: 0.3g | Monounsaturated Fat: 0.4g | Trans Fat: 0.003g | Cholesterol: 32mg | Sodium: 227mg | Potassium: 100mg | Fiber: 1g | Sugar: 10g | Vitamin A: 62IU | Vitamin C: 1mg | Calcium: 61mg | Iron: 1mg

Filed Under: Healthy Snacks, Muffins, Recipes

No Bake Cookies

March 27, 2023 by Christine Leave a Comment

No Bake cookies are rich, chocolatey and chewy. The combination of cocoa, oatmeal and coconut make these a delicious sweet treat.

No Bake Cookies with scattered coconut flakes on a piece or parchment paper.

Looking for a sweet treat but short on time? These No Bake Cookies are for you! No Bake Cookies are made with seven simple ingredients. They are prepared on the stovetop and chilled in the refrigerator or freezer. You don’t have to worry about putting them in the oven and watching a timer so you don’t overbake them. No Bake Cookies come together easily. Simply prepare them, put them in the fridge or freezer and come back when you are ready to eat them. No Bake Cookies are rich, decadent and a perfect treat to satisfy that sweet tooth craving!

Ingredients

All ingredients for No Bake Cookies measured and placed on a table.
  • Butter, unsalted – I used unsalted butter for this recipe.
  • Milk – I used 0% skim milk. Any other type of milk can be substituted.
  • Granulated Sugar – adds sweetness to the cookies.
  • Cocoa Powder – makes the cookies rich and chocolatey.
  • Vanilla – adds a boost of flavor.
  • Oats – I used quick oats for this recipe.
  • Coconut – I used unsweetened coconut.

See recipe card for quantities.

Instructions

Line two large large baking sheet with parchment paper.

Butter, sugar, milk and cocoa powder added to a large saucepan.

In a large saucepan, add butter, milk, granulated sugar, and cocoa powder. Place pan on stovetop and turn on the heat to medium (about 4-5).

Smooth brown liquid in a large saucepan.

As the pan heats up, use a large wooden spoon to continuously mix the butter, milk, granulated sugar and cocoa powder. Once the ingredients have melted, you will have a smooth liquid. Continue mixing until small bubbles start to form.

Oats and coconut have been mixed into the batter in a large saucepan.

Remove pan from heat and stir in vanilla. Add oats and coconut and mix until combined.

No Bake Cookies dropped by the tablespoon on a pan lined with parchment paper.

Scoop 2 tablespoons of batter with a spoon and drop onto prepared baking sheets. Continue until all of the batter has been added to the baking sheets.

Transfer baking sheets to the fridge or freezer to chill the No Bake Cookies. Chill for 30 minutes in the freezer or one hour in the refrigerator. Remove from fridge or freezer and enjoy! Makes 24 cookies.

Hint: Make sure to continuously mix the butter, milk, granulated sugar and cocoa powder as they are melting. The mixture will burn easily if it sits stagnant on the heat for too long.

Substitutions

  • Milk – any type of milk can be substituted.
  • Cocoa Powder – any type of cocoa powder can be used.

Equipment

I used two large metal baking sheets for this recipe. You can use any kind of baking sheet as long as they have a large flat surface.

Storage

No Bake Cookies can be stored in an airtight container in the fridge for up to three days. No Bake Cookies freeze well. Place cookies in an airtight container or freezer bag and freeze up to three months. Remove from freezer and thaw in the fridge.

Top tip

Do not use steel cut oats in the this recipe! They will create a different consistency with these No Bake Cookies. I have tried rolled oats and they work but I find quick cooking oats work the best for this recipe.

FAQ

Do No Bake Cookies need to be refrigerated?

No Bake Cookies keep best in the refrigerator as it helps to keep the chocolate mixture firm.

Can you put No Bake Cookies in the freezer to set?

I prefer to put my No Bake Cookies in the freezer to set. They will set quicker than in the refrigerator and this means you get to eat them quicker!

Related

Looking for other recipes like this? Try these:

No Bake Cookies with scattered coconut flakes on a piece or parchment paper.
Print Recipe
No ratings yet

No Bake Cookies

No Bake cookies are rich, chocolatey and chewy. The combination of cocoa, oatmeal and coconut make these a delicious sweet treat.
Prep Time15 minutes mins
Set Time30 minutes mins
Total Time45 minutes mins
Servings: 24
Calories: 124kcal
Author: Christine

Ingredients

  • ½ cup butter unsalted
  • 1 cup granulated sugar
  • ½ cup cocoa powder
  • ½ cup milk
  • 2 teaspoons vanilla
  • 3 cups oats
  • 1 cup coconut unsweetened

Instructions

  • Line two large baking sheets with parchment paper.
  • In a large saucepan, add butter, milk, granulated sugar and cocoa powder.
  • Place pan on stovetop and turn the heat to medium (about 4-5).
  • Use a large wooden spoon to continuously mix the butter, milk, granulated sugar and cocoa powder.
  • Once the ingredients have completed melted, you will have a smooth liquid.
  • Continue mixing until small bubbles start to form.
  • Remove pan from heat and stir in vanilla.
  • Add oats and coconut and stir until combined.
  • Scoop 2 tablespoons of batter with a spoon and drop onto prepared baking sheets. Continue until all of the batter has been added to the baking sheet.
  • Transfer baking sheet to fridge or freezer to chill the cookies.
  • Chill for 30 minutes in the freezer or one hour in the fridge.
  • Remove from the fridge or freezer and enjoy! Makes 24 cookies.

Notes

Do not use steel cut oats in this recipe! It will change the texture of these cookies.
No Bake Cookies can be stored in the fridge in an airtight container or bag for up to three days.  No Bake Cookies freeze well.  Place cookies in an airtight container or bag and freeze up the three months.  Thaw in the refrigerator.  You can also eat them straight from the freezer!

Nutrition

Serving: 1cookie | Calories: 124kcal | Carbohydrates: 17g | Protein: 2g | Fat: 6g | Saturated Fat: 4g | Polyunsaturated Fat: 0.4g | Monounsaturated Fat: 1g | Trans Fat: 0.2g | Cholesterol: 11mg | Sodium: 34mg | Potassium: 85mg | Fiber: 2g | Sugar: 9g | Vitamin A: 126IU | Vitamin C: 0.1mg | Calcium: 16mg | Iron: 1mg

Filed Under: Cookies, Recipes

Easter Cake

March 19, 2023 by Christine Leave a Comment

Easter Cake is sweet, moist and fluffy. Crushed candy coated chocolate eggs mixed into the batter make this the perfect indulgent Easter treat.

Cut up pieces of Easter Cake on a table.

As soon as Valentine’s Day is over I have to admit I am anxiously awaiting for the Easter treats to come out on the shelves in stores. I am a BIG fan of Easter treats…most notably candy coated chocolate eggs. I could eat bags and bags of candy coated chocolate eggs. As many of you know I am all about balance in life so I decided to create an Easter Cake with balance in mind. Candy coated chocolate eggs are an indulgent treat so I created a healthy cake batter to combine them with. The result is a sweet and decedent cake bursting with candy coated chocolate egg flavor without the added oil, butter or refined sugar in the batter. If you are looking for balance in an Easter dessert, this Easter Cake is for you.

Ingredients

Ingredients for Easter Cake in bowls on a table.
  • All-purpose flour – I used all purpose flour for this recipe. I haven’t tried this recipe using any other types of flour.
  • Baking Powder – Helps to create that fluffy cake texture.
  • Baking Soda – Helps the cake to rise.
  • Salt – Brings out the flavor of the other ingredients.
  • Greek Yogurt – I used plain, 0%, no sugar added.
  • Applesauce – I used unsweetened applesauce.
  • Large eggs – eggs help to bind the ingredients together.
  • Vanilla – Adds flavor to the batter.
  • Almond Milk – I used unsweetened vanilla almond milk.
  • Honey – adds a touch of sweeteness.
  • Candy coated chocolate eggs – the best ingredient in this recipe!

See recipe card for quantities.

Instructions

Preheat oven to 350F. Line a 9×13 metal cake pan with parchment paper. Add 1 cup of candy coated chocolate eggs to a paper bag. Use the flat side of a meat tenderizer to crush the eggs. Alternatively, place eggs in a metal pot and crush them using the flat side of the meat tenderizer.

Dry ingredients in a medium size bowl. A whisk is in the dry ingredients.

In a medium size bowl, add flour, baking powder, baking soda and salt. Whisk to combine.

Wet ingredients that have been whisked in a large bowl. The whisk is in the bowl.

In a large bowl add Greek yogurt, applesauce, eggs, vanilla, almond milk and honey. Whisk to combine.

Dry and wet ingredients are mixed together with a spatula in a large bowl.

Add the dry ingredients to the wet ingredients. Using a spatula, gently fold the dry ingredients into the wet ingredients until the flour mixture is incorporated. Do not overmix.

Crushed candy coated chocolate eggs are added to the batter in a large bowl.

Add crushed candy coated chocolate eggs to the batter and gently fold them into the batter.

Pour mixture into prepared baking pan. Bake for 25-30 minutes or until a toothpick inserted into the center of the Easter Cake comes out clean. Let cake cool. Once cake has cooled completely, take the remainder of the candy coated eggs and gently press the smaller side of eggs into the Easter Cake. Push them in far enough to keep them secure. Using the edges of the parchment paper, remove Easter Cake from pan and cut into 24 slices. Serve and enjoy!

Hint: It’s important to let the Easter Cake cool completely before pushing the candy coated chocolate eggs into the top. If the cake is not cooled, the candy coating shell will start to melt.

Substitutions

  • Almond Milk – any type of milk can be substituted for the almond milk.

Equipment

Use a metal cake pan for this recipe. If you are using glass, lower the temperature by 25 degrees and bake 5-10 minutes longer.

Storage

Easter Cake can be stored in an airtight container in the fridge for up to three days.

Easter Cake freezes well. Place cake slices in a freezer safe container or bag and freeze up to three months. Thaw at room temperature or pop in the microwave for 20-30 seconds.

Top tip

Don’t overcook the Easter Cake. The cake will be dry if it is cooked too long.

Related

Looking for other recipes like this? Try these:

Cut up pieces of Easter Cake on a table.
Print Recipe
No ratings yet

Easter Cake

Easter cake is sweet, moist and fluffy. Crushed candy coated chocolate eggs mixed into the batter make this the perfect indulgent easter treat.
Prep Time20 minutes mins
Cook Time30 minutes mins
Total Time50 minutes mins
Servings: 24
Calories: 84kcal
Author: Christine

Ingredients

  • 3 cups all-purpose flour
  • 2 teaspoons baking powder
  • 2 teaspoons baking soda
  • ¼ teaspoon salt
  • â…“ cup Greek yogurt plain 0%, no sugar added
  • ½ cup unsweetened applesauce
  • 2 large eggs
  • 2 teaspoons vanilla
  • 1 ¼ cup almond milk
  • â…“ cup honey
  • 1 ½ cups candy coated chocolate eggs divided

Instructions

  • Preheat oven to 350F.
  • Line a 9×13 baking pan with parchment paper.
  • Add 1 cup of candy coated chocolate eggs to a small paper bag. Fold over the top of the bag. Use the flat side of a meat tenderizer to crush the candy coated chocolate eggs.
  • In a medium size bowl, add flour, baking powder, baking powder and salt. Whisk to combine.
  • In a large bowl, add Greek yogurt, applesauce, eggs, vanilla, almond milk and honey. Whisk to combine.
  • Add the dry ingredients to the wet ingredients. Using a spatula, gently fold the dry ingredients into the wet ingredients until the flour is incorporated. Do not overmix.
  • Add crushed candy coated chocolate eggs and gently fold them into the batter.
  • Pour mixture into prepared baking pan.
  • Bake for 25-30 minutes or until a toothpick inserted into the center of the cake comes out clean.
  • Let cake cool. Once cake has cooled completely, take the remainder of the candy coated chocolate eggs and gently press the smaller side of eggs into the Easter Cake. Push them in far enough to keep them secure.
  • Once cake is completely cooled, use edges of parchment paper to remove the cake from the pan.
  • Slice the cake into 24 squares and enjoy!

Notes

Make sure to use unsweetened applesauce and plain 0%, no sugar added Greek yogurt.  The cake will be much sweeter if sweetened varieties of these products are used.
Store in an airtight container for up to three days in the fridge.  Easter cake freezes well.  Place cakes pieces in a freezer safe container or bag and freeze up to three months.  Easter Cake can be thawed at room temperature or popped into the microwave for 20-30 seconds.
The nutritional information has been calculated without the candy coated chocolate eggs included.

Nutrition

Serving: 1piece | Calories: 84kcal | Carbohydrates: 17g | Protein: 3g | Fat: 1g | Saturated Fat: 0.2g | Polyunsaturated Fat: 0.2g | Monounsaturated Fat: 0.2g | Trans Fat: 0.002g | Cholesterol: 16mg | Sodium: 175mg | Potassium: 33mg | Fiber: 1g | Sugar: 5g | Vitamin A: 24IU | Vitamin C: 0.1mg | Calcium: 44mg | Iron: 1mg

Filed Under: Recipes

Brownies

March 17, 2023 by Christine 1 Comment

Brownies are rich, chewy and chocolatey. Adding chocolate chips to the batter makes these brownies the ultimate decadent treat.

Cut up pieces of brownie on a piece of parchment paper.

I have always loved eating brownies. When I was growing up I remember eating brownies but they were always made from a box or they were the store bought two bite brownies. I was visiting my mom a couple of months ago in my hometown and she had made brownies from a box. They tasted amazing but of course it had me thinking I had to create my own brownie recipe for the blog. I created a tested a few different recipes…and trust me, my partner the taste tester sure didn’t mind. The third recipe turned out to be the winner. The rich chocolatey flavor of these brownies make them better than any store bought variety. I highly encourage you to try this recipe today…you won’t regret it!

Subscribe

* indicates required

Ingredients

Ingredients for brownies on a table.
  • Butter, melted and slightly cooled – I used unsalted butter for this recipe. If you use salted butter, then omit the salt from the recipe.
  • Brown Sugar – Helps to make the brownies sweet and chewy.
  • Granulated sugar – Adds more sweetness.
  • Salt – Helps bring out the other flavors in the brownies.
  • Eggs – I used large eggs. Make sure the eggs are at room temperature.
  • Vanilla – Adds flavor.
  • Cocoa – I used natural cocoa for this recipe.
  • Flour – I used all-purpose flour for this recipe. I haven’t tried this recipe using any other type of flour.
  • Chocolate Chips – I used semi-sweet chocolate chips in this recipe.

See recipe card for quantities.

Instructions

Whisking the wet ingredients in a large bowl.

Preheat oven to 350F and line an 8×8 baking pan with parchment paper. In a medium size bowl whisk together melted butter, brown sugar, granulated sugar, salt, eggs and vanilla. Whisk until the batter is thoroughly combined.

Using a spatula to fold dry ingredients into wet ingredients.

Sift cocoa and flour into the batter. Use a spatula to fold in the flour and cocoa. Mix the batter until the flour and cocoa are incorporated.

Using a spatula to fold chocolate chips into the batter in a large bowl.

Using a spatula, fold in 3/4 cups of the chocolate chips.

Brownie batter poured into a pan lined with parchment paper.

Pour batter into prepared pan. Spread the remaining chocolate chips on top of the batter. Bake for 35 minutes or until a toothpick inserted into the center comes out clean. Cut brownies into 16 equal pieces.

Hint: Do not skip the sifting! Cocoa often has lumps and it will be difficult to mix into the batter if it hasn’t been sifted.

Substitutions

Chocolate chips – I used semi-sweet chocolate chips for this recipe. You could substitute your favorite type of chocolate chip to these brownies.

Equipment

I used a metal nonstick pan for this recipe. Using a glass pan will change the cooking time. If you are using a glass pan, lower the oven temperature to 325F and bake for an extra 5-10 minutes.

Storage

Brownies can be stored at room temperature for up to three days. Brownies freeze well. Place them in a freezer safe container or bag and freeze for up to three months. Thaw on counter at room temperature before serving. You can also heat brownies in the microwave for a warm sweet treat.

Top tip

Do not skip the sifting! Cocoa needs to be sifted to remove the lumps.

FAQ

How to make brownies fudgy vs. cakey?

It’s all about the ratio of butter to flour. Fudgy brownies will call for more butter in the recipe and cakey brownies will call for more flour. These brownies fall on the fudgy side.

How to keep brownies soft and chewy?

Store brownies in an airtight container or sealable bag. Brownies will remain soft and chewy at room temperature for up to three days.

Related

Looking for other recipes like this? Try these:

Cut up pieces of brownie on a piece of parchment paper.
Print Recipe
5 from 1 vote

Brownies

Brownies are rich, chewy and chocolatey. Adding chocolate chips to the batter makes these brownies the ultimate decadent treat.
Prep Time10 minutes mins
Cook Time35 minutes mins
Total Time45 minutes mins
Servings: 16 (1 piece each)
Calories: 282kcal
Author: Christine

Ingredients

  • 1 cup unsalted butter melted and slightly cooled
  • ½ cup brown sugar
  • 1 cup granulated sugar
  • ¼ teaspoon salt
  • 4 large eggs room temperature
  • 2 teaspoons vanilla
  • ¾ cup cocoa
  • ½ cup flour
  • 1 cup semi-sweet chocolate chips divided

Instructions

  • Preheat oven to 350F.
  • Line an 8×8 baking pan with parchment paper.
  • In a medium size bowl, whisk together melted butter, brown sugar, granulated sugar, salt, eggs and vanilla. Whisk until the batter is thoroughly combined.
  • Sift cocoa and flour into the batter.
  • Use a spatula to mix in the flour and cocoa. Mix the batter until the cocoa and flour are incorporated.
  • Fold in 3/4 cups of the chocolate chips.
  • Pour batter into prepared pan.
  • Sprinkle the remaining chocolate chips on top of the batter.
  • Bake for 35 minutes or until a toothpick inserted into the center of the brownies comes out clean.
  • Let cool. Use edges of parchment paper to lift brownies from pan.
  • Slice into 16 squares.
  • Enjoy!

Notes

Make sure to let the butter cool slightly after it has been melted.
These brownies freeze well.  Place them in a freezer safe bag or container and freeze up to three months.  Thaw on counter a room temperature when you are ready to eat them.
For an extra sweet treat, serve brownies fresh from the oven with a scoop of vanilla ice-cream on top.  You can also reheat brownies for 20 seconds in the microwave.

Nutrition

Serving: 1piece | Calories: 282kcal | Carbohydrates: 31g | Protein: 3g | Fat: 17g | Saturated Fat: 10g | Polyunsaturated Fat: 1g | Monounsaturated Fat: 5g | Trans Fat: 0.5g | Cholesterol: 72mg | Sodium: 58mg | Potassium: 158mg | Fiber: 2g | Sugar: 23g | Vitamin A: 420IU | Calcium: 28mg | Iron: 2mg

One response to “Brownies”

  1. bruce
    March 17, 2023

    those are the best brownies…can’t wait til the next batch

    Reply
5 from 1 vote (1 rating without comment)

Leave a Reply Cancel reply

Your email address will not be published. Required fields are marked *

Recipe Rating


Filed Under: Desserts, Recipes

Pumpkin Loaf

February 20, 2023 by Christine Leave a Comment

Pumpkin loaf is light, fluffy and moist. With no refined sugar, butter or oil pumpkin loaf is a healthy treat.

Slices of pumpkin loaf on a white cutting board.

We might be in the middle of winter here in Northwestern Ontario but I am still thinking of pumpkin recipes!  I’ll admit I could eat a lot of pumpkin treats.  There is something about the taste of pumpkin and spices that makes my mouth water.  If you are like me and you often eat more than one treat, pumpkin loaf is a great option.  Pumpkin loaf comes together easily and is ready in just over an hour.  Honey is used in place of refined sugar to make this a healthier option.  I also added Greek Yogurt instead of oil to add a healthy protein boost.  Once you taste this pumpkin loaf you will have a hard time believing it’s actually healthy.

Subscribe

* indicates required

Ingredients

All of the ingredients for pumpkin loaf on a table.
  • All-purpose flour – I used all-purpose flour for this recipe.  I haven’t tried this recipe using any other type of flour.
  • Baking powder – Helps the make the pumpkin loaf fluffy and cake like.
  • Baking soda – Helps the pumpkin loaf to rise.
  • Salt – Brings out the flavor of the other ingredients.
  • Pumpkin pie spice – This is a combination of cinnamon, nutmeg, ginger and cloves.  You can find it in the spice aisle at the grocery store.
  • Large eggs – Use large eggs for this recipe.
  • Honey – Used to sweeten the pumpkin loaf.
  • Canned pumpkin – Make sure to used canned pumpkin and not pumpkin pie filling.
  • Greek yogurt – Used in place of oil or butter. I used 0%, no sugar added.
  • Almond Milk – I used unsweetened vanilla almond milk. 
  • Raisins – Add a nice, sweet flavor to the loaf.

See recipe card for quantities.

Instructions

Preheat oven to 350F. Lightly grease loaf pan.

Whisking dry ingredients in a medium size bowl.

Add flour, baking powder, baking soda, salt and pumpkin pie spice to medium size bowl and whisk until combined.

Wet ingredients added to a large bowl.

In a large bowl add eggs, honey, canned pumpkin, Greek yogurt and almond milk. Whisk to combine.

Folding dry ingredients into wet ingredients.

Add half the flour mixture to the wet mixture.  Use a spatula to gently mix in the flour.  Add the remaining flour mixture and stir until batter is smooth and there are no lumps. Fold in raisins.

Batter is poured into a loaf pan.

Pour batter into greased loaf pan. Bake for 50-60 minutes or until toothpick inserted in the center comes out clean. Let loaf slightly cool and then transfer to a wire rack to cool completely. Cut loaf into 12 equal slices. Enjoy!

Hint: Check loaf after it has been in the oven for 50 minutes. If the loaf is overbaked it will be dry.
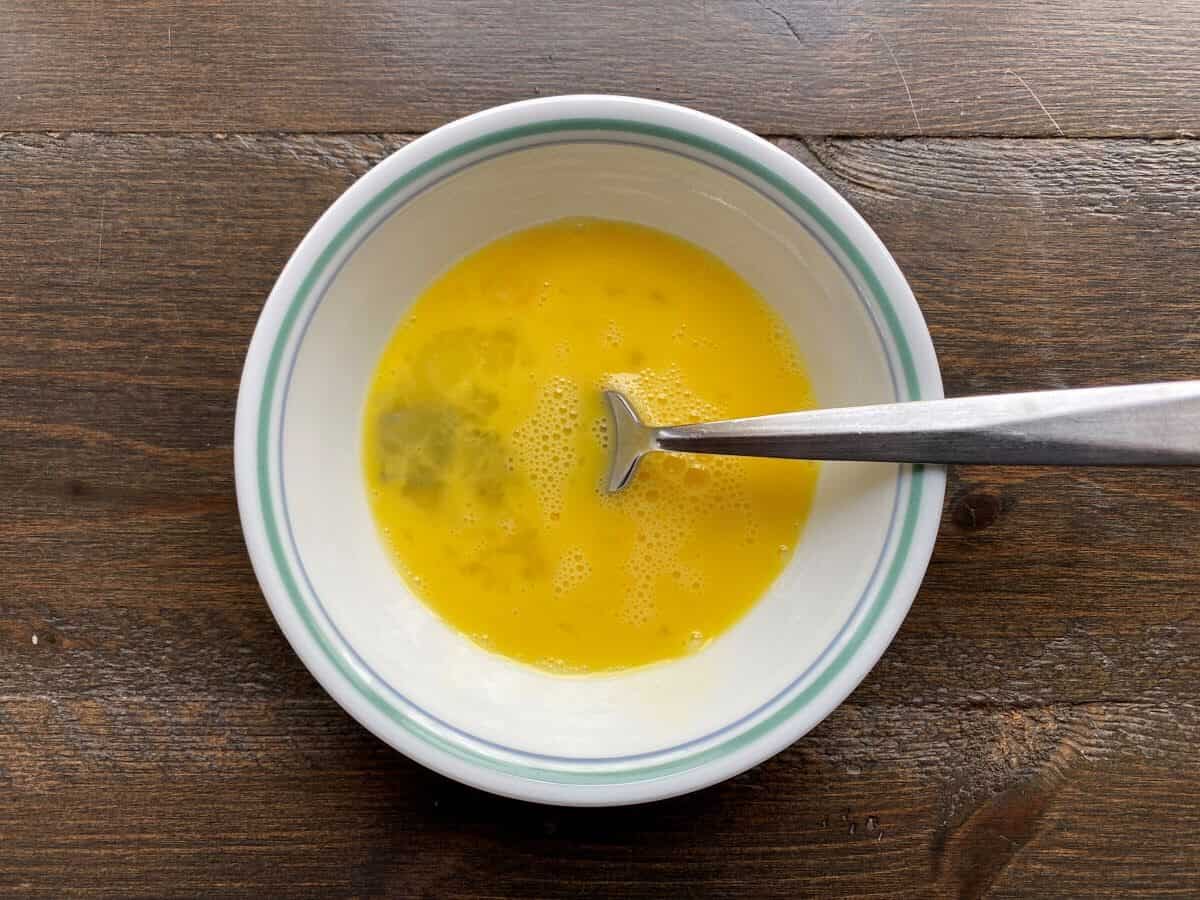
Substitutions

  • Almond Milk – any type of milk can be substituted for the almond milk.

Equipment

I used a metal non-stick loaf pan for this recipe. I have also used a silicone loaf pan and it worked well.

Storage

Pumpkin loaf can be stored in an airtight container on the counter for up to three days.

Pumpkin loaf freezes well.  I wrap each individual piece before placing in a large freezer bag.  Alternatively, you can freeze pieces on a pan lined with parchment paper and then transfer to a freezer bag.  Pumkin loaf can be frozen for up to three months.  Thaw on the in the fridge or on the counter.  Pop into the microwave for 20 seconds for a warm fall treat.

Top tip

Do not overmix the batter.  Overmixing will cause the loaf to become dense.

Slices of pumpkin loaf on a white cutting board.
Print Recipe
5 from 1 vote

Pumpkin Loaf

Pumpkin loaf is light, fluffy and moist.  With no refined sugar, butter or oil pumpkin loaf is a healthy fall treat.
Prep Time10 minutes mins
Cook Time55 minutes mins
Total Time1 hour hr 5 minutes mins
Servings: 12 (1 slice each)
Calories: 152kcal
Author: Christine

Ingredients

  • 1 ½ cups all-purpose flour
  • 2 teaspoons baking powder
  • 1 teaspoon baking soda
  • ¼ teaspoon salt
  • 2 teaspoons pumpkin pie spice
  • 2 large eggs
  • ½ cup honey
  • 1 ½ cups canned pumpkin
  • â…“ cup Greek yogurt
  • ¼ cup almond milk
  • 1 cup raisins

Instructions

  • Preheat oven to 350F.
  • Lightly grease muffin tin. 
  • In a medium bowl, add flour, baking powder, baking soda, salt and pumpkin pie spice.  Whisk until well combined.
  • In a large bowl, add eggs, honey, canned pumpkin, Greek yogurt and almond milk. Whisk until well combined.
  • Add half the flour mixture to the wet mixture. Use a spatula to gently mix in the flour.  Add the remaining flour mixture and stir until batter is smooth and there are no lumps. Be careful not to overmix because overmixing will make the muffins dense.
  • Add raisins to the batter and use a spatula to fold them in
  • Divide batter evenly among prepared muffin tin. 
  • Bake for 50-60 minutes or until a toothpick inserted into the center comes out clean.
  • Let cool slightly before transferring to a wire rack to completely cool.
  • Cut loaf into 12 equal slices.
  • Enjoy!

Notes

Do not overmix the batter.  Overmixing will cause the loaf to become dense.
Pumpkin loaf freezes well.  I wrap each individual piece before placing in a large freezer bag.  Alternatively, you can freeze pieces on a pan lined with parchment paper and then transfer to a freezer bag.  Pumpkin loaf can be frozen for up to three months.  Thaw on the in the fridge or on the counter.  Pop into the microwave for 20 seconds for a warm treat.

Nutrition

Serving: 1slice | Calories: 152kcal | Carbohydrates: 36g | Protein: 3g | Fat: 0.4g | Saturated Fat: 0.1g | Polyunsaturated Fat: 0.1g | Monounsaturated Fat: 0.1g | Cholesterol: 0.3mg | Sodium: 225mg | Potassium: 197mg | Fiber: 2g | Sugar: 13g | Vitamin A: 4768IU | Vitamin C: 2mg | Calcium: 68mg | Iron: 2mg
5 from 1 vote (1 rating without comment)

Leave a Reply Cancel reply

Your email address will not be published. Required fields are marked *

Recipe Rating


Filed Under: Breads, Recipes

  • « Previous Page
  • 1
  • 2

Copyright © 2026 · Foodie Pro 5 on Genesis Framework · WordPress · Log in

Rate This Recipe

Your vote:


A rating is required
A name is required
An email is required

Recipe Ratings without Comment

Something went wrong. Please try again.

Recipe Ratings without Comment

Something went wrong. Please try again.